Z-WAVE PLUS V2 THERMOSTAT QUICK START GUIDE
Copyright © 2020 Nortek Security & Control
10028239 Rev-A
Z W A VE
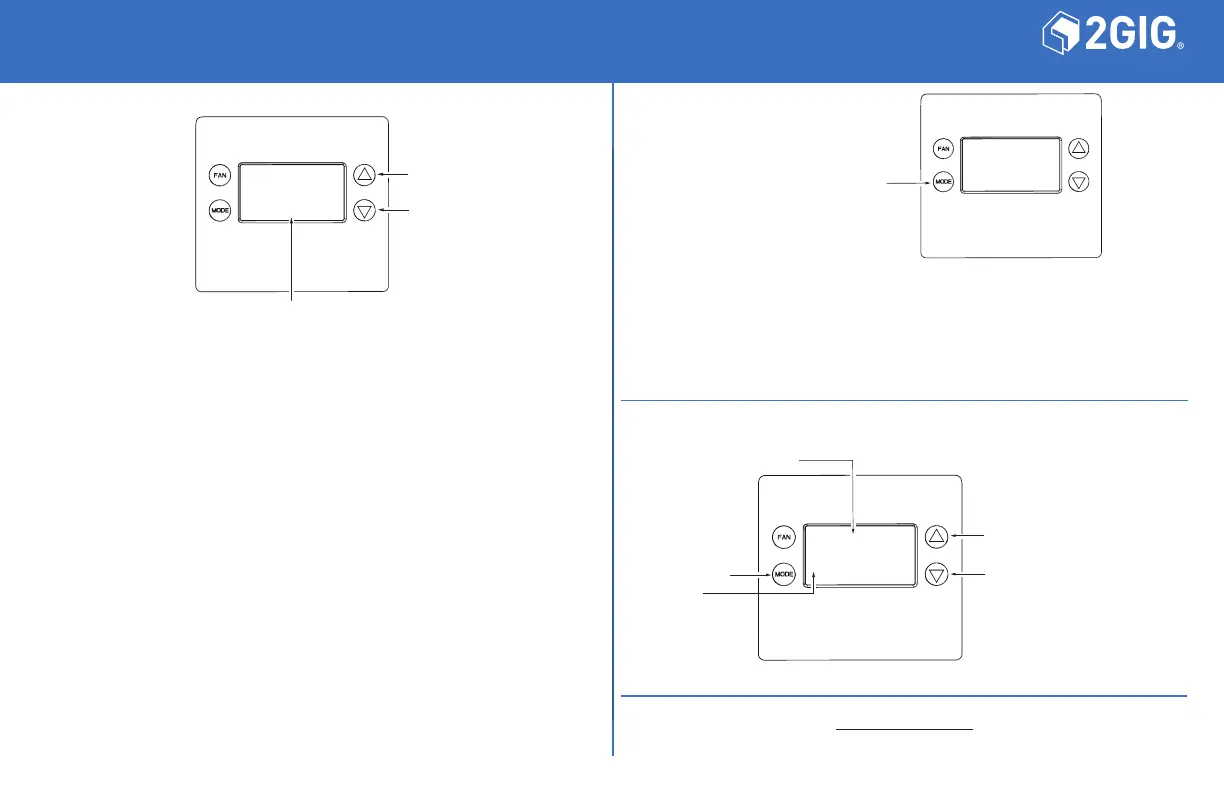
Menu Choices are displayed in
the Status Display Line.
Use the Touch-Sensitive
▲▼ buttons to change
to the desired menu item,
then press FAN (Select).
6. Z-Wave Plus Installation
General Programming Procedure:
Set your primary Z-Wave controller to Include, Add or Install mode to add the thermostat as a node
on your network (see your controller’s user manual for detailed instructions).
1. Touch any button to take thermostat out of sleep mode.
2. Touch and hold the MODE button (ve seconds), then navigate using and arrows to cycle
MENU options.
3. Scroll to the “ZWAVE” option using buttons, then touch FAN (Select).
4. When prompted by your Z-Wave controller, touch the YES button in the Z-Wave Install screen.
5. Touch FAN (Select) to add thermostat to network.
6. The display should ash WAIT then SUCCESS if Z-Wave connection is made.
7. If Z-Wave does not connect to controller, WAIT, and then TIMEOUT will ash on status display.
8. If the thermostat fails to connect, repeat steps three (3) through seven (7) to attempt to connect.
Your controller will indicate the thermostat was successfully added to its network (see your
controller’s user manual for details).
7. Setting the System Mode
Y SS T E M
Touch MODE (Done)
to change the
SYSTEM MODE
System Modes
• Off: System is off. No heating or cooling will come on. If system was on, it will turn off immediately.
• Heat: Only heating will occur.
• Cool: Only cooling will occur.
• Auto: Heating or cooling will turn on according to the heating and cooling setpoints. The system will
automatically switch between heating and cooling modes as needed to maintain the setpoints.
• Heat-E: Disable the compressor and use Auxiliary Heater for heating. Available in a Heat Pump
HVAC system only.
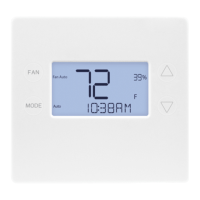
8. Setting the Heating or Cooling Temperature Setpoint
72
S E T TO
Setpoint being changed
Touch MODE to
change from the
HEAT SETPOINT
to the COOL
SETPOINT.
Touching the ▲▼ buttons will
change the SETPOINT 1 degree.
Touch and hold the button to
ramp the SETPOINT.
Use the Touch-Sensitive ▲▼
buttons to set the desired
SETPOINT.
Raise SETPOINT
Lower SETPOINT
For additional help please contact:
2gig.linear@nortekcontrol.com
For toll free technical support in the USA and Canada:
(800) 421-1587 or dial (760) 438-7000
 Loading...