EasyManua.ls Logo

2K Furniture Designs SR 6451 User Manual

2K Furniture Designs SR 6451
4 pages
To Next Page IconTo Next Page
Page #1 background imageLoading...
Page #1 background image
NOTE TO CUSTOMERS:
For ease and speed of assembly we recommend that before you commence each step of the
assembly that you identify all the parts required to complete that step.
We recommend that where possible you allow sufficient space to assemble the item as close
as possible to the place where it will be once assembled.
For the protection of your furniture we recommend that the product is placed on a dry, soft,
smooth and clean surfaces during assembly to prevent any damage. Avoid damp and direct
sunlight.
During assembly do not over tighten the screws or bolts, as this may damage the product.
Please ensure you retain all the product packaging until the item is completely assembled.
Periodically check all fitting and re-tighten as necessary.
Never allow any liquids to remain on your furniture as absorption can cause the wood to warp
or finish to de-laminate.
It is recommended that this item should be assembled by two adults.
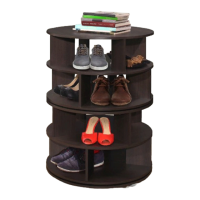
MODEL : #SR 6451 SHOE RACK
PAGE 1 OF 4
Question and Answer IconNeed help?

Do you have a question about the 2K Furniture Designs SR 6451 and is the answer not in the manual?

2K Furniture Designs SR 6451 Specifications

General IconGeneral
Brand2K Furniture Designs
ModelSR 6451
CategoryIndoor Furnishing
LanguageEnglish

Summary

General Advice and Preparation

Customer Notes

Important advice for ease and safety during assembly.

Parts Identification

Lists all components (P1-P6) required for assembly.

Hardware List

Lists all fasteners and hardware (H1-H10) needed for assembly.

Tools Required

Lists necessary tools for the assembly process.

Assembly Steps

Step 1: Prepare Base Components

Attaching components P6 to P1 using dowels (H3).

Step 2: Connect Base Panels

Connecting base panels P1, P2, P4 using connecting bolts (H4).

Step 3: Attach Revolving Plates

Attaching revolving plates (H9) to base panels.

Step 4: Secure Top Panel

Aligning and securing cam locks (H5) to the top panel.

Step 5: Assemble First Tier

Connecting panels P6 to P1 and P2 using screws (H1).

Step 6: Assemble Second Tier

Securing cam locks (H5) to the second tier panels.

Step 7: Assemble Third Tier

Connecting panels P6 to P1, P2, P3 using screws (H1).

Step 8: Attach Revolving Plates

Attaching revolving plates (H7, H8) to the structure.

Step 9: Assemble Fourth Tier

Securing cam locks (H5) to the fourth tier panels.

Step 10: Assemble Fifth Tier

Connecting panels P6 to P4, P2, P1 using screws (H1).

Step 11: Assemble Sixth Tier

Securing cam locks (H5) to the sixth tier panels.

Step 12: Attach Top Panel

Connecting the top panel P3 to the structure with screws (H1).

Step 13: Final Revolving Plates

Attaching revolving plates (H7, H8) to the top tiers.

Step 14: Attach Legs and Final Screws

Attaching legs (H6) and securing with screws (H2).

Step 15: Finalizing Assembly

Turning the assembled item upright.