This document describes an electronic weather station, model No 172802, manufactured by 2measure. It provides instructions for use, technical specifications, and maintenance guidelines in multiple languages, including Polish, English, German, Russian, Lithuanian, Latvian, Estonian, Romanian, Czech, Slovak, French, Ukrainian, and Hungarian.
Function Description
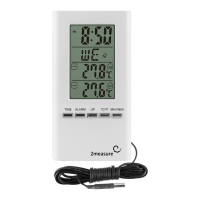
The electronic weather station is designed to measure both indoor and outdoor temperatures, display the current time, and provide alarm and calendar functions. It also tracks maximum and minimum temperature values and indicates temperature trends.
Key Functions:
- Temperature Measurement: Displays indoor and outdoor temperatures in Celsius (°C) or Fahrenheit (°F).
- Clock: Features a 12-hour or 24-hour clock format with an alarm function.
- Calendar: Shows the day, month, year, and day of the week.
- Max/Min Temperature Storage: Records and displays the highest and lowest temperatures measured.
- Low Temperature Alarm: Alerts the user if the outdoor temperature drops below a set threshold (e.g., 4°C).
- Temperature Trend Indicator: Shows the direction of temperature change.
Important Technical Specifications
Cable:
- Cable length for outdoor temperature measurement: Approximately 1.3 meters.
Base Station:
- Indoor temperature measuring range: 0°C to 50°C (32°F to 122°F).
- Outdoor temperature measuring range: -20°C to 50°C (-4°F to 122°F).
- Tolerance/accuracy of temperature measurement: +/- 1°C (+/-2°F).
Batteries:
- The weather station requires 1 x LR1130 alkaline battery, which is included in the set.
Usage Features
Setting Time and Date:
- In normal display mode, press and hold the TIME button for 2-3 seconds. The time format (12 or 24 hours) will flash.
- Use the UP button to select the desired format and confirm with TIME.
- The display will then show the hour flashing. Use UP to set the hour and confirm with TIME.
- Repeat for minutes, year, month, and day.
- After setting the day, press TIME to return to normal display mode.
Setting the Alarm:
- In normal display mode, press and hold the ALARM button for 2-3 seconds. The hour will flash.
- Use UP to set the alarm hour and confirm with ALARM.
- Repeat for minutes and confirm with ALARM.
- Press TIME to return to normal display mode.
Activating/Deactivating the Alarm:
- To turn the alarm on or off, press ALARM, then UP. The bell symbol will appear or disappear on the display.
- Press TIME to return to the clock display.
Selecting Temperature Unit (°C/°F):
- In normal display mode, press the °C/°F button to switch between Celsius and Fahrenheit.
Displaying Max/Min Temperatures:
- In normal display mode, press MAX/MIN once to display the maximum recorded temperature.
- Press MAX/MIN again to display the minimum recorded temperature.
- Press MAX/MIN a third time to return to the current temperature display.
- To clear stored values, press and hold MAX/MIN for 3 seconds.
Low Temperature Alarm Function:
- To activate or deactivate the low temperature alarm, press and hold the °C/°F button for 3-4 seconds.
- When activated, a snowflake symbol appears in the outdoor temperature field.
- If the temperature drops below 4°C, the alarm will sound, and the snowflake symbol will flash.
- To silence the alarm, press any button. The snowflake symbol will continue to flash.
Maintenance Features
General Precautions:
- Avoid exposing the device to strong vibrations or mechanical stress.
- Protect the device from sudden and significant temperature changes (direct sunlight, very low temperatures).
- Clean the casing and display with a soft, slightly damp cloth.
- Do not immerse the device in water.
- Remove depleted batteries immediately. Use only the specified battery type.
- Handle the metal sensor at the end of the cable with care, as it is susceptible to damage.
- Do not allow the cable to be pinched or cut by a door or window frame.
- The device contains small parts; keep it out of reach of children and pets.
Battery Replacement:
- The device uses one LR1130 alkaline battery. Ensure the battery is inserted with correct polarity.
Environmental Responsibility:
- The product is marked with a crossed-out wheeled bin symbol, indicating that it should not be disposed of with general household waste.
- This labeling also signifies that the equipment was introduced to the market after August 13, 2005.
- Users are responsible for transferring used equipment to a designated collection point for proper recycling. Information on electrical equipment collection systems can be found at stores or municipal offices.
- Proper disposal of discarded equipment helps prevent negative consequences for the environment and human health.