page 19
... print your plane | www.3DLabPrint.com
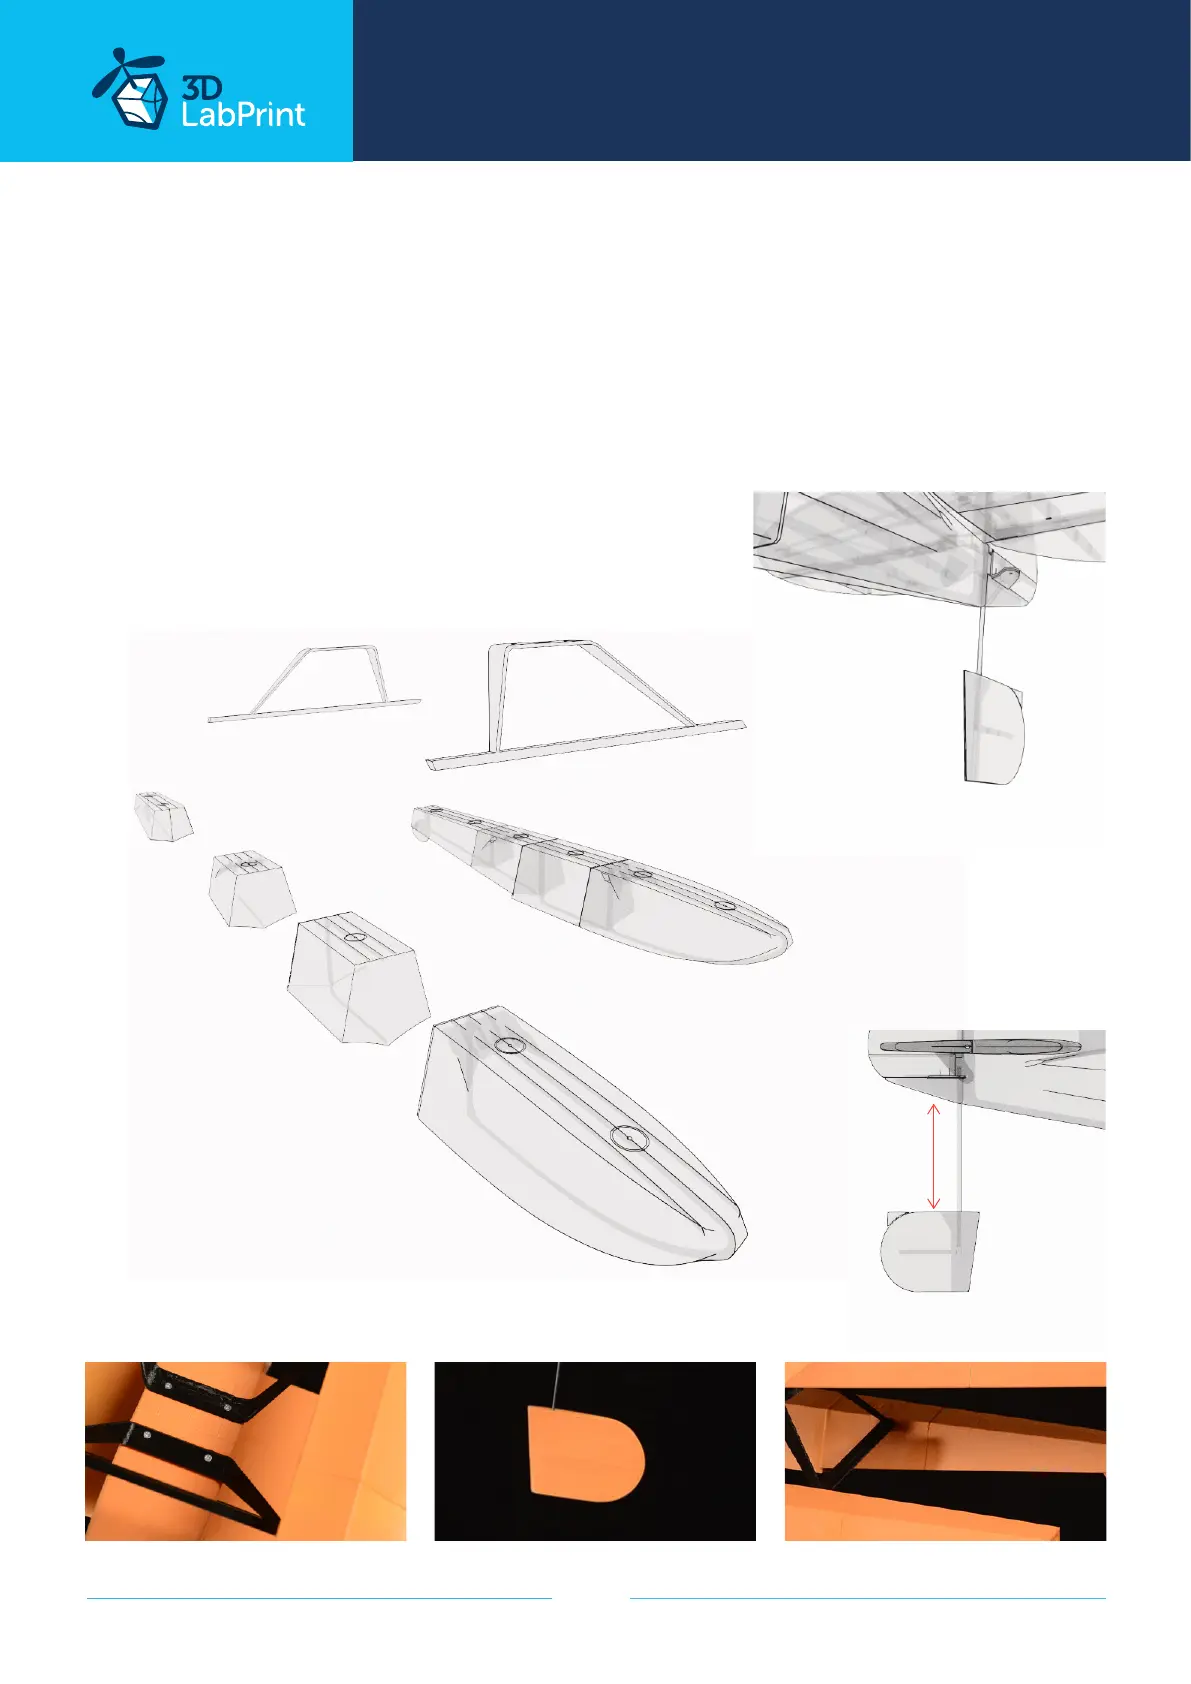
5.2.4 Floats assembly Piper J-3 Cub (experimental)
Glue the float parts 1 - 4 together for both sides. Paint the float well for perfect
watertightness. The float attachment is marked with an arrow in the direction of flight to
avoid confusion. Secure the entire main float to the hull with four screws.
The rudder tail fin is used to guide the direction of the aircraft on the water. Glue it to a 1.5 -
1.75 mm thick carbon rod. Glue the whole assembly into the rudder. The rear rudder
extension has been experimentally determined to be xx mm and will be fine-tuned according
to experience with flying on the water.
you will need: 200mm of carbon rod 1,5 - 1,75 mm
4x Self-tapping screw
back float holder
13,1g/0.46oz PET
front float holder
13,1g/0.46oz PET
float R1
23g/0.81oz
80 mm
float R4
5,4g/0.19oz
float R3
11,6g/0.41oz
float R2
7,6g/0.27oz
tail rudder fin
1,7g/0.06oz LW
left float
completed
 Loading...