page 18
... print your plane | www.3DLabPrint.com
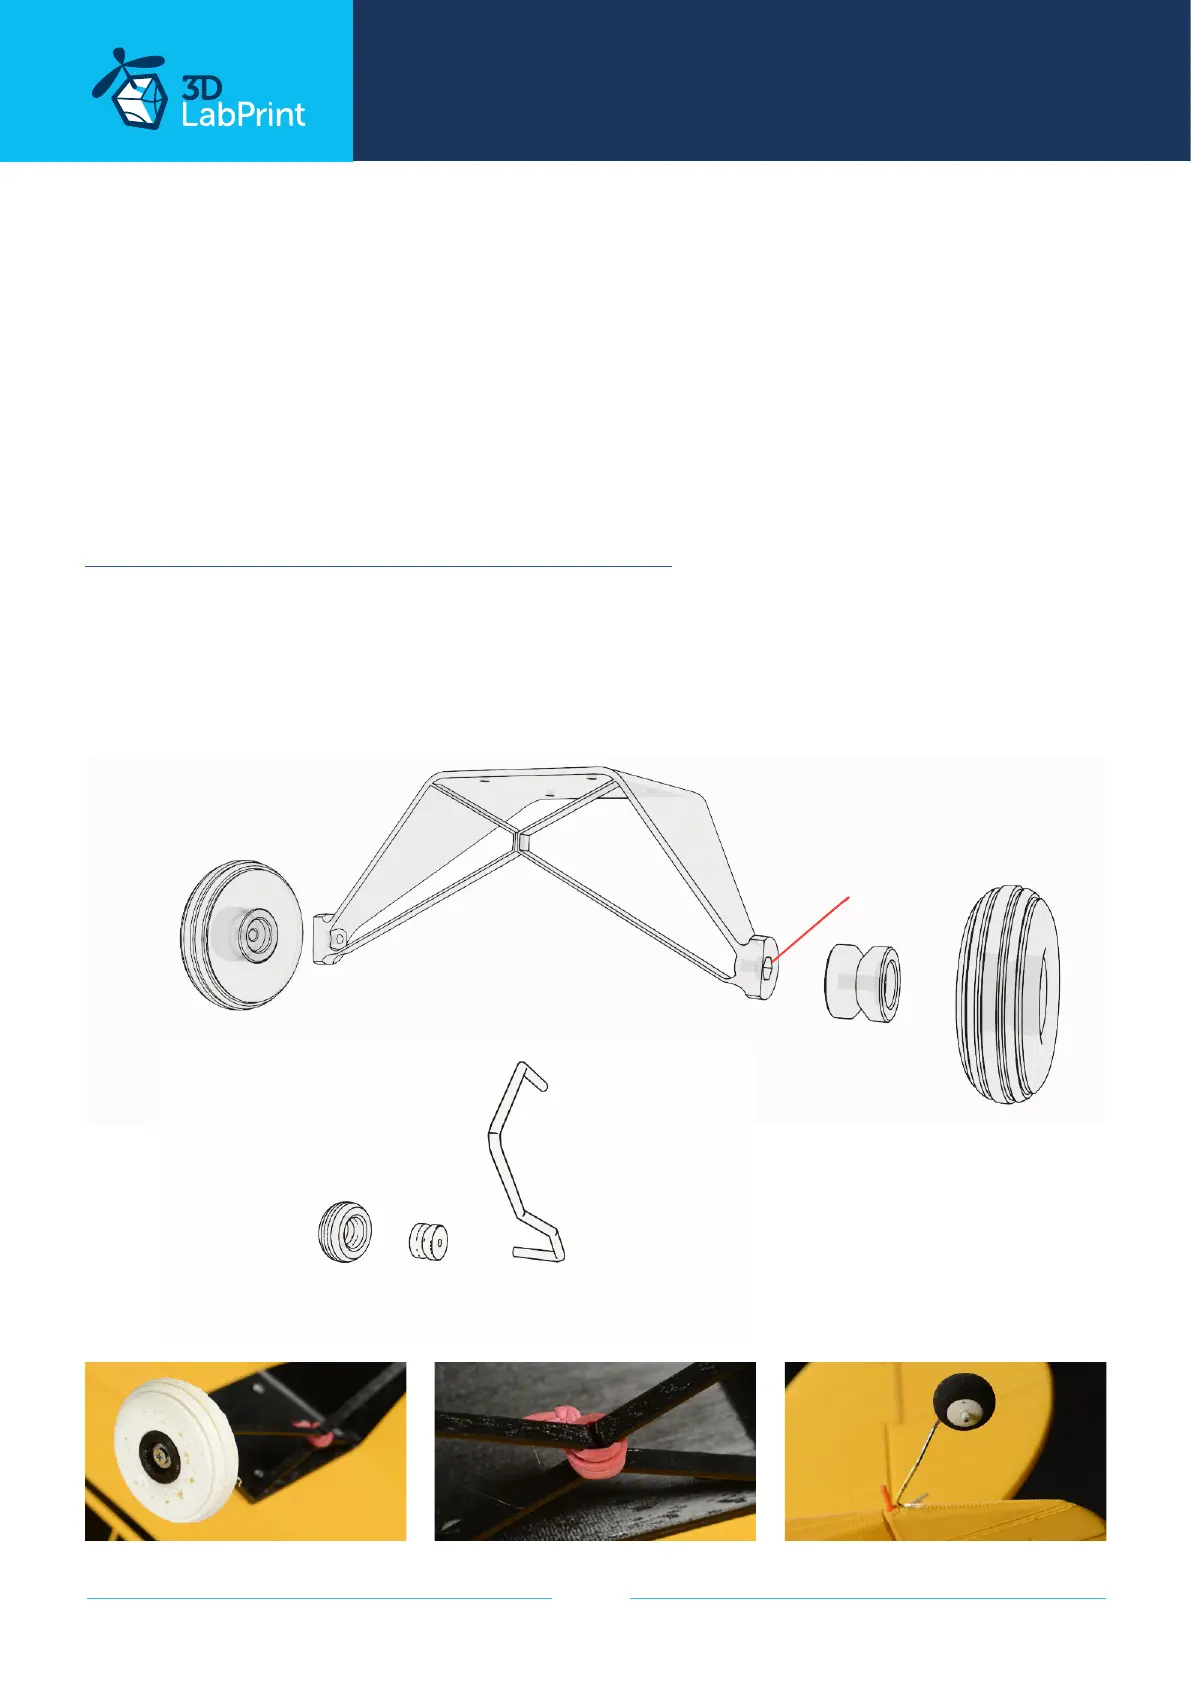
5.2.3 Landing gear assembly Piper J-3 Cub
Put gear tyres on the rims. Insert one nut into the printed chassis and use the other nut on
the wheel axle as a counter-nut. Adjust the tightening of the bolt and the counternut so that
the wheel turns freely. Tie the centre of the chassis legs together with an oce rubber band.
Tie the center of the chassis legs together with an oce rubber band. Use the remaining
1mm wire to shape the rear chassis to your taste. Secure the rear wheel against sliding out
with a small washer and cover with glue or crimp the small brass servo bushing with pliers.
Weave the entire rear wire into the rudder and bend towards the rear. Check the functionality
of the landing gear assembly carefully.
See video guide Piper J-3 Cub landing gear assembly
you will need: 2x M3 x 28-30mm screws for main wheel axle
4x M3 nuts + washers
Small piece of 1.5 mm steel wire for tail drag wheel axle
4x Self-tapping screw 3x10mm
oce rubber band
gear tyre (pair)
11,6g/0.41oz FLEX
tail wheel tyre
0,4g/0.01oz FLEX
main gear disc (pair)
7,6g/0.27oz PLA
tail wheel disc
0,4g/0.01oz PLA
main gear legs
23g/0.81oz PET
tail drag wheel axle
1,5 mm steel wire
M4 nut inside
 Loading...