2 Technical Bulletin #161 Release B
Process
It is recommended you follow the steps outlined below to successfully upgrade from the XT-1 Basestation to the G5
Basestation.
1. Disconnect and remove the XT-1 Basestation from the wall.
2. Mount the G5 Basestation to the wall.
3. Re-wire Lane1 - Speaker, Microphone, Induction Loop to the G5 Basestation.
4. Install Vehicle Detector Board and any External Antennas.
5. Timer Greet Event.
6. Wire any external button to Change Order Taking Modes, SPLIT/CROSS, or DAY/NIGHT.
7. Wire any Alert Message Triggers.
8. Power up the G5 Basestation.
9. Register G5 and/or XT-1 Headsets to the G5 Basestation.
10. Connect to G5 Basestation Web Server (for configuration).
11. Configure G5 Basestation for Store Operation, Greeter, Alert and Reminder functionality.
12. Save the current G5 Basestation settings.
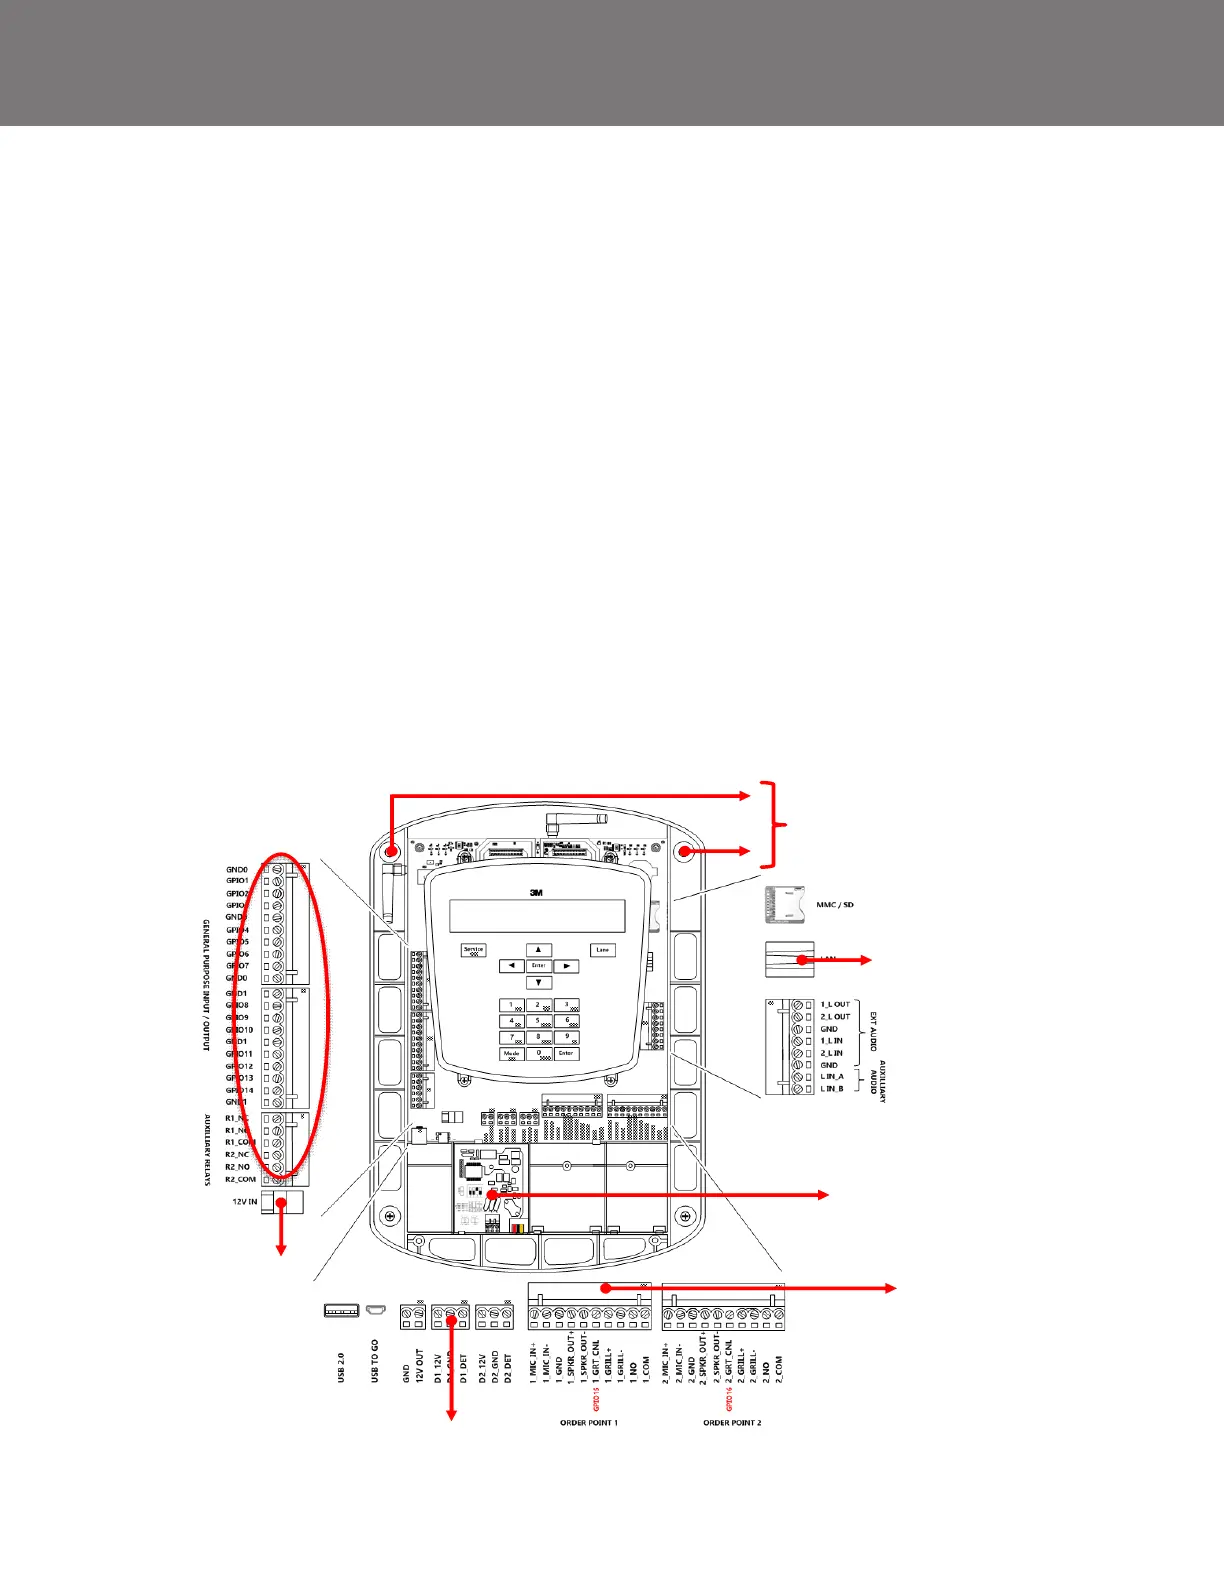
G5 Basestation Wiring Terminals - Reference
The labels on the illustration below correspond to the recommended steps listed above to properly migrate from XT-
1 Basestation to the G5 Basestation as outlined in the remainder of this document.


 To Next Page