3M Touch Systems Technical Note
Product: MicroTouch
™
CT150 Monitor Industrial Bezel – Installation Instructions
Document #33148 3M Touch Systems Inc. Proprietary Information © 2006 3M. All Rights Reserved. Page 4
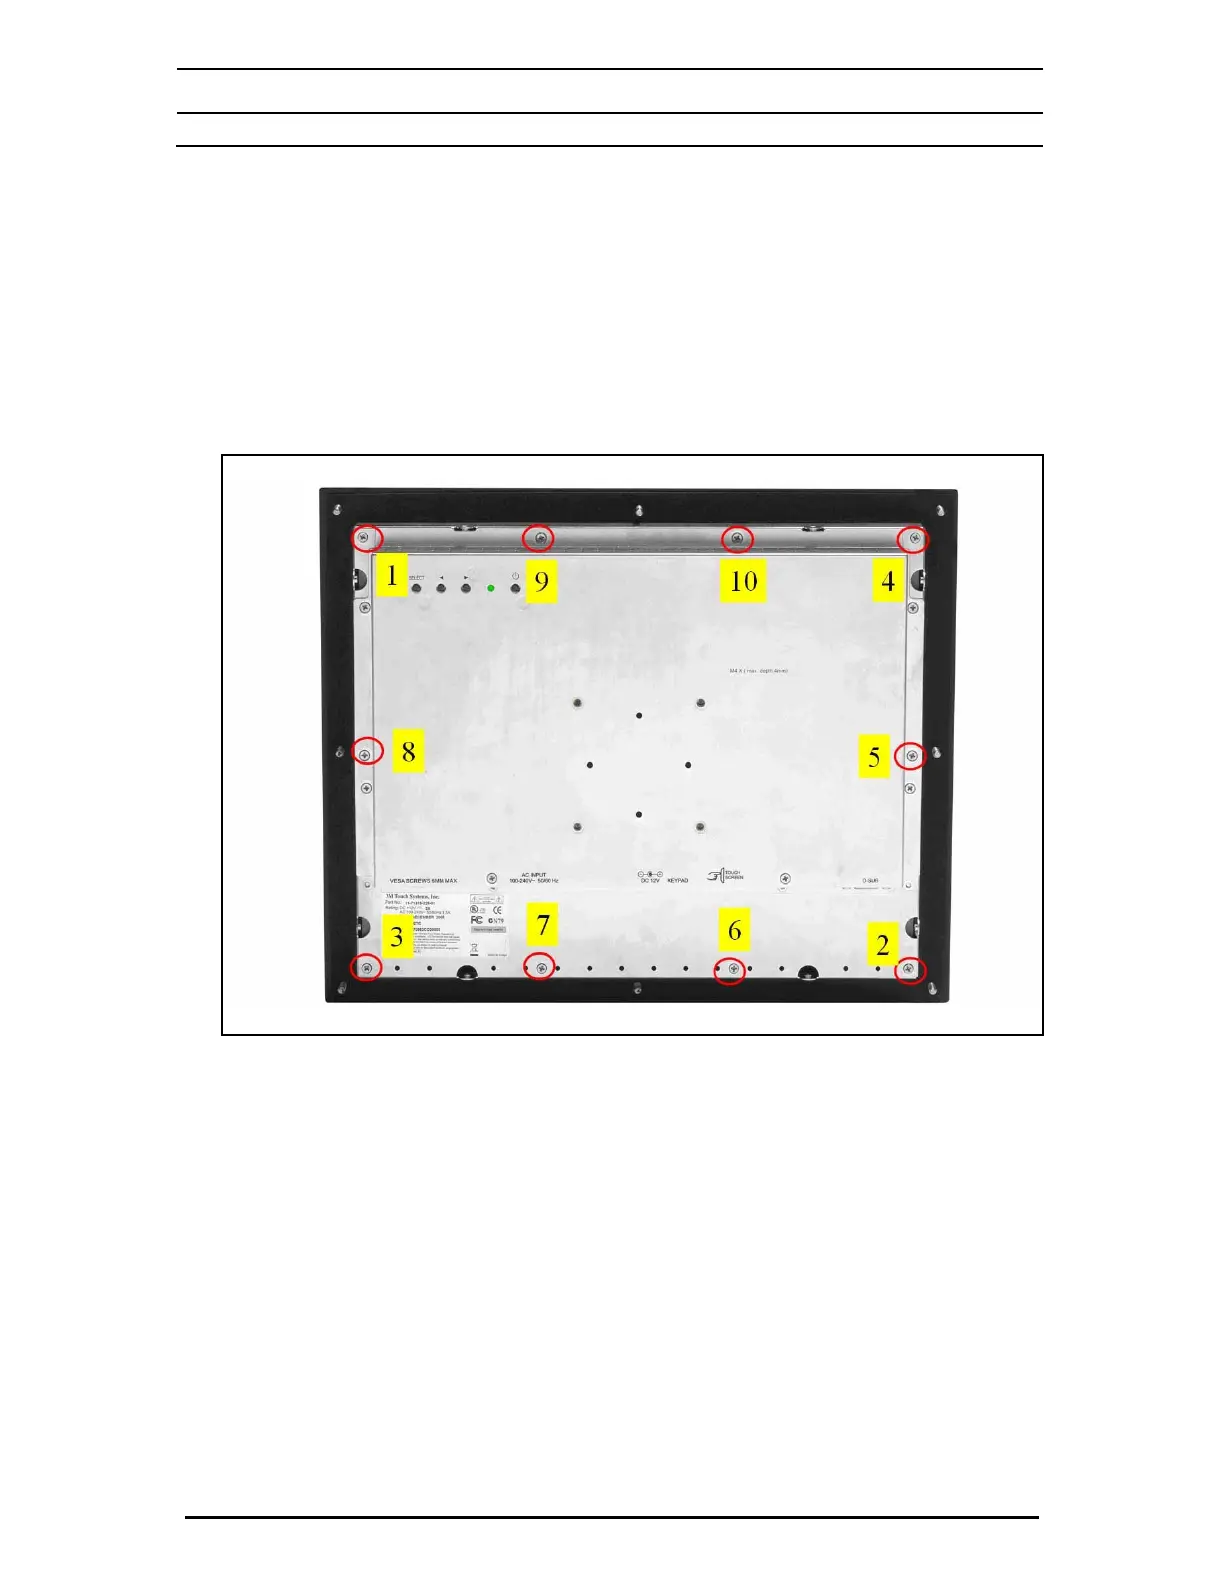
6. Loosely secure the bezel with the ten M3 x 12mm phillips screws provided as shown by the red
circles in the figure below. Install the four corner screws first to ensure that the bezel is seated
uniformly. Then install the six remaining screws. Install all of these screws only until you begin
to feel the resistance of the shoulder of the screw seating against its mating surface on the monitor
case.
7. Torque the screws. All bezel affixment screws need to be tightened to a torque of 7 in/lbs to
effect a proper seal. Utilize and repeat an alternating cross pattern as shown in Figure 3 until the
7 in/lb. torque rating is achieved at all screw locations. Do not over tighten the screws or you
may damage the chassis or the LCD display.
Figure 3 – Screw Tightening Sequence
8. The eight studs on the outside of the bezel require an M5 nut. Due to the array of unique
installation possibilities, these are not provided by 3M.