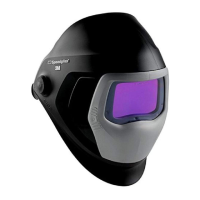
7
1) Remove the silver front panel by pulling one of its upper corners away from the shield (Figure 4). Lift out the
old ADF protection plate.
2) Remove the protective film from both sides of the new protection plate, if applicable. Place the new plate into
position, sliding its tabs into the ADF’s two slots (Figure 5).
3) Place the silver front panel back into position by inserting its two bottom tabs into the openings in the shield
shell (Figure 6). “Hook” one of the upper corners of the panel onto the shield. Then, using your thumb, push the
opposite corner until it snaps into place (Figure 7).
Replacing the Inner Protection Plate
1) To replace the inner protection plate, first lift out the old plate (Figure 8).
2) Remove the protective film from both sides of the new plate. Insert the two corners of one side of the plate into
the corner “pockets” of the ADF. Flex the protection plate so you can insert the other two corners into the opposite
end pockets (Figure 9).
Installing Magnification Plates
A standard 4.25 x 2 inch magnification plate, available from your local welding distributor, can be used with all
3M™ Speedglas™ welding helmets.* Simply remove the silver front panel and outer protection plate, place the
magnifying plate in front of the ADF cassette, and then re-install the outer protection plate and silver front panel.
No special adapter or retainer is needed.
*Note: Do NOT use magnifying plates that do not fit under the outer protection plate. The outer protection plate
MUST be fully seated with its two tabs inserted into the ADF’s two slots (Figure 5).
Removing the ADF Cassette/Changing The Batteries
Batteries should be replaced when the ADF does not turn noticeably lighter (shade 5 to 3) when switched on. In
addition, all 9002 models have a low battery indicator that will flash repeatedly when the battery should be
replaced. To change batteries, remove the silver front panel and then remove the ADF cassette from the helmet
by squeezing the two tabs at the top of the ADF cassette (Figure 10). At the bottom of the ADF cassette, there are
two battery compartments. Carefully pry open the compartments using a small flathead screwdriver. The battery
holders slide straight out; do not use excessive force nor insert the screwdriver farther than necessary when
opening the compartments. Remove the two batteries and dispose of them according to local regulations. Insert
the new batteries (type CR-2032, Speedglas part no. 04-0320-00) into the battery holders (Figure 11). Push the
holders into the ADF cassette until they snap into position. NOTE: always replace both batteries at the same time.
Reassemble as described under "Replacing the Outer Protection Plate."
Installing the ADF Cassette (except FlexView - see special instructions below)
1) Insert the ADF cassette bottom first so that the two retaining tabs fit over the edge of the opening in the shell
(Figure 12)
2) Push the upper part of the ADF cassette towards the shell until the tabs at the top lock into the clips on the
shell (figure 13).
3) Use a bright light to check for light leaks around the ADF cassette. Re-instll as necessary. Do not begin
welding until all light leaks are corrected.
Instructions for FlexView Assemblies (equipped models only)
Disassembly
• To remove the lens assembly (consisting of the silver front panel, the 9000 lens, and the ADF holder), first
lift it into the up position so it rests on top of the helmet. Then slide the entire spring assembly to your left