Leviosa Shades Programming Instructions (page 2)
Other actions
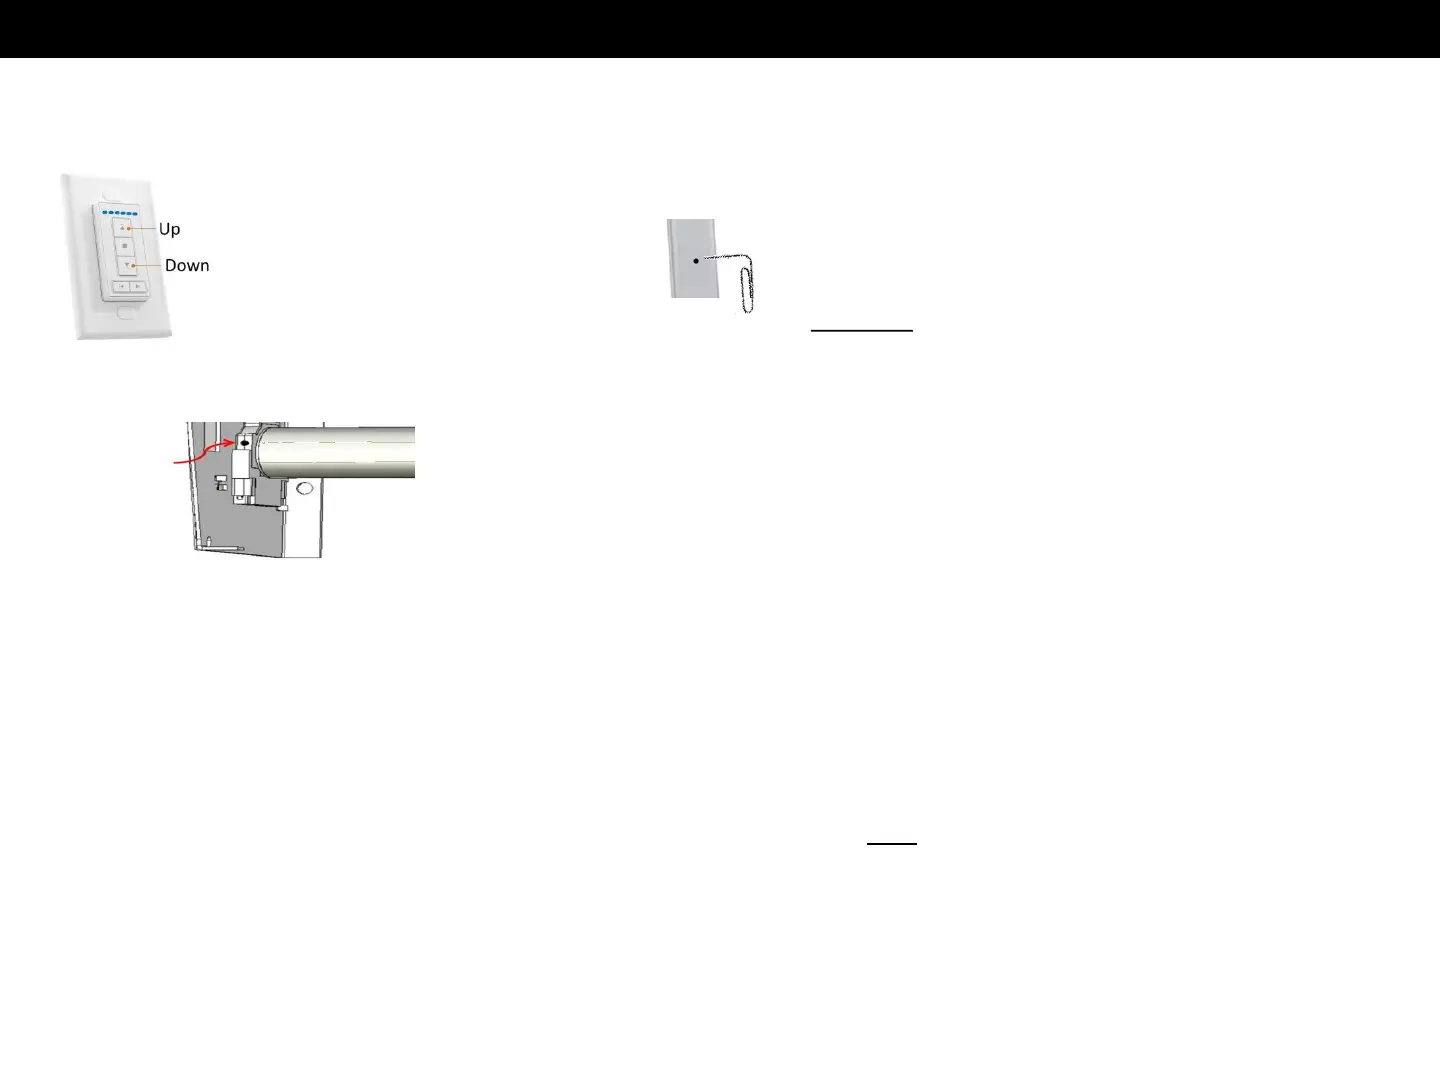
Delete a limit position (the upper limit cannot be deleted unless all positions are deleted)
Notes: If action between steps (a, b, c) takes longer than 30 seconds, the program will not complete. Simply start each step again at ‘step a.’
Up to 4 intermediate stops can be set by following Step 3 for each
Not sure what Step is next, or Everything is messed up? Go to ‘Delete ALL memory’ step on this page and start over at Instruction #1.
a. Wait 30 seconds after last command.
Press the UP and/or DOWN button until
the shade stops at the position to be
deleted. Once it stops, do not change
position.
b. Use a paperclip
to PRESS/HOLD the
button on the BACK
of the remote for
7 seconds
c. After 1 second, the shade rotates
briefly up and down.
KEEP PRESSING/HOLDING button.
After 5 more seconds, the shade
rotates briefly up and down again.
The position is now deleted.
Delete ALL memory (including the remote and limits - resets the motor to factory settings)
Add a new Controller to a Shade
With a paper clip or small screwdriver, PRESS the PROGRAM BUTTON on the
motor 4 times in a row – you will hear a beep after each press. Then PRESS/HOLD
the button again for 3 seconds until shade rotates briefly up and down.
ALL memories are now deleted. Go to Instruction #1 to Link to a Remote
Program
Button
on motor,
left bracket
Multiple controllers can be linked to one shade:
• Follow Instruction #1 for “Link the Shade to the Remote Control”.
• No need to reset upper and lower positions for the shade
Multiple shades can be controlled by a single remote:
• Power only the 1
st
shade of the group of shades. Remove power to other shades on same group.
• Setup 1
st
shade starting at Instruction #1, and set upper/lower positions.
• Remove power to 1
st
shade. Power up the next shade, setup this shade starting at Instruction #1, and set upper and lower positions.
• Repeat the process, ensuring that power is off to shades not being programmed. After the last shade is programmed, reapply power to all.
Add a new Shade to a Controller
 Loading...