54 5
4. Add the device to the account by using a web browser and
entering the following URL: www.alarm.com/addcamera (you
will need your user name and password.
5. Select the camera from the video device list or type in its MAC
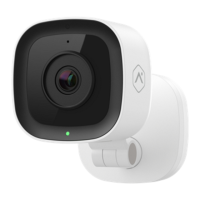
address to begin adding the camera. The camera’s MAC address
is located on the bottom of the camera or on the packaging.
6. Follow the on-screen instructions to finish adding the camera.
Y ou may configure camera settings from your online account. .
You can now power down the camera and install it in its final
location using the included hardware.
Connect the camera to the network
Ethernet mode
Complete these steps prior to installing the camera in its
final location.
1. Using an Ethernet cable, connect the camera to the network.
2. Connect the camera’s AC power adapter and plug it into a
non-switched outlet.
3. Wait a few minutes for the camera to connect to the Internet.
When the LED is solid green, the connection is complete.
If the LED is not solid green after a few minutes:
• Power cycle the camera.
• Try a different Ethernet port on the router.
• Try to connect using a different mode (AP or WPS mode).
4. Add the device to the account by by using a web browser and
entering the following URL: www.alarm.com/addcamera (you
will need your user name and password ).
5. Select the camera from the video device list or type in its MAC
address to begin adding the camera. The camera’s MAC address
is located on the bottom of the camera or on the packaging.
6. Follow the on-screen instructions to finish adding the camera.
Important: If the video device will be connected to the Wi-Fi
network after this initial installation, be sure to configure the
Wi-Fi network after the camera is added to the account.
Y ou may configure camera settings from the online account.
You can now power down the camera and install it in its final
location using the included hardware.
reboot with factory defaults.
 Loading...