44
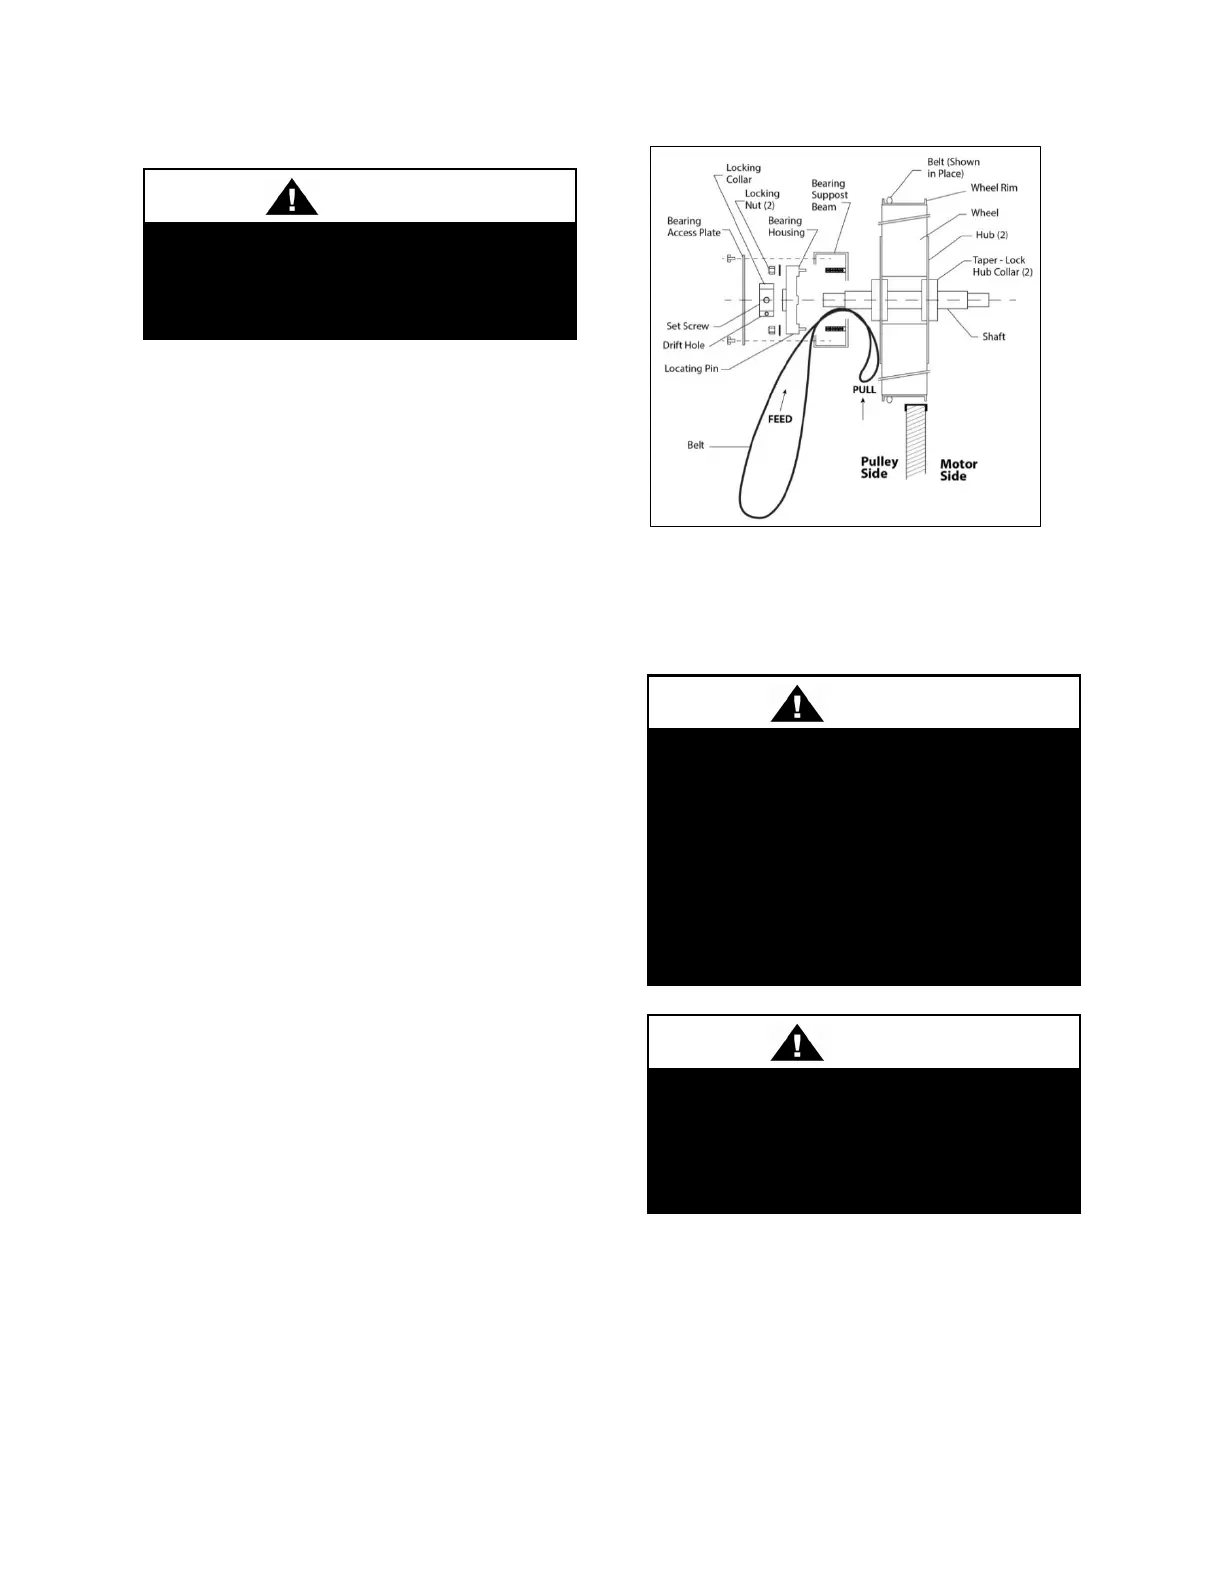
5. Loop the trailing end of the belt over the
shaft (belt is partially through the opening).
6. Reinstall the bearing onto the wheel shaft,
being careful to engage the two locating pins
into the holes in the bearing support beam.
Secure the bearing with two self-locking
nuts.
7. Install the belts around the wheel and
pulley according to the instructions provided
with the belt.
8. Reinstall diameter seals or hub seal and
tighten retaining screws. Rotate wheel in
clockwise direction to determine that wheel
rotates freely with slight drag on seals.
9. Reinstall bearing locking collar. Rotate
collar by hand in the direction the wheel
rotates (see label provided on each cassette
for wheel rotation).
10. Lock in position by tapping drift pin hole
with hammer and drift. Secure in position by
tightening set screw.
11. Reinstall Bearing Access Cover.
12. Apply power to wheel and ensure that the
wheel rotates freely without interference.
Figure 24 - Belt Replacement
Startup
(See back of the manual for startup form)
During startup, it is necessary to perform
routine checks on the performance of the unit.
This includes checking of the air flow, the air
filters, condenser water flow and refrigerant
charge.
Improper installation, adjustment,
alteration, service or maintenance can
cause property damage, personal
injury or loss of life.
Startup and
service must be performed by a
Factory Trained Service Technician. A
copy of this IOM must be kept with the
unit.
Electric shock hazard. Shut off all
electrical power to the unit to avoid
shock hazard or injury from rotating
parts.
Protect hands and belt from possible
sharp edges of hole in Bearing
Support Beam.