5
41-181.2K
This represents the burden on the current trans-
former connected to terminals 4 and 5 or 8 and 9.
The burden on the current transformer connected to
terminals 6 and 7 is twice the stated values.
5.0 SETTINGS
5.1. MAIN UNITS
No setting is required on the non-tapped relay
because it is calibrated for one ampere sensitivity
and is set to operate on an unbalance as shown in
the operating curve of figure 3. For the tapped relay,
select the minimum tap that is compatible with the
current transformer error expected during motor
starting. All taps should be set identically. On the 2
and 3 ampere tap, the relay contact should make
within
±5% of tap value with no current in the other
unit on the same disc.
5.2. INDICATING CONTACTOR SWITCH (ICS)
No setting is required on the ICS unit except the
selection of the 0.2 or 2.0 ampere tap setting. This
selection is made by connecting the lead located in
front of the tap block to the desired setting by means
of the connecting screw.
5.3. AC INDICATING CONTACTOR SWITCH
(ACS)
No setting is required on the ACS unit with the core
screw locked in its “all in” position. The unit should
operate and drop its target at a value not greater than
its rated operating current.
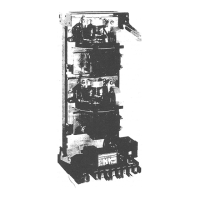
6.0 INSTALLATION
the relays should be mounted on switchboard panels
or their equivalent in a location free from dirt, mois-
ture, excessive vibration and heat. Mount the relay
vertically by means of the rear mounting stud or
studs for the type FT projection case or by means of
the four mounting holes on the flange for the semi-
flush type FT case. Either the stud or the mounting
screws may be utilized for grounding the relay. Exter-
nal toothed washers are provided for use in the loca-
tions shown on the outline and drilling plan to
facilitate making a good electrical connection
between the relay case, its mounting screws or
studs, and the relay panel. Ground wires are affixed
to the mounting screws or studs as required for
poorly grounded or insulating panels. Other electrical
connections may be made directly to the terminals by
means of screws for steel panel mounting or to the
terminal stud furnished with the relay for thick panel
mounting. The terminal stud may be easily removed
or inserted by locking two nuts on the stud and then
turning the proper nut with a wrench.
For more detailed information on the FT case refer to
Instruction Leaflet 41-076.
7.0 ADJUSTMENTS & MAINTENANCE
The proper adjustments to insure correct operation of
this relay have been made at the factory. Upon
receipt of the relay no customer adjustments, other
than those covered under “SETTINGS” should be
required.
7.1. ACCEPTANCE CHECK
The following check is recommended to insure that
the relay is in proper working order.
7.1.1. Main Units
For all electrical checks refer to test diagram figure 4
for tapped CM, put tap screw in one amp setting.
Non-Tapped Relay
Volt
Ampere
Power
Factor
Angle
Current
Amperes Frequency
1
5
1
5
1
5
60
60
50
50
25
25
0.95
15.00
0.85
14.5
0.46
8.00
74
73
72
71
55
54
Tapped Relay
Volt
Ampere
Power
Factor
Angle
Tap
Current
Amperes
Frequency
1
1
2
2
3
3
1
5
2
5
3
5
60
60
60
60
60
60
0.95
15.00
0.95
5.8
1.05
2.8
74
73
65
65
54
54