EasyManua.ls Logo

About Time Paddington User Manual

About Time Paddington
6 pages
To Next Page IconTo Next Page
Page #1 background imageLoading...
Page #1 background image
Assembly Instructions
Please see photos below.
1. Insert the 2 bolts through the holes on either side of the nial bar and
loosely secure with an 8mm x 5mm nut on each side.
2. Attach the top spare part to the top of wall bracket as shown in gure 1.
3. Keep one hexagonal screw on bracket as shown in gure 2.
4. There is one screw hole on top of clock case, see gure 3. Insert wall
bracket through the screw hole, and fasten another hexagonal screw from
inside (see gure 4).
5. Attach the wall bracket in your desired location using the screws and
xings provided.
g. 1
g. 2
g. 3
g. 4
This product contains valuable materials which can be recovered or
recycled – please dispose of in accordance with your local council directives
1
EN | Paddington Clock Instructions
Question and Answer IconNeed help?

Do you have a question about the About Time Paddington and is the answer not in the manual?

About Time Paddington Specifications

General IconGeneral
BrandAbout Time
ModelPaddington
CategoryClock
LanguageEnglish

Summary

Assembly Instructions

Insert Bolts and Secure Finial Bar

Insert two bolts through the finial bar holes and loosely secure with 8mm x 5mm nuts on each side.

Attach Top Spare Part to Bracket

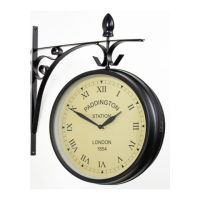
Attach the top spare part to the top of the wall bracket as shown in figure 1.

Prepare Bracket with Hexagonal Screw

Keep one hexagonal screw on the bracket as shown in figure 2.

Connect Bracket to Clock Case

Insert wall bracket through the clock case screw hole and fasten another hexagonal screw from inside (see figure 4).

Mount Wall Bracket to Location

Attach the wall bracket to your desired location using the screws and fixings provided.