Do you have a question about the Abus KeyGarage 787 Smart-BT and is the answer not in the manual?
Initial step to open the KeyGarage™ for 787 Smart-BT wall mounting.
Aligning and marking drill holes for secure wall mounting.
Preparing the wall surface by drilling and inserting dowels.
Fastening the KeyGarage™ to the wall and closing the compartment.
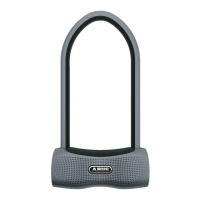
Initial step to open the KeyGarage™ for shackle mounting/change.
Moving the bolt to allow shackle access for 797 Smart-BT.
Removing silicone plugs for access to internal components.
Inserting the shackle into the lock mechanism for the 797 model.
Securing the shackle by moving the bolt forward.
Final step to close the KeyGarage™ after shackle manipulation.
First step to access the battery compartment by loosening a screw.
Removing the protective flap to access the battery compartment.
Inserting batteries with correct polarity.
Securing the battery compartment after battery replacement.
Instructions to download the app and enable Bluetooth on the smartphone.
Guidelines for app operation and secure keycard handling.
Security note for injury/health risks, requires careful observation.
Warning for possible device damage, requires careful observation.
Informative note for user guidance.
Details on dimensions, weight, storage, and operating parameters.
Information on radio frequency and encryption used.
Instructions for the responsible disposal of the product and packaging.
Details on warranty coverage for defects and exclusions.
Details on FCC certification and Supplier's Declaration of Conformity.
Contact information for the US responsible party.
Canadian compliance information for licence-exempt transmitters.
Key conditions for device operation under FCC rules.
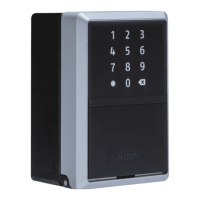
| Brand | Abus |
|---|---|
| Model | KeyGarage 787 Smart-BT |
| Category | Locks |
| Locking Type | Keypad |
| Smart Home Protocol | Bluetooth |
| Connectivity | Bluetooth |
| Material | Metal |
| Power Supply | Battery |
| Power Source | Battery |
| Battery Type | AA |
| Battery Life | Up to 2 years |
| Weather Resistance | Yes |
| Weatherproof | Yes |
| Security Level | High |
| Locking Mechanism | Electronic |
| Compatibility | Smartphones |