12
11
15
Nacisnąć
i przytrzymać 3 s
Press and hold for
3 seconds
Nacisnąć krótko 3x
Press 3 times briey
Krok 4 - przyporządkowanie kamery do stacji bazowej
Step 4 – Assign the camera to the base station
Dodatkowa stacja bazowa może być stosowana, gdy np. w przypadku większych obiektów dwie
kamery przyporządkowane do tej samej stacji bazowej są umieszczone zbyt daleko odsiebie.
W takim przypadku stosuje się drugą stację bazową w pobliżu drugiej kamery i kamera zostaje
przyporządkowana do tej stacji bazowej. W jednej stacji bazowej można używać dwóch kamer.
Aplikacja obsługuje maksymalnie 8 stacji bazowych.
An additional base station can be used if, for example, two cameras assigned to one base
station are positioned too far apart in a larger building. In this case, a second base station
can be installed close to the second camera and the camera can be assigned to this base
station. Two cameras can be operated from one base station. Up to 8 base stations are
supported by theapp.
Przy dostawie fabrycznej zestawu kamer (z jedną lub dwoma kamerami) kamera/kamery
jest/są już wczytane dla tej stacji bazowej. W takim przypadku można pominąć krok 4.
In the case of camera sets (with one or two cameras) delivered from the factory, the
camera(s) is/are already programmed for this base station. Step 4 can therefore be skipped.
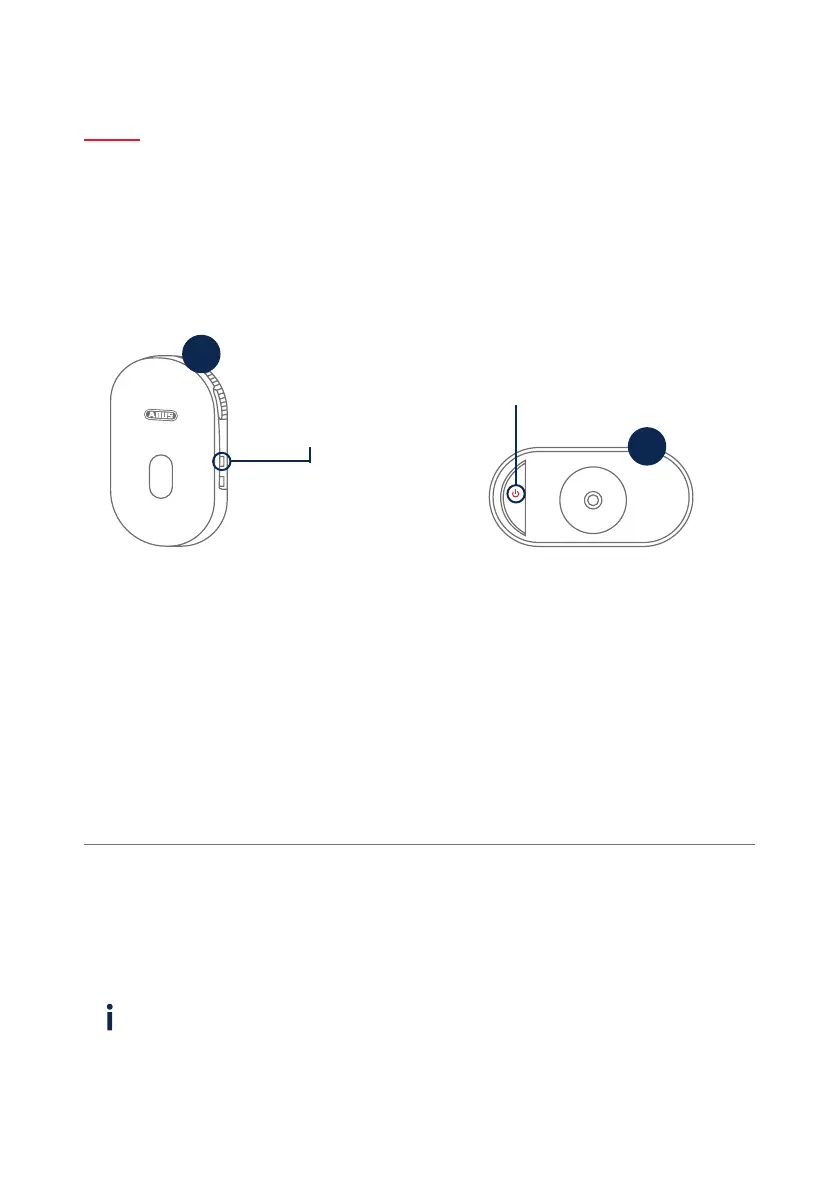
Nacisnąć przycisk parowania przez co najmniej
3 sekundy, aż dioda LED zacznie migać na
niebiesko. Odtwarzany jest komunikat głosowy
"Gotowy do połączenia z kamerą". Jeśli kamera
została już sparowana z inną stacją bazową,
należy ją wcześniej usunąć z listy kamer w
aplikacji.
Press and hold the pairing button for at least
3seconds until the blue LED ashes. The voice
command „Ready for camera connection“ is
emitted. If the camera is already programmed
in a base station, please delete it from the list
in advance.
Włączyć kamerę. Nacisnąć krótko 3x symbol
włącznika, aby wczytać kamerę. Jeśli połączenie
się powiedzie, odtwarzany jest komunikat
głosowy "Połączenie z kamerą zostało
pomyślnie zakończone".
Switch on the camera. Press the activation
symbolbriey 3times in order to programme
thecamera. If the connection is successful,
thevoice command „Camera connection
completed successfully“ is emitted.
 Loading...