Accu Cutter Company
160 Stover Drive, P O Box 1170, Carlisle, Pennsylvania 17013 800-345-0062 (Fax) 717-241-2350
4 “If it doesn’t say Accu Cutter, it isn’t!”
Adjusting the Shear Action
The shear action is tested and properly adjusted and lubricated prior to shipping the shear.
The action may appear to be stiff, but it is set that way for two reasons. First, if the action is too
loose, the blades can move in and out of adjustment depending on the way you move the handle. This
will result in poor and irregular cutting and dramatically shorten the useful life of the blades. One
symptom of a loose shear is that the metal bends instead of cutting. Second, because of possible in-
jury, you should never remove your hand from the handle of the shear while the blades are open any
amount. However, if you do so inadvertently, the stiff action of a properly adjusted shear will cause
the blades to stay in that position so they will not close accidentally.
Under normal conditions, the shear should not require adjustment by you. However, if you
are having a problem, follow the procedures in this Manual carefully while referring to Figures 3 and
4. If doing so does not resolve your problem, call Accu Cutter for assistance.
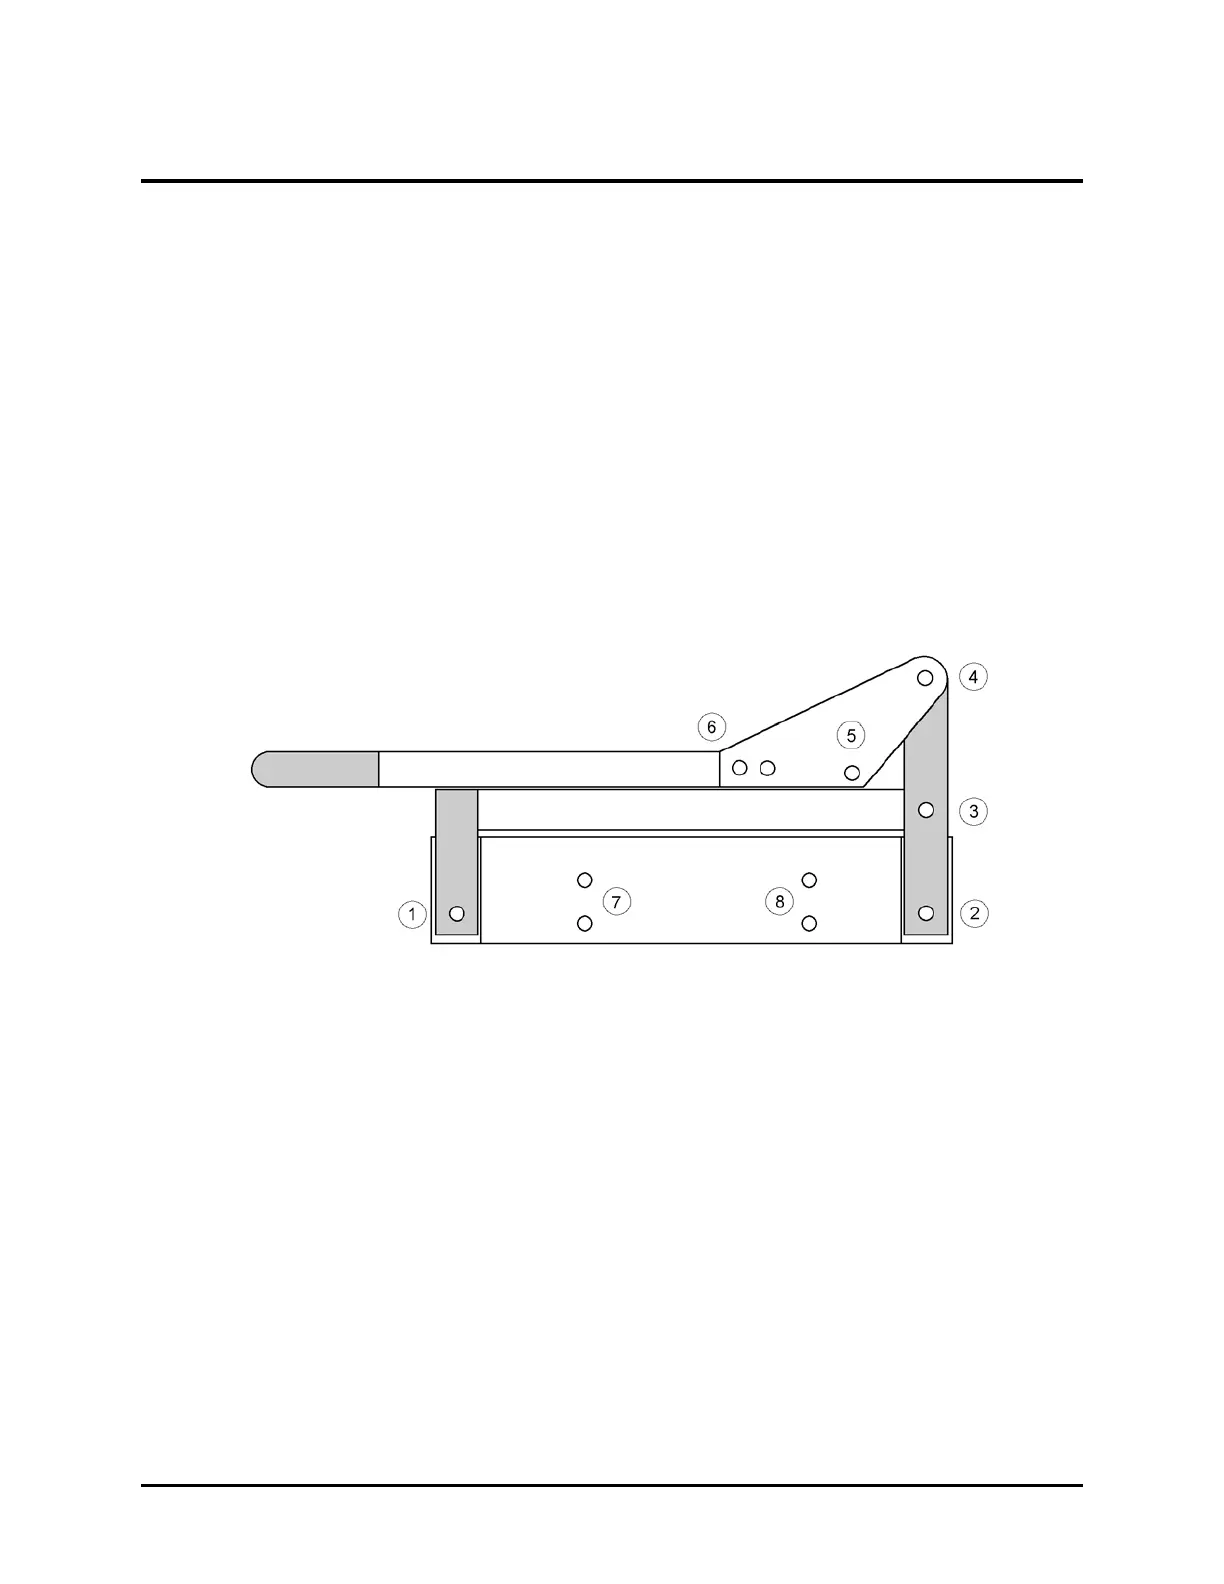
Figure 3.
To correctly adjust the shear action, carefully follow all of the steps below.
1. Examine the shear to determine if any parts, including the blades, are damaged,
broken, or missing. If any are, call Accu Cutter for assistance. If none are, con-
tinue with this section.
2. Lift the handle until it is open fully. If the shear is too loose and the handle will
not stay in the open position, temporarily tighten bolt Number 3, Figure 3 above.
3. Move the bottom blade away from the top blade. There are three setscrews visible
in the slots in the shear table. Using the ball hex provided with the shear, loosen
the three setscrews so they are no longer touching the bottom blade. Next loosen
the four button head bolts holding the bottom blade. A standard 5/32” hex head
wrench is required. Once the bottom blade is loose, move it away from the top
blade creating a gap, and secure it by lightly tightening one of the button head
screws.
 Loading...