Accu Cutter Company
160 Stover Drive, P O Box 1170, Carlisle, Pennsylvania 17013 800-345-0062 (Fax) 717-241-2350
“We’ve stayed in business by cutting corners!” 5
4. Carefully loosen bolt Number 3 in Figure 3 above. You should now be able to
move the handle up and down without the top and bottom blades touching each
other.
5. Check all moving parts for proper lubrication and lubricate as needed. White li-
thium grease is preferred, but heavy machine oil may also be used. Silicon sprays
evaporate rapidly and are not recommended.
6. Adjust the bolts in the following sequence:
a. The bolts through the handle should be tight. (Number 6, Figure 3)
b. The other bolts through the triangles (Numbers 4 and 5, Figure 3) should
be loose enough that you can turn them with your fingers when moving
the handle from side to side.
c. Bolts Numbers 1 and 2, Figure 3, should be tight but not dead tight. You
should still be able to move the handle up and down.
d. Bolt Number 3, Figure 3, is the last one tightened. It is a feel adjustment.
It should be tight enough to keep the handle in the upright position, but
not so tight that you can’t operate the shear.
7. Adjust the blades following the instructions in the section below, Removing, In-
stalling and Adjusting the Blades.
* * * * *
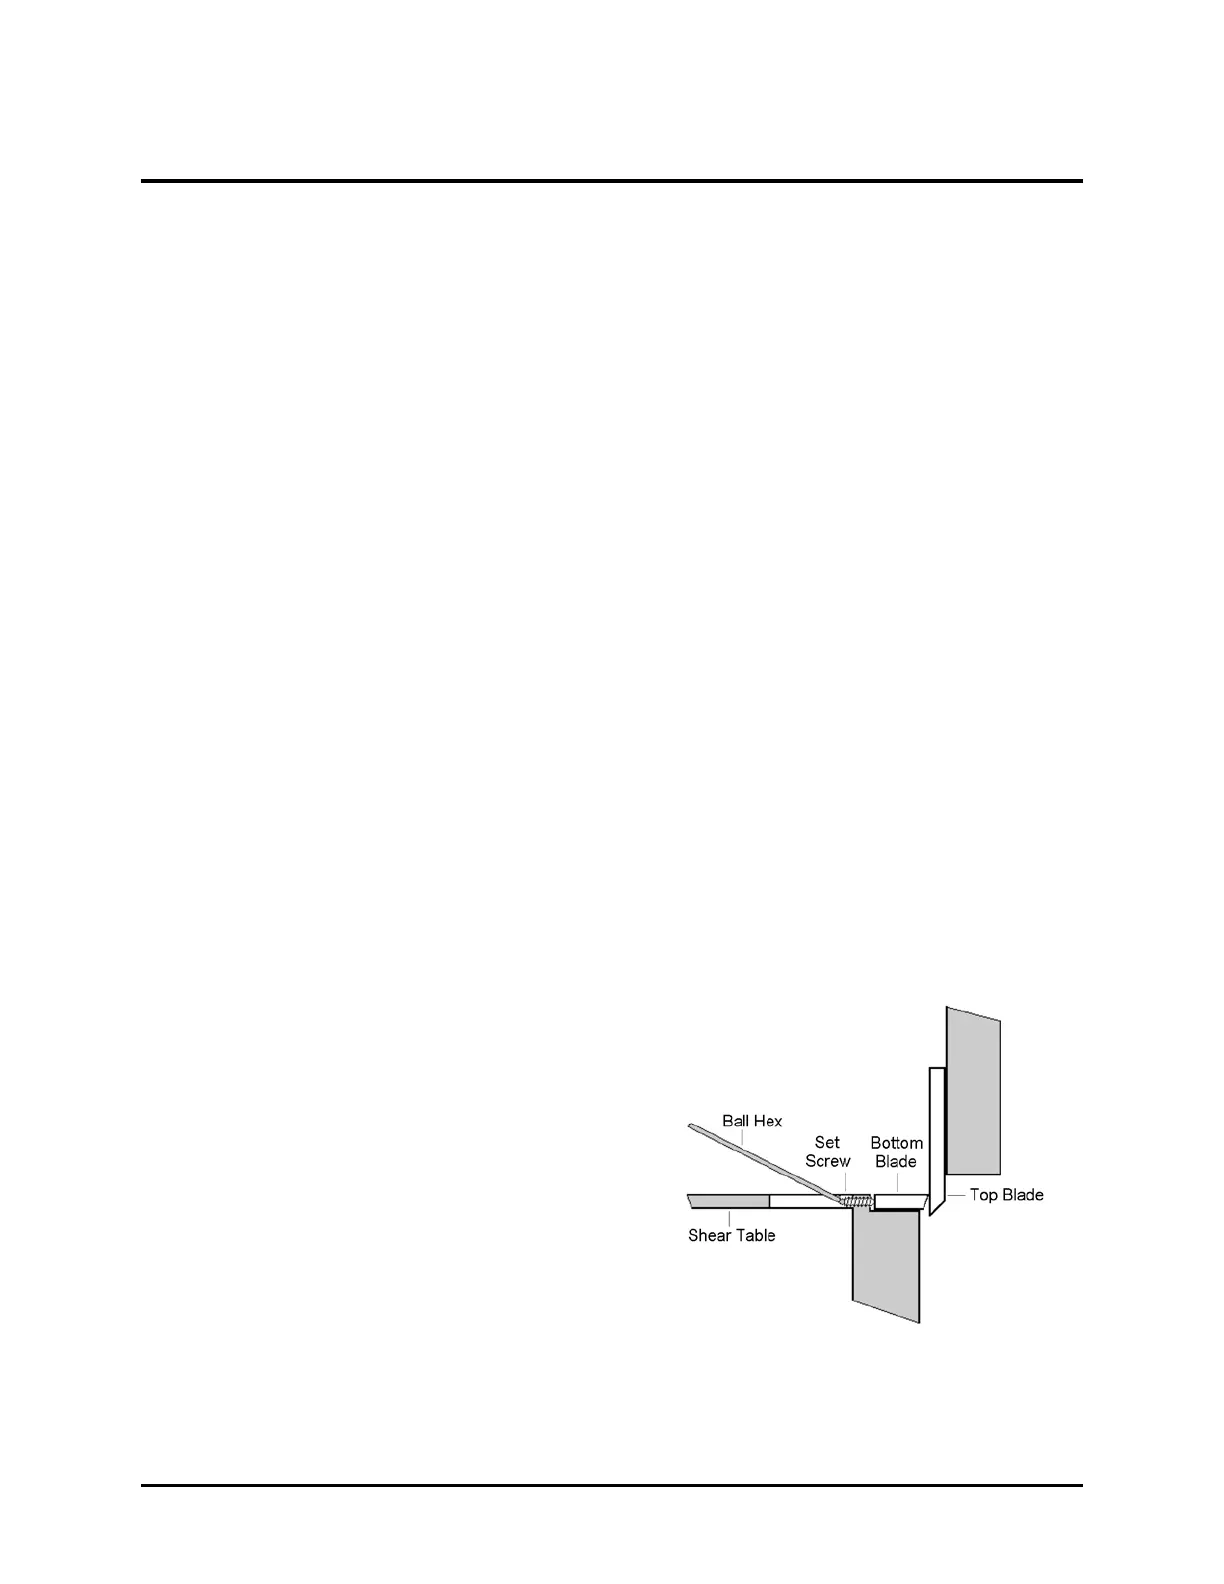
Removing, Installing, and Adjusting the Blades
The drawing to the right is a cross sec-
tion of a portion of the Shear. It shows the
general relationship of the work table, top and
bottom blades, and the set screws used to ad-
just the bottom blade. Refer to it as you read
the instructions below. It will help you visual-
ize the instructions.
ALWAYS WEAR GLOVES when
working with blades. They should always
be considered very sharp even if they
have been used. Shear blades can and
will cut you and can cause serious harm
to you or someone working with you.
Removing the Blades
1. Remove the top guide from the worktable. (Optional)
 Loading...