Do you have a question about the AccuDual ACS-75241 and is the answer not in the manual?
This document describes the ACS-75241, a RAID box designed for SCSI interfaces, supporting RAID 1 (Disk Mirroring) for data redundancy and improved performance. It is a reliable and affordable solution for managing two hard drives in a RAID box simultaneously, and it features intelligent online recovery. If a hard drive fails, the RAID box allows for a hot swap of the failed drive and automatically rebuilds the data to the new hard drive without any system downtime.
The ACS-75241 package includes:
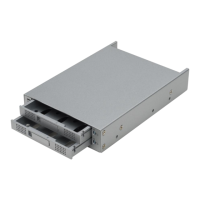
Front View of ACS-75241 RAID box: The front panel features two drive trays, each with status indicators and a drive tray lock. The LED indicators provide visual feedback on the hard drive status.
LED Status Indicators:
The LED indicators are built into the right-side of the drive tray for indicating hard drive status. Users should refer to the table for all status details. When hearing the beeper sounds "bi-bi-bi", it indicates a status event that requires immediate attention.
Rear View of ACS-75241 RAID box: The rear panel includes:
Front View of Power Delay Module: The Power-delay module is designed to eliminate damage from unstable and critical power supply system. It can maintain the 12V DC output up to 10 seconds even though unexpected input DC power dropped.
RAID 1 is an acronym for Redundant Array of Independent/Inexpensive Disks. RAID 1 is one of several RAID levels. RAID 1 also known as "Disk mirroring". Data are written to both disks simultaneously. RAID 1 provides both high reliability and continued data availability in the event of failure of an array member. When a RAID 1 member disk fails, array management simply directs all application requests to the remaining disk. RAID 1 is suitable for data which reliability requirements are extremely high, or for data to which high performance access is required.
Installation of RAID box: CAUTION: Turn off and disconnect all electrical power from the system before beginning installation.
Configure the SCSI channel: Follow the instructions provided below to configure the system interface setup depending on the type of RAID box. The Default SCSI configuration as shown in the figure. The default SCSI ID is 6. If you intend to configure the SCSI channel to different ID number, please refer the table. And leave others setting as default if unnecessary. The ID 7 is usually reserved for SCSI host controller, please avoid using ID 7 for ACS-75241 box for preventing the conflict.
| ID | 0 | 1 | 2 | 3 | 4 | 5 | 6 | 7 |
|---|---|---|---|---|---|---|---|---|
| SW1 | OFF | ON | OFF | ON | OFF | ON | OFF | ON |
| SW2 | OFF | OFF | ON | ON | OFF | OFF | ON | ON |
| SW3 | OFF | OFF | OFF | OFF | ON | ON | ON | ON |
Mount or Remove hard drive:
Install ACS-75241 into system:
ACS-75241 power module connection:
Start using RAID box:
Application 1: Two new disk drives. Insert both hard drives into the RAID box. Power on the host computer. After system boot up, the RAID box will be recognized by host system. And system treats it as a single disk. Partition and format the array under OS before it can be used.
Application 2: Installing one hard drive with data and one new hard drive. The new hard drive must be the same capacity or larger capacity than the hard drive with data. Insert hard disk with data into the top slot and leave bottom Slot empty. This identifies the disk with data as the source drive. (The host computer must be in power-off status.) Power on the host computer. Insert the new hard drive into bottom slot. This identifies the newly inserted hard drive as a target disk. The RAID box will immediately begin mirroring the data from the source hard drive to the new hard drive in bottom slot. Any old data on the newly inserted hard drive will be lost, and is overwritten with the mirror image of the source drive.
Note: If you have installed non-identical hard drives, your computer will recognize RAID box as a single hard disk with a capacity equal to the smaller hard disk drive installed in the RAID box.
| Brand | AccuDual |
|---|---|
| Model | ACS-75241 |
| Category | Recording Equipment |
| Language | English |