Data Storage Devices
Location: The Vision Series desktop has the option to utilize both spinning hard drives (HDD) and
M.2 SSD storage devices. The storage devices are located as indicated in Figure 1.
Type and number of fastenings: HDD = (4) Phillips screws, M.2 SSD = (1) Phillips screw.
Tools required:
HDD = Screwdriver with PH2 bit
M.2 SSD = Screwdriver with PH1 or smaller bit.
Procedure:
HDD = Bottom mount
Step 1: Ensure the desktop is off, unplugged, and any potential energy is dissipated.
Step 2: Remove the side panel from the chassis as indicated in the “Chassis Cover” section of this
manual.
Step 3: The HDD is mounted to the bottom of the chassis. Turn the chassis on the side, the screws
are located on the bottom of the chassis. While you are unfastening the screws be sure to secure
the HDD so it does not fall and damage any of the components.
Step 4: Remove all data cables from the motherboard.
Reinstallation
Step 5: Reinstall new HDD in the same position as the one being removed, insert the (4) screws
into the HDD through the bottom of the chassis.
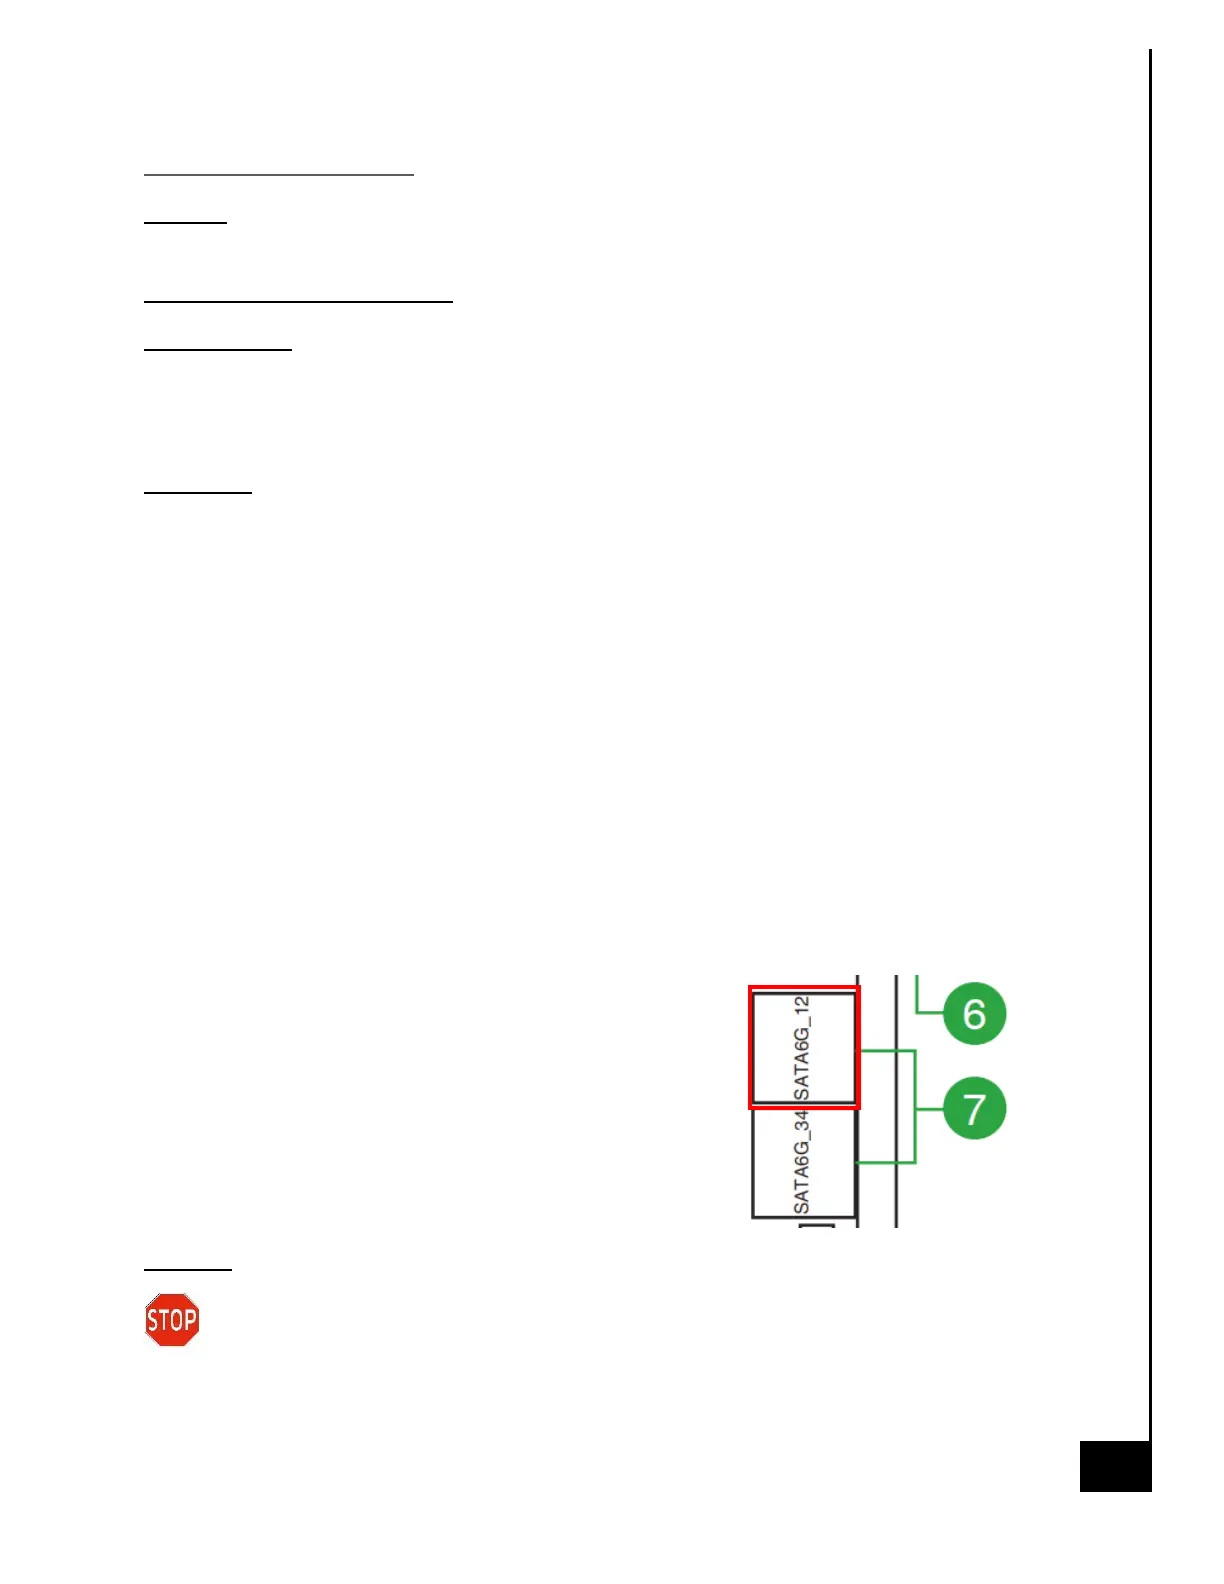
Step 6: Attach data cable from HDD to MB, the
recommended port is “SATA6G_12”.
Step 7: Attach SATA power from Power Supply to HDD.
Disposal:
Selective Treatment/Special Handling Per Annex VII, Directive 2012/19/EU: The HDD
contains a printed circuit board of greater than 10 sq. cm and must be removed from the
device and must be disposed of, or recovered, in compliance with the requirements of Directive
2008/98/EC.