Motherboard
The motherboard is equipped with a lithium metal battery. The battery must be removed
separately from the motherboard and shall be disposed or recovered in compliance with
Directive 2008/98/EC.
Refer to the “Battery” section of this manual for additional guidance.
Location: The motherboard is generally centrally located within the unit. Standard practice would
be to remove all the components, peripherals, and add-ons from the motherboard before
removal of the motherboard.
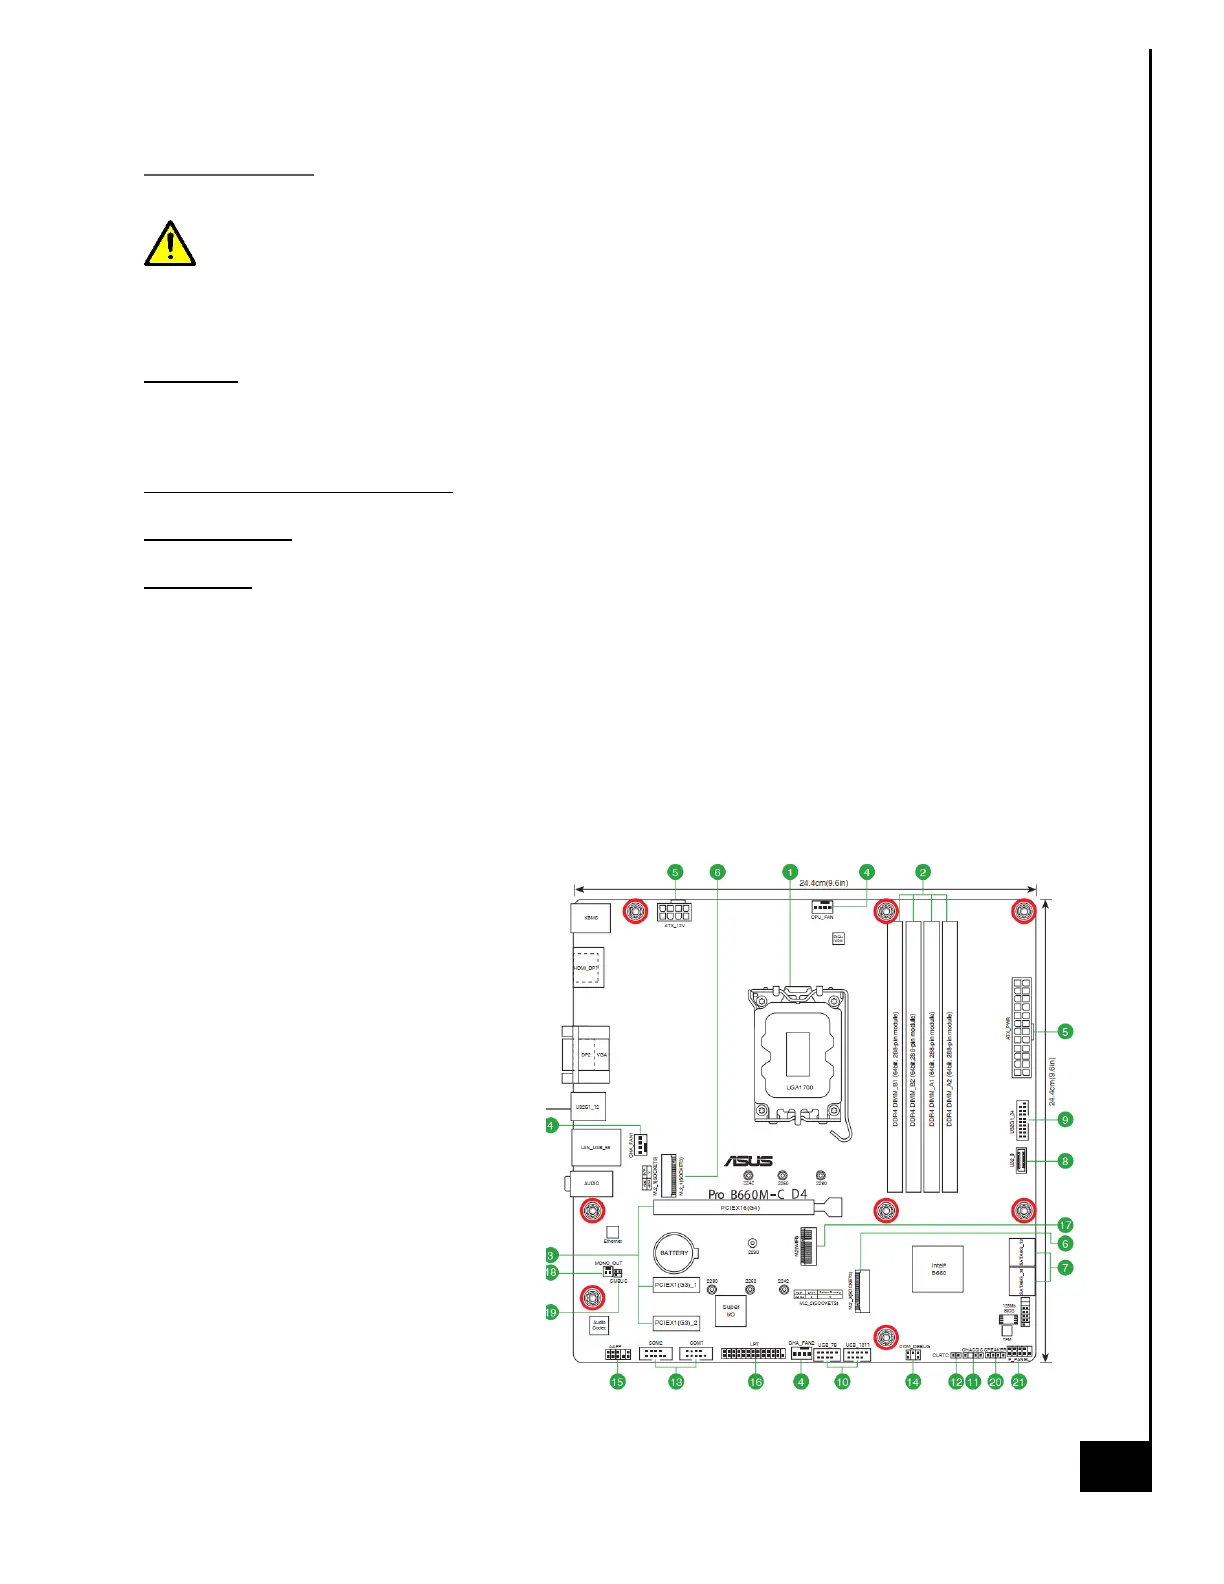
Type and number of fastenings: 8 Phillips screws
Tools required: Screwdriver with PH2 bit.
Procedure:
Step 1: Ensure the computer is off, unplugged, and any potential energy is dissipated.
Step 2: Remove the side panel from the chassis as indicated in the “Chassis Cover” section of this
manual.
Step 3: Remove all peripheral components on the motherboard, the details of the removal are in
the applicable sections of this guide noted above.
Step 4: Disconnect all cables as necessary.
Step 5: Remove all 8 Phillips screws
(see photo of motherboard, screw
holes are denoted with red circles).
Step 6: Lift the motherboard gently
from the position within the case.
Reinstallation
Step 7: Carefully slide the motherboard
into the chassis be sure not to damage
any soldered components on the board.
Step 8: Align the motherboard with the
rear I/O shield and the motherboard
standoffs located on the chassis. Be
sure the motherboard is properly
seated against the I/O shield and the
metal prongs and not interfering with
the motherboard interface ports.