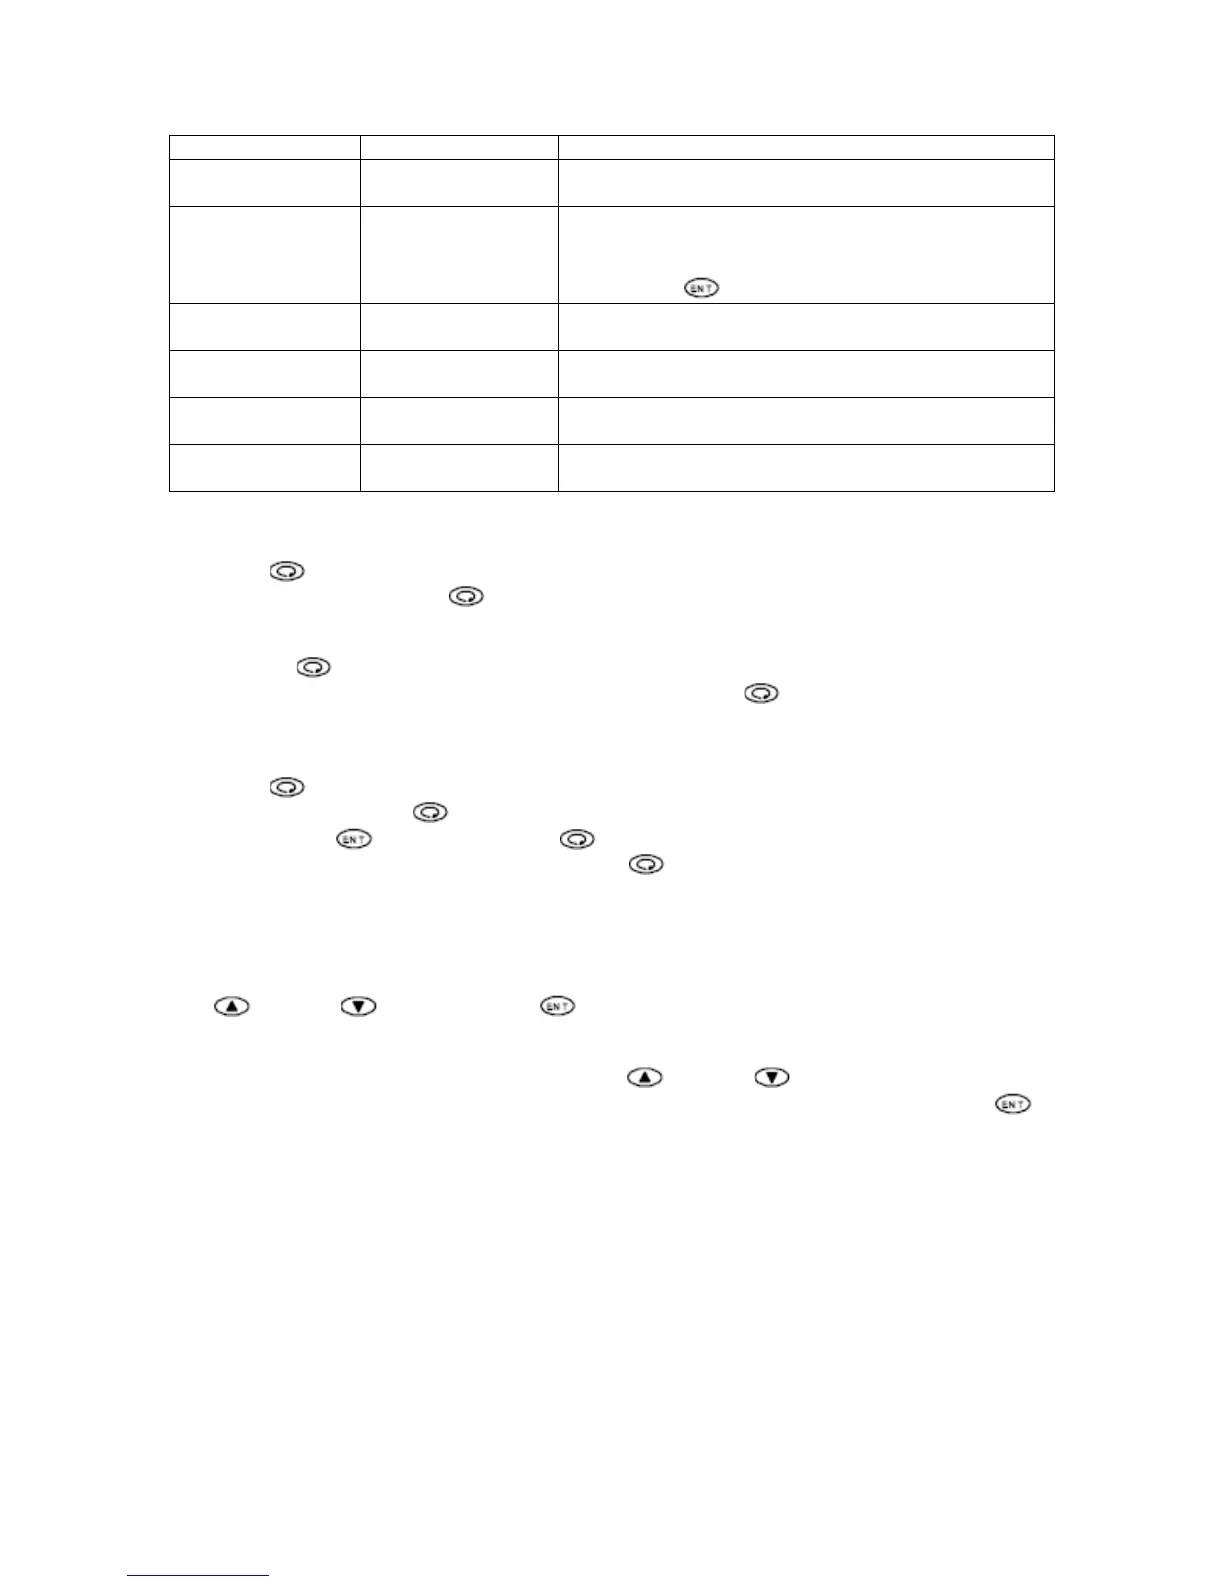
Upper Display Lower Display Description
PV – Outlet
Temperature
SV – Setpoint Displays current and Setpoint temperature. This is
the initial screen of Operation Mode.
PV – Outlet
Temperature
OUTPUT –
Modulation Output
Lower display shows modulation output in
percentage. In this screen modulation output can be
switched from auto to manual and vice versa by
pressing the
key for three seconds.
STBY – Standby
Action
EXE or STBY Select between Standby Mode or Execution Mode
AT – Auto Tuning
Action
ON or OFF This screen is used to turn on and off auto tuning.
E1Hd – High
Deviation Alarm
High Deviation
Alarm Setting
Alarm is activated when the outlet temperature is
above the setpoint by the degree set on this screen.
E2Ld – Low
Deviation Alarm
Low Deviation
Alarm Setting
Alarm is activated when the outlet temperature is
below the setpoint by the degree set on this screen.
Table 1 – Operation Mode Parameter
Press the
button to scroll through the Operation Mode parameter. On the last screen of the
Operation Mode, pressing the
button will return to the initial screen of the Operation Mode.
Changing between Operation Mode and Setup Mode
Pressing the
button continuously for 3 seconds from the initial screen of Operation Mode
brings up the initial screen of Setup Mode. Also by pressing the
button continuously on the
initial screen of Setup Mode returns to the initial screen of the Operation Mode.
Setup Mode
Press the
button to scroll through the Setup Mode parameter. On the last screen of the
Setup Mode, pressing the
button will return to the initial screen of the Setup Mode.
By Holding down
button and pressing button simultaneously, controller will display the
previous screen on the Setup Mode. Pressing the
button continuously for 3 seconds skips to
the initial screen of the Setup Mode.
Setup Mode consists of the following items in Table 2 – Setup Mode Parameters.
Changing Parameter Values
On the screen with a configurable parameter, the valve of the parameter can be changed using
the
button or button. Press the button to save the new parameter.
Changing Setpoint Parameter
On the initial screen of Operation Mode, press the
button or button to increase or
decrease the setpoint. When the desire setpoint is displayed on the lower display, press the
button to save the new setpoint parameter.
Note: Setpoint parameter can not be changed while Auto Tuning is in execution.
NOTE
Parameters with * are OEM parameters. Changing these parameters will cause the unit to
malfunction. DO NOT CHANGE OEM PARAMETERS
 Loading...