6 Aceletiqs Align Ball Storage Rack Assembly Guide & User Manual 7
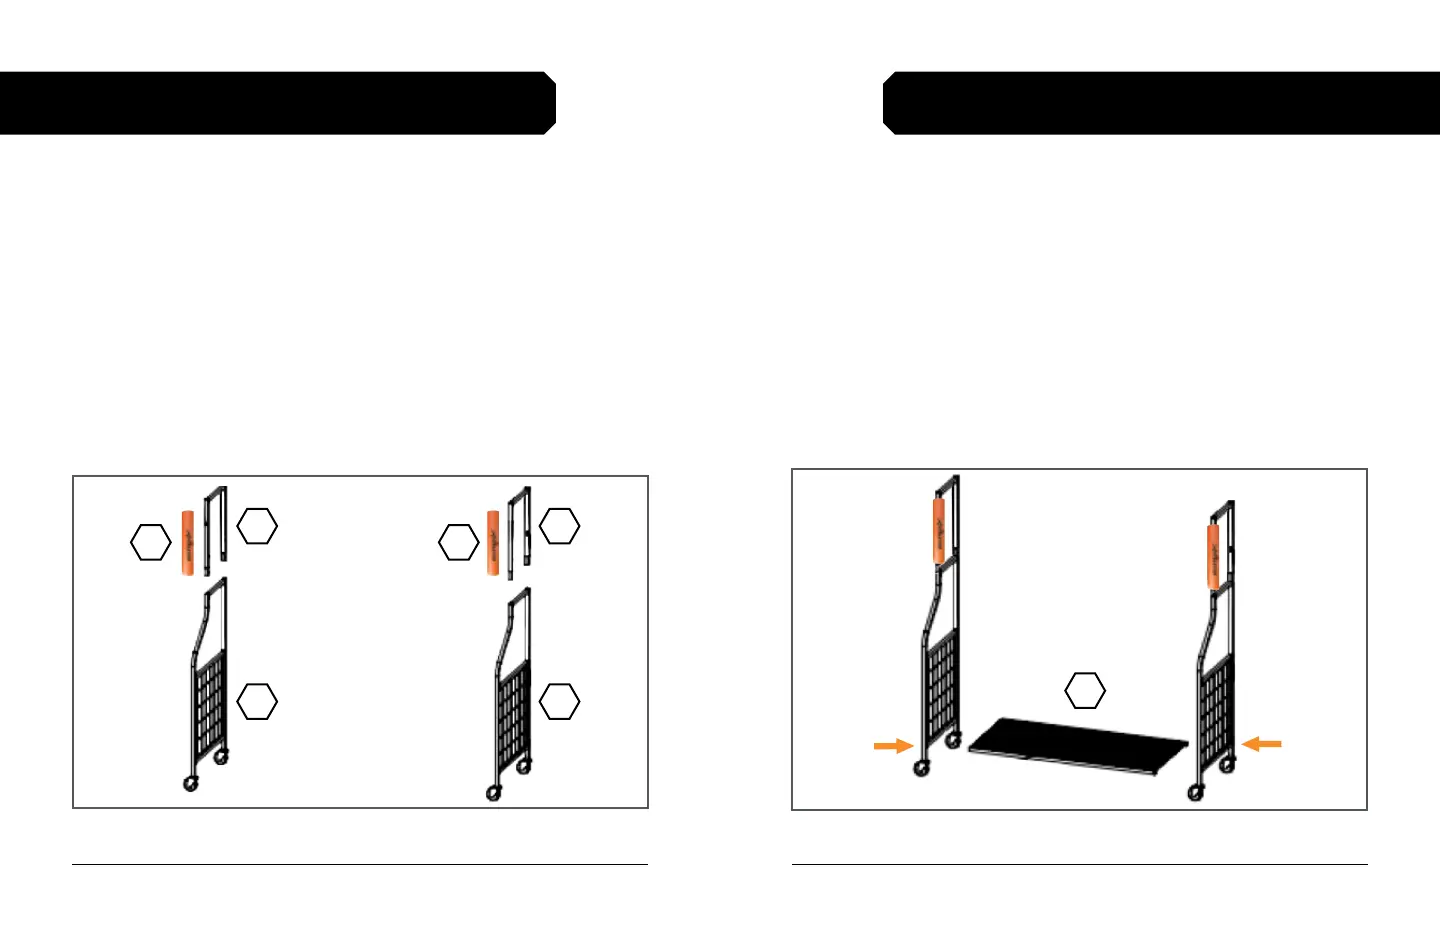
STEP 2: ATTACH THE BOTTOM PANEL
1. Use four long M6×24mm screws to attach the two side
panels [3] to the bottom panel [4]. See Fig. 2.
a. Screws insert from the sides (on the outside) of the frame.
b. Be sure to use the lower screw holes. The upper screw
holes will be used to attach the front and back panels.
c. Support beam running down the center of the bottom panel
[4] faces down.
2. Use the hex key to fully tighten the screws.
9-MINUTE ASSEMBLY GUIDE
Figure 2. Attach the side panels to the bottom panel
9-MINUTE ASSEMBLY GUIDE
STEP 1: ASSEMBLE THE SIDE PANELS
1. Gather the components labeled [1] – [3] and the four wheels.
2. Slide a foam Aceletiqs tube [1] onto each upper frame [2].
3. Use one short M6×10mm screw and one spring washer to attach
an upper frame [2] to a side panel [3] as shown in Fig. 1.
a. Ensure the foam Aceletiqs tube faces to the front.
b. Front edge of the side frame is tapered; back edge is raight.
4. Use the hex key to fully tighten the screws.
5. Firmly insert two wheels into the base of each side panel.
Figure 1. Assemble the side panels
2
11
2
3
4
3