This document is a user's manual for the Acer Aspire 3 notebook computer. It provides comprehensive information on setting up, using, maintaining, and troubleshooting the device.
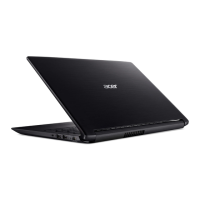
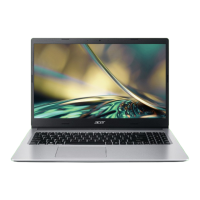
General Device Description
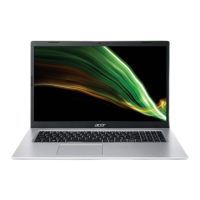
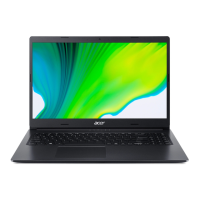
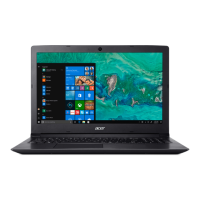
The Acer Aspire 3 is a notebook computer designed for mobile computing needs. It features a full-sized keyboard with a numeric keypad, separate cursor keys, lock keys (Caps Lock, Num Lock), Windows keys, special keys, and hotkeys for various functions. The device includes a Precision Touchpad for navigation and supports a range of gestures. It runs on the Windows operating system, with specific instructions provided for Windows 11.
Technical Specifications and Ports
The Aspire 3 is equipped with various ports and connectors for external devices and network connectivity.
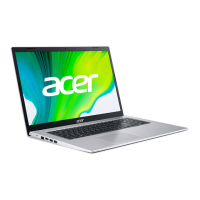
Left View Ports:
- DC-in jack: Connects to an AC adapter for power.
- Ethernet (RJ-45) port: Connects to an Ethernet 10/100/1000-based network. The port has a lip that needs to be pulled down to open it fully.
- HDMI port: Supports high-definition digital video connections. HDMI (High-Definition Multimedia Interface) is a high-quality, digital audio/video interface that allows connection to compatible digital audio/video sources like monitors, set-top boxes, DVD players, and audio/video receivers, including digital televisions (DTVs), with a single cable for optimal audio and visual quality.
- USB port: Connects to USB devices. The manual specifies that USB 3.2 Gen 1 compatible ports are blue and are compatible with USB 3.2 Gen 1 and earlier devices. For optimal performance, USB 3.2 Gen 1-certified devices should be used. These ports are defined by the USB 3.2 Gen 1 specification (SuperSpeed USB).
Right View Ports:
- Headset/speaker jack: Connects to audio devices such as speakers, headphones, or a headset with a microphone. Some computers may have a single "combo" port for single-pin headsets with a built-in microphone, commonly used with smartphones.
- USB port: Connects to USB devices.
- Kensington lock slot: Connects to a Kensington-compatible security lock for physical security.
Screen View Features:
- Microphones: Internal digital microphone for sound recording.
- Camera: Used for video communication or taking photos. A light next to the camera indicates when it is active.
- Screen: Displays computer output.
Base View Features:
- Ventilation and cooling fan: Allows the computer to stay cool. Users are advised not to cover or obstruct the openings.
- Battery reset pinhole: Simulates removing and reinstalling the battery. To use, insert a paperclip into the hole and press for four seconds.
- Speakers: Deliver stereo audio output.
Usage Features
Keyboard:
The keyboard includes:
- Lock keys:
- Caps Lock: When on, all alphabetic characters typed are in uppercase.
- Num Lock: When on, the numeric keypad is in numeric mode, functioning as a calculator with arithmetic operators (+, -, *, /).
- Special keys:
- Speaker toggle (turns speakers on/off)
- Volume down (decreases sound volume)
- Volume up (increases sound volume)
- Microphone toggle (turns microphones on/off)
- Brightness down (decreases screen brightness)
- Brightness up (increases screen brightness)
- Display toggle (switches display output between the display screen, external monitor, and both).
- Hotkeys: Activated by pressing and holding the Fn key before another key.
Fn + F1-F12: Activates the F1 to F12 keys.Fn + F: Switches fan mode between Silent, Normal, and Performance. More information is available via the Acer Quick Access application.Fn + Left arrow: Locks the computer, requiring a password to continue work.Fn + Right arrow: Turns on/off the computer's network devices (Flight mode).Fn + Touchpad toggle: Turns the built-in touchpad on and off.Fn + Snipping tool: Snips a rectangle, freeform, window, or full screen to the clipboard.Fn + Print screen: Takes quick screen shots.Fn + Insert: Turns Insert on or off.- Note: The function key setting in the BIOS (accessed by pressing F2 during startup) can be changed to swap hotkey and special function behavior of F1-F12 keys.
Precision Touchpad:
The touchpad controls the cursor on the screen and supports various gestures:
- Single-finger slide: Moves the cursor.
- Single-finger press or tap: Performs a 'click' (selects or starts an item). A quick repeat performs a 'double tap' or 'double click'.
- Two-finger press: Performs a 'right click' (opens context menu or toggles app commands in Start screen).
- Two-finger slide: Scrolls through web pages, documents, and playlists.
- Two-finger pinch: Zooms in and out of photos, maps, and documents.
- Three-finger press: Opens Search Windows.
- Three-finger swipe:
- Swipe up: Opens Task View.
- Swipe down: Minimizes all open windows and shows Desktop; swipe upwards to restore.
- Swipe left or right: Switches between open windows.
- Four-finger press: Opens Action Center.
- Four-finger swipe:
- Swipe up: Opens Task View.
- Swipe down: Minimizes all open windows and shows Desktop; swipe upwards to restore.
The touchpad is sensitive to finger movement; keeping it and fingers dry and clean improves response.
Windows OS Desktop (Windows 11):
The manual outlines key elements of the Windows 11 desktop:
- Settings: Changes app settings.
- Start: Launches apps (Pinned, Recommended, All apps).
- Search: Searches the computer and Internet.
- Task View: Switches between running applications and adds virtual desktops.
- Widgets: Provides weather, news, stocks, and sports information.
- Power: Shuts down, sleeps, or restarts the computer.
- Quick settings: Displays network connection, battery level, and sound settings; allows quick actions.
- Notification: Displays notifications and calendar.
Internet and Online Security:
- Internet Service Provider (ISP): Users need to choose an ISP for internet connection.
- Connection types:
- Dial-up: Uses a telephone line (modem connector required). Slower speed, typically charged per hour.
- DSL (e.g., ADSL): 'Always-on' connection over phone line (requires micro-filter and DSL modem). Faster and more reliable, fixed monthly rates.
- Cable: Fast, 'always-on' internet via cable television line.
- Cellular: Uses cellular networks (SIM card slot or external device required). Additional charges may apply, especially roaming.
- Network connections:
- LAN (Local Area Network): Group of computers sharing resources, set up with wired (Ethernet) or wireless (Wi-Fi, Bluetooth) technologies.
- Wireless LAN (WLAN): Wireless local area network. Easy to set up, allows sharing files, devices, and internet connection.
- Access point (router): Two-way transceiver broadcasting data, mediates between wired and wireless networks.
- Network cable (RJ45): Connects host computer to access point.
- Wireless adapter: Most computers have a wireless module and Wi-Fi button.
- Internet browser: Microsoft Edge is pre-installed for web browsing.
- Acer website: www.acer.com for support, information, and downloads.
- Internet security software: Acer partners with Norton Security (pre-installed on select models) to protect against viruses, spyware, malware, and online threats.
- Cybersecurity tips:
- Keep software up to date.
- Beware of fake/phishing emails.
- Don't be fooled by tech support scams.
- Protect against ransomware (use security software, regular backups).
- Protect against botnets (use security software).
- Protect against viruses/malware (use security software).
- Take precautions on public Wi-Fi (use VPN).
- Use strong, unique passwords.
- Don't click random links or open unsolicited attachments.
- Don't access personal info over unprotected Wi-Fi.
- Use Windows security tools and updates.
Power Management and Battery
Power Management:
The computer has a built-in power management unit that monitors system activity (keyboard, mouse, hard disk, peripherals, video memory) to conserve energy when idle.
Saving Power (Disable Fast startup):
Fast startup allows quick boot but slowly drains battery. To reduce power requirements:
- Search for "Choose a power plan" in Windows.
- Select "Choose what the power buttons do."
- Select "Change settings that are currently unavailable."
- Scroll down and disable "Turn on fast start-up."
- Select "Save changes."
Disabling Fast startup will make the computer take longer to start from Sleep and prevent it from starting via Wake on LAN.
Battery Pack:
The computer uses an embedded Lithium battery.
- Charging: Connect the AC adapter to the computer and a mains power outlet. Charging overnight is advised for a fully charged battery the next day.
- Conditioning a new battery: For first use or after long storage, perform three full charge-discharge cycles:
- Fully charge with AC adapter.
- Turn on and set up OS.
- Disconnect AC adapter.
- Operate on battery until low-warning appears.
- Reconnect AC adapter and fully charge.
- Optimizing battery life:
- Use AC power whenever possible.
- Remove unused accessories.
- Store in a cool, dry place (10°C to 30°C / 50°F to 86°F).
- Avoid excessive recharging.
- Look after AC adapter and battery.
- Checking battery level: Rest the cursor over the battery/power icon in the taskbar.
- Battery-low warning: When the warning appears, plug in the AC adapter, save necessary files, and close applications. If the AC adapter is unavailable, turn off the computer.
Maintenance Features
Basic Care:
- Turning off: Use Windows shutdown command (Windows key or Start > Power > Shut down).
- Taking care of your computer:
- Use only the adapter provided.
- Do not expose to direct sunlight or temperatures below 0°C (32°F) or above 50°C (122°F).
- Do not subject to magnetic fields.
- Do not expose to rain or moisture.
- Do not spill water or any liquid.
- Do not subject to heavy shock or vibration.
- Do not expose to dust or dirt.
- Never place objects on top.
- Do not slam the display.
- Never place on uneven surfaces.
- Taking care of your AC adapter:
- Do not connect to other devices.
- Do not step on or place heavy objects on the cord.
- Pull the plug, not the cord, when unplugging.
- Ensure total ampere ratings do not exceed cord/fuse ratings.
- Cleaning and servicing:
- Turn off computer.
- Disconnect AC adapter.
- Use a soft, moist cloth (no liquid/aerosol cleaners).
- If dropped, visibly damaged, or not working normally, contact an authorized Acer service center.
Battery Safety Guidelines:
- Charging:
- When using a charging cart or small space, ensure good ventilation and temperature between 0°C (32°F) and 35°C (95°F). Stop charging at 100% capacity. Continuous charging can cause deformation/damage.
- Avoid constant charging at full capacity.
- Avoid charging above 35°C (95°F) or below 0°C (32°F).
- Recharge when battery level drops below 70%.
- Charging port must be clean and used only with Acer charging equipment.
- For long-term storage, turn off, remove AC power, store at 0°C-35°C (32°F-95°F) in a dry (45%-80% humidity), well-ventilated area. Avoid direct sunlight, high temperatures, and high humidity. Charge to ~50% every 6 months.
- General:
- Use battery only for its intended purpose.
- Never use damaged charger/battery.
- Do not short-circuit terminals.
- Keep between 15°C and 25°C (59°F and 77°F).
- Do not dispose of in fire.
- Dispose according to local regulations; recycle when possible.
- Wireless devices may be susceptible to battery interference.
- Replacement:
- Built-in battery: Must be replaced by an authorized service center. Do not attempt self-replacement.
- Removable battery: Only use Acer-approved parts.
- Lithium-based battery: Do not use in humid, wet, or corrosive environments. Do not store near heat sources, high temperatures, direct sunlight, microwave ovens, or pressurized containers. Do not expose to temperatures over 50°C (122°F).
- Do not pierce, open, or disassemble. If leaked fluids contact skin, rinse thoroughly and seek medical attention.
- Full performance after 2-3 charge/discharge cycles. Replace when operation time noticeably shortens.
Recovery:
Acer provides Acer Care Center for recovery options. If inaccessible, use Windows Settings > System > Recovery.
- Creating a file history backup:
- Start > Care Center > Recovery Management.
- Backup tab > Get started for Create backup.
- Set up syncing for OneDrive folder syncing.
- Select folders to back up > Start back up.
- View sync progress.
- Open OneDrive folder by double-clicking icon in notification area.
- Backing up wireless and LAN drivers:
- Start > Care Center > Recovery Management.
- Backup tab > Get started for Backup wireless and LAN drivers.
- Choose folder > OK.
- Restoring your computer:
- Reset this PC and keep my files:
- Start > Care Center > Recovery Management.
- Restore tab > Get started.
- Reset PC > Choose an option.
- Select "Keep my files."
- Choose Cloud download or Local reinstall (internet required for Cloud download).
- Change settings (e.g., restore preinstalled apps, download Windows).
- Confirm > Next.
- Reset. The PC will restart multiple times.
- Reset this PC and remove everything:
- Start > Care Center > Recovery Management.
- Restore tab > Get started.
- Reset PC > Choose an option.
- Select "Remove everything."
- Choose Cloud download or Local reinstall.
- Change settings (e.g., clean data).
- Confirm > Next.
- Reset. The PC will restart multiple times.
Troubleshooting
- Computer does not start/boot up:
- Check power supply (AC adapter, battery charge).
- Unplug USB storage devices, then Ctrl + Alt + Del to restart.
- Nothing appears on screen:
- Press any key to wake from power management blank screen.
- Adjust brightness (Brightness up hotkey).
- Toggle display to computer (display toggle hotkey).
- Press power button to resume from Sleep/Hibernate.
- No audio:
- Check volume control (speaker icon in taskbar) for mute or low volume.
- Disconnect headphones/earphones/external speakers if internal speakers are desired.
- Keyboard does not respond:
- Try external USB keyboard. If it works, contact dealer/service center.
- Printer does not work:
- Check printer power and cable connection to USB port.
- Restore to original settings:
- Back up all data as C: drive will be reformatted.
- Ensure D2D Recovery setting in BIOS (F2 during boot) is Enabled.
- Exit BIOS and save changes; system will reboot.
Error Messages:
The manual provides a table of common error messages and corrective actions, generally advising to contact a dealer or authorized service center for most hardware-related errors (CMOS battery bad, CMOS checksum error, Hard disk 0 error, I/O parity error, Keyboard error, Keyboard interface error). For "Disk boot failure," insert a bootable disk and press Enter. For "Equipment configuration error," press F2 to enter BIOS, then Exit to reboot. For "Memory size mismatch," press F2 to enter BIOS, then Exit to reboot.
Security
Securing your computer:
- Computer security lock: Use the Kensington lock slot with a compatible security lock.
- Passwords:
- Supervisor Password: Prevents unauthorized entry into BIOS utility.
- User Password: Secures computer against unauthorized use, combined with password checkpoints on boot-up and resume from Hibernation.
- Password on Boot: Secures computer against unauthorized use.
- Important: Do not forget Supervisor Password; contact dealer/service center if forgotten.
This manual serves as a comprehensive guide for users of the Acer Aspire 3, covering everything from initial setup and daily use to advanced troubleshooting and security measures.