EasyManua.ls Logo

Acer model - User Manual

Acer model
17 pages
Print Icon
To Next Page IconTo Next Page
Loading...
Table of Contents
Preface ........................................................................................................2
Chapter 1 Installation................................................................................4
Unpacking.....................................................................................................................................4
Connecting the LCD Monitor and Base...................................................................................4
Viewing Angle Adjustment........................................................................................................4
Detaching LCD Monitor from Its Stand....................................................................................5
Interface for Arm Applications..................................................................................................5
Connecting the Display to your Computer..............................................................................5
Connecting the AC Power..........................................................................................................7
Setting Up the LCD Monitor......................................................................................................7
Power Management System.......................................................................................................7
Chapter 2 Display Controls.......................................................................8
User Controls ................................................................................................................................8
Adjusting the Monitor's Display...............................................................................................8
Function Description.................................................................................................................10
Chapter 3 Technical Information ...........................................................12
Specifications..............................................................................................................................12
Standard Timing Table ..............................................................................................................15
Troubleshooting.........................................................................................................................17
Question and Answer IconNeed help?

Do you have a question about the Acer model and is the answer not in the manual?

Summary

Chapter 1 Installation

Connecting the Display to your Computer

Guides on connecting the monitor video cable to the PC.

Connecting the AC Power

Steps for connecting the monitor's power cord.

Chapter 2 Display Controls

User Controls

Overview of monitor control buttons and indicators.

Adjusting the Monitors Display

How to use the OSD menu for display adjustments.

Function Description

Detailed explanation of OSD menu functions and icons.

Chapter 3 Technical Information

Troubleshooting

Provides solutions for common display issues.

Overview

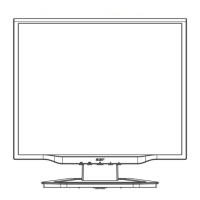
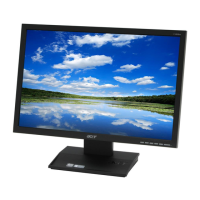
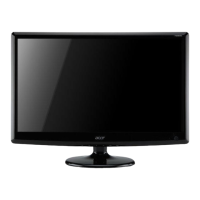
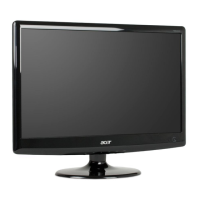
This document describes the Acer LCD Monitor, a device designed for visual display with user-friendly controls and a focus on comfortable viewing.

Function Description:

The Acer LCD Monitor serves as a visual output device for computers, displaying graphics and text. It features an On-Screen Display (OSD) menu for easy adjustment of various display parameters.

Usage Features:

  • Installation:

    • Unpacking: Before setup, a stable and clean workspace near a wall power outlet is recommended. Ensure sufficient airflow around the monitor. The package includes the LCD Monitor, AC Adapter, 1.5M Monitor-to-PC signal Cable, 1.8M Power Cord, Base, and User's Manual.
    • Connecting the LCD Monitor and Base: The base should be placed on the desk first, then the LCD Monitor is connected to the base (refer to Figure 1-1).
    • Viewing Angle Adjustment: The monitor allows for a comfortable viewing angle, adjustable from -5° to +35° (refer to Figure 1-2). Users are warned not to force the monitor beyond these limits to prevent damage.
    • Detaching LCD Monitor from Its Stand: To detach, unscrew the hinge bracket screws and remove the stand from the LCD monitor (refer to Figure 1-3).
    • Interface for Arm Applications: The rear of the display has four integrated 4 mm, 0.7 pitches threaded nuts and four 5 mm access holes, meeting VESA Flat Panel Monitor Physical Mounting Interface Standard specifications (paragraphs 2.1 and 2.1.3, version 1, dated 13 November 1997) (refer to Figure 1-4).
    • Connecting to Computer: Power off the computer. Connect one end of the signal cable to the LCD Monitor's VGA port and the other end to the PC's VGA port. Ensure all connections are secure (refer to Figure 1-5). An off-the-shelf video cable with a ferrite-core interface is required for FCC compliance.
    • Connecting AC Power: Connect the power cord to the AC adapter, then the AC adapter's DC output connector to the monitor's DC Power Jack, and finally the power cord to an AC power source (refer to Figure 1-6). It is recommended to use a "Surge Protector" device to prevent damage from power surges.
    • Setting Up: Ensure the AC Adapter is connected and turn on the LCD Monitor's power switch on the bezel.
  • Display Controls (OSD Menu):

    • User Controls:
      • DC Power Switch: Toggles monitor ON/OFF.
      • DC Power-On Indicator: Green for ON, Yellow for "Power Saving Mode," Off for OFF.
      • Function Select Buttons: Used for OSD menu selection (left/right).
      • Adjustment Control Buttons: Used to decrease (left) or increase (right) OSD settings.
    • Adjusting the Monitor's Display: Access the OSD Main menu by pressing a Function Select button. Scroll through items with Function Select buttons and adjust with Adjustment Control buttons.
    • OSD Function Menu Items:
      • Brightness: Increases or decreases image brightness.
      • Contrast: Increases or decreases the difference between dark and light colors.
      • H-Position: Shifts the entire display image left or right.
      • V-Position: Shifts the entire display image up or down.
      • Phase: Adjusts focus and clarity (0 to 31 scales).
      • Clock: Frequency tracking feature for stability and clarity (up to +50 scales, decreasing depends on input timing).
      • Auto Adjustment: Automatically adjusts display size to fit the screen.
      • OSD H-Position: Moves the OSD menu window left or right.
      • OSD V-Position: Moves the OSD menu window up or down.
      • Graph Text: Selects display for maximum graphics text quality (640x400 or 720x400 resolutions).
      • Recall: Returns all adjusted parameters to factory preset values.
      • Language: Selects OSD language (English, German, French, Spanish, Italian).
      • Color Management:
  • Hue: 100 scales to adjust hue from green to red.

  • Saturation: 100 scales to choose from 0 to 100.

  • Color Temp.: Selects different color temperatures (9300°K or 6500°K presets, or user-defined).

    • Save Exit: Saves settings and exits the OSD menu.

Important Technical Specifications:

  • LCD Panel:

    • Size: 15.0" (38 cm)
    • Display Type: Active matrix color TFT LCD
    • Resolution: 1024 x 768
    • Display Dot: 1024 x (RGB) x 768
    • Display Area (mm): 304 x 228 (H x V)
    • Display Color: 262K
    • Brightness: 200 cd/m² (typical)
    • Contrast Ratio: Hannstar: 300:1 (typical), AU: 350:1 (typical)
    • Response Time: Hannstar: (15+35) ms (typical), AU: 30 ms (Tr+Tf) (typical)
    • Lamp Voltage: Hannstar: 640 Vrms (typical), AU: 630 Vrms (typical)
    • Lamp Current: Hannstar: 6.0 mA rms. (typical), AU: 6.5 mA rms. (typical)
    • Viewing Angle: Vertical: -45° ~ +40°, Horizontal: -60° ~ +60° (Hannstar); Vertical: -60° ~ +40°, Horizontal: -60° ~ +60° (AU)
    • Display Colors: 16.7M with FRC or Dithering
  • Video:

    • Input Signal: Analog RGB 0.7Vp-p
    • Input Impedance: 75 Ohm ± 2%
    • Polarity: Positive
    • Amplitude: 0 - 0.7 ± 0.05 Vp
    • Multi-mode Supported: Horizontal Frequency: 24 ~ 61 KHz, Vertical Frequency: 56 ~ 75 Hz
  • Control:

    • Power: On/Off switch with LED indicator
  • OSD:

    • Brightness, Contrast, Horizontal Position, Vertical Position, Phase, Clock: Digital
    • Display Mode Setup: Uses EEPROM to save settings in memory
    • OSD Format: 20 characters x 9 rows
  • Power Management (VESA DPMS version 1.0 compliant):

    • On: 25W maximum, 240 VAC, Green LED
    • Standby: 5W maximum, 240 VAC, Yellow LED
    • Suspend: 5W maximum, 240 VAC, Yellow LED
    • Off: 5W maximum, 240 VAC, Yellow LED
    • DC Power Off: 5W maximum, 240 VAC, Dark LED
    • Disconnected: 5W maximum, 240 VAC, Yellow (Standby, Suspend, Off) / Dark (DC Power off)
    • Note: Power consumption measured from AC Input end of AC adapter.
  • Sync Input:

    • Signal: Separate TTL compatible horizontal and vertical synchronization
    • Polarity: Positive and negative
  • Plug & Play: Supports VESA DDC1 and DDC2B functions

  • External Connection:

    • Power Input (DC input): +12 VDC / 2.5A min. input through AC/DC adapter
    • Video Cable: 1.5M with 15-pin D-sub connector
  • Environment:

    • Operating Condition:
      • Temperature: 5°C to 40°C / 41°F to 104°F
      • Relative Humidity: 20% to 80%
    • Storage Condition:
      • Temperature: -20°C to 60°C / -4°F to 140°F
      • Relative Humidity: 5% to 85%
  • Power Supply (AC Adapter):

    • Input Voltage: Single phase, 100 ~ 240VAC, 50 / 60 Hz
    • Input Current: 1.5 A maximum
  • Size and Weight:

    • Dimensions: 349.6 (W) x 371.5 (H) x 158 (D) mm
    • Net Weight: 3.2 ± 0.3 kg
    • Gross Weight: 4.7 ± 0.3 kg
  • Pin Assignment (VGA Connector):

    • PIN 1: Red, PIN 2: Green, PIN 3: Blue, PIN 4: Digital GND, PIN 5: Digital GND, PIN 6: Red Rtn, PIN 7: Green Rtn, PIN 8: Blue Rtn
    • PIN 9: +5V, PIN 10: NC, PIN 11: Digital GND, PIN 12: SDA, PIN 13: H. Sync., PIN 14: V. Sync., PIN 15: SCL
  • Standard Timing Table: The monitor supports various resolutions and refresh rates, including VGA-350, NEC PC9801, VGA-400-GRAPH, VGA-480, VESA-480 (72Hz, 75Hz), VESA-400-TEXT, SVGA, VESA-600 (60Hz, 72Hz, 75Hz), APPLE MAC-800, XGA, COMPAQ-XGA, VESA-768 (70Hz, 75Hz). If an unsupported timing is selected, the monitor will use the most suitable available timing.

Maintenance Features:

  • Cleaning: To clean the LCD Monitor screen, power off the monitor and unplug the AC Cord. Spray a non-solvent cleaning solution onto a rag and gently clean the screen.
  • Storage: Store the LCD Monitor in a room with a temperature of -20° ~ 60°C (-4° ~ 140°F). Storing outside this range could result in permanent damage.
  • Troubleshooting:
    • Unclear/Unstable Picture: If the picture is unclear or unstable, enter "Shut Down Windows" status. Check for black vertical stripes; if present, adjust the "Clock" function in the OSD menu. Then, adjust the "Phase" function for the clearest display. Return to normal PC operation.
    • No Picture:
      • Ensure power indicator is ON, all connections are secure, and the system is running on the correct timing (refer to Chapter 3 for timing information).
      • Turn off and on the LCD Monitor. If still no picture, press the Adjustment Control button several times.
      • If the above steps fail, connect the PC to an external CRT. If the PC functions properly with the CRT but not the LCD Monitor, the VGA card's output timing may be out of the LCD's synchronous range. Change to an alternative mode listed in the Standard Timing Table or replace the VGA card.
      • If an output timing outside the monitor's synchronous range (Horizontal: 24 ~ 61 KHz, Vertical: 56 ~ 75 Hz) is chosen, the OSD will display "Out of Range." Select a supported mode.
      • If the signal cable is not connected or improperly connected, the monitor screen will display "No Input Signal."
  • Safety:
    • Do not place the monitor near a window to avoid rain, moisture, or sunlight damage.
    • Do not apply pressure to the LCD screen to prevent permanent damage.
    • Do not remove the cover or attempt to service the unit yourself; servicing should be performed by an authorized technician.
    • Immediately unplug the monitor and call an authorized technician if the signal cable is frayed/damaged, liquid is spilled into the monitor, or the monitor/case is damaged.
    • A certified line (H05VV-F, 3G, 0.75 mm²) is required for power connection for devices up to 6A and above 3 kg.
    • Use only with power supply type: Li-shin, LSE 9802A1240.

Acer model Specifications

General IconGeneral
BrandAcer
Modelmodel
CategoryMonitor
LanguageEnglish

Related product manuals