EasyManua.ls Logo

ACME MH-275R - User Manual

ACME MH-275R
5 pages
Print Icon
To Next Page IconTo Next Page
Loading...
Technical Specifications
Power AC 120V 60Hz AC 230-250V 50/60Hz
Fuse 20mm Glass T6.3A Fast Blow 20mm Glass T5A Fast Blow
Lamps
HID 150W
ELC 24V 250W
Dimension 338mm x 320mm x 216 mm
Weight 9 kg / 19.8 lbs
================================================================
For further requirements, contact the nearest authorized technical assistance office
================================================================
Professional Lighting Technology
User Guide
Please read these instructions carefully before use
Question and Answer IconNeed help?

Do you have a question about the ACME MH-275R and is the answer not in the manual?

Summary

Technical Specifications

EC Declaration of Conformity

Harmonized Standard

General Instructions

Preprogram Functions

Details linking units and triggered chase sequences for master/slave operation.

Easy Controller Operation

Explains the use of the remote control for unit functions like Stand by, Strobe/Next.

DMX512 Configuration

Main Features

Lamp

HID 150 Lamp Installation Or Replacement

How to Control the Unit

Universal DMX Controller

Details DMX512 system requirements, connections, and termination for lighting control.

Overview

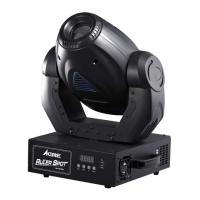
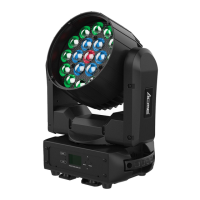
The Intelligent Scanner is a professional lighting technology device designed for dynamic lighting effects. It functions as a DMX512 scanner, offering comprehensive control over its lighting features. The unit can be operated independently, linked in a master/slave configuration, or controlled via a universal DMX controller.

Function Description

The Intelligent Scanner features full DMX512 control, allowing for precise manipulation of its lighting elements. It includes 14 gobos plus an open position, and 14 colors plus white, providing a wide range of visual effects. The device utilizes an accurate focusable optics system and a stepper motor with a blackout feature, ensuring smooth and precise movements. Fan cooling is integrated to maintain optimal operating temperatures.

In addition to DMX control, the scanner can operate as an individual unit without external control. It can also be linked together in a master/slave combination, allowing multiple units to run synchronized preprogrammed chase sequences. These sequences can be triggered automatically or by sound activation through an internal microphone, creating intelligent and responsive lighting effects. The unit supports various preprogrammed chase patterns.

For master/slave operation, the units can be daisy-chained, and built-in preprogrammed chase sequences are triggered by music. Dipswitch 10 allows for inversion of movement, enabling contrasting effects between linked units, even with just two units. In a DMX linking setup, dipswitch 10 on the first unit (master) does not affect its operation as it dictates the light show for all linked units.

The device also supports control via an easy remote, which is used exclusively in master/slave mode. Connecting the remote to the 1/4" microphone jack of the first unit allows it to control all other linked units for "Stand by," "Strobe/Next," and "Fast/Slow" functions.

  • Stand By: Blackouts all linked units.
  • Function - Strobe/Next: In "FAST" mode (LED off), units strobe in three ways:
    • Strobe in different gobos and colors.
    • Synchronous strobe in white color.
    • Two-light strobe in white color. In "SLOW" mode (LED on), pressing the "FUNCTION" button allows selection of desired colors and gobos, cycling through ten colors and then one gobo.
  • Mode - Fast/Slow: When the LED is off, the unit is in "FAST" mode, where Pan/Tilt and Gobo/Color movements are sound activated. When the LED is on, it is in "SLOW" mode, where Pan/Tilt is sound activated, but the Gobo/Color wheel remains static and is controlled by the "Next" button.

Usage Features

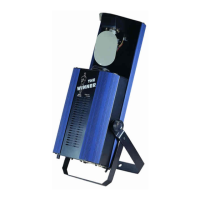
The Intelligent Scanner is designed for ease of use and versatility in professional lighting applications. It requires a 3-pin XLR cable/plug for connecting units in a DMX or master/slave setup. For DMX control, a DMX512 system requires a controller, lighting equipment, and cables connected in a "daisy chain" with a terminator at the end. The cable should not be branched or split into a "Y" configuration. A terminator, consisting of a 90-120 Ohm 1/4 Watt resistor soldered between two signal cables, is necessary to reduce signal errors and avoid transmission problems, especially at the end of the DMX chain. Each lighting unit needs a unique DMX address set between 0-511.

The device's DMX configuration includes four channels:

  • Channel 1 (Shutter): Controls shutter speed from fastest to slowest, including strobe effects and blackout.
  • Channel 2 (Gobos/Colors): Manages gobos and colors, offering rainbow effects, gobo shaking, and specific gobo/color combinations.
  • Channel 3 (Rotation): Controls rotation speed and direction, including stop positions.
  • Channel 4 (Zoom): Manages zoom in/out functions, from fastest to slowest.

Addressing the DMX512 system is done via dipswitches, where each switch corresponds to a value, allowing for the calculation of the desired channel address.

Maintenance Features

Regular maintenance is crucial for optimizing light output and ensuring the longevity of the Intelligent Scanner.

  • Fixture Cleaning: The internal and external optical lenses and mirrors should be cleaned periodically. The frequency of cleaning depends on the operating environment; damp, smoky, or particularly dirty surroundings will necessitate more frequent cleaning.

    • Clean with a soft cloth using normal glass cleaning products.
    • Always dry the parts carefully after cleaning.
    • Clean external optics at least every 20 days.
    • Clean internal optics at least every 30-60 days.
  • Lamp Installation/Replacement (HID 150):

    • Always switch off the main power supply before installing or replacing the lamp.
    • Never attempt to replace a hot lamp.
    • Avoid touching the bulb with bare hands. If contact occurs, clean the lamp with denatured alcohol and wipe with a lint-free cloth before installation.
    • To replace the lamp:
      1. Loosen the screw on the housing cover.
      2. Loosen the screws of the lamp wire from the terminator.
      3. Remove the old lamp from the fixture.
      4. Carefully install the new lamp into the case, ensuring it is wedged tightly to prevent movement. Improper installation can shorten lamp lifespan or cause explosion during operation.
      5. Connect the lamp wire to the terminator.
      6. Reinstall the housing cover and secure the screws.

General Instructions for Safety and Care:

  • Always read the instructions carefully before installation, usage, and maintenance.
  • Keep the instruction booklet for future reference. If the unit is sold, ensure the new user receives the booklet.
  • Upon initial start-up, unpack and check all components for transportation damage.
  • Place the device in a suitable spot with good ventilation, ensuring no ventilating fans or slots are blocked.
  • Dispose of packing materials properly to protect the environment.
  • Electrical work for installation must be performed by qualified personnel.
  • Always unplug the unit from the main power before any service.
  • Do not open the unit; there are no serviceable parts inside.
  • It is critical to ground the yellow/green conductor to earth to meet safety regulations.
  • Ensure the surrounding area is free of flammable liquids, water, or metal objects that could enter the fixture. If a foreign object enters, immediately disconnect the main power.
  • Place the fixture in a well-ventilated room, approximately 15 cm from walls.
  • Do not touch any wires during operation due to high voltage hazards.
  • In case of serious operating problems, stop using the unit immediately. Do not attempt repairs yourself; contact the nearest authorized Technical Assistance Center. Always use genuine spare parts.

ACME MH-275R Specifications

General IconGeneral
TypeMoving Head
Pan540°
Tilt270°
Prism3-facet
Gobos7 rotating gobos + open

Related product manuals