Manual Reset:
If you think your camera has developed a fault, try a system reset as below:
Remove all batteries & SD Card, bring the camera inside for 24hrs then test again.
When in TEST mode, push the menu button and scroll down to "Default", push OK to return your
camera back to factory settings.
Infrared:
The infrared beam is powerful so don’t position the camera too close to any solid objects as your
night shots could suffer “white out” issues. For cameras that came out of the factory from around
early 2018 onwards you may have the Infrared Brightness Adjustment feature too. This feature
allows you to adjust the strength of your cameras infrared beam and can help reduce white out
problems with night time images or video.
Infrared Cut Filter (situated in front of the lens):
When moving the camera in your hand you may notice the IR cut filter moving in front of the lens,
this is perfectly normal. When the camera is in operation, it will decide if the cut filter is needed
automatically depending upon light levels.
We take a lot of calls & messages from customers thinking that they have a broken part on
their camera but this is not the case!
Infrared Brightness Adjustment:
If your camera has this feature then you can adjust the power of the infrared, great if you are getting
some white out issues on your night vision video footage or photos. When in TEST mode just push
the downward arrow button on the camera, your current infrared brightness level will be displayed
on the screen, push the downward arrow key again to change the setting, there are 3 levels available
(high, medium & low) and your camera is likely to be set to high as default.
Language Set:
When you have the camera in TEST mode, push the left arrow key to run through the various
language options.
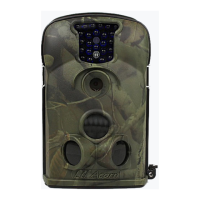
How does the camera work?
The wildlife trail camera has 3 heat sensors. 2 of these are known as side sensors or prep sensors,
they cover a total range of 100 degrees.
So if you imagine drawing the letter V with the bottom point being the camera lens and the V
having a 100 degree angle then you start getting a feel for the area that the sensors will cover in
front of the camera.
The third (and most important) of the 3 sensors is the central “shooting” sensor.
This sensor has a V of 35 degrees.
The camera will only actually record a video or capture an image when this sensor is triggered.
The side sensors act to prepare the camera in advance of the central shooting sensor being triggered.
The reason for this is so that the majority of your videos or images will begin with the subject fairly
central within the camera view.
All 3 sensors are heat sensors. They take the ambient air temperature and if they notice a different
heat signature that’s what triggers the camera into action. For example, it’s 15 degrees outside and
a human or creature with a body temperature of much higher than 15 degrees moves into the
sensing area then the camera will come alive!

 Loading...