Do you have a question about the Acorn 5210A and is the answer not in the manual?
Details on recommended AA batteries like Energizer Lithium and Panasonic Eneloop Pro.
Advises against using low-capacity batteries and leaving batteries in unused devices.
Guidance on using genuine SDHC cards and formatting them for optimal performance.
Steps to perform a full system reset by removing batteries and SD card.
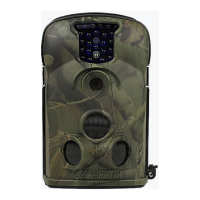
Explanation of the 3 heat sensors (side and central) and how they detect heat signatures.
How trigger speed affects the camera's recording response time after detection.
Guidance on camera placement angles (45-90 degrees) for best subject detection.
Details on the 35-degree central sensor for recording and 100-degree side sensors for preparation.
How ambient and subject temperature differences impact camera sensitivity and trigger likelihood.
Checking power and SD card as primary steps for troubleshooting camera faults.
The Ltl Acorn 5210A Trail Camera is a device designed for capturing images and videos of wildlife or other subjects in a remote setting. It operates by detecting motion and heat changes within its sensing area, triggering recordings automatically.
The camera's primary function is to record images or videos when motion or heat changes are detected. It can be set to different modes: "Camera" for images only, "Video" for videos only, or "Cam+Video" which captures an image followed by a video. The camera utilizes three heat sensors: two side or "prep" sensors covering a 100-degree range, and a central "shooting" sensor with a 35-degree range. The side sensors prepare the camera for recording, while the central sensor triggers the actual recording. This design ensures that subjects are often centered in the frame. The camera's sensitivity to triggers depends on the temperature difference between the ambient air and the subject; a larger difference results in higher sensitivity.
The camera features an infrared (IR) beam for night vision, allowing it to capture images and videos in low light or darkness. An IR cut filter automatically moves in front of the lens based on light levels. Some models also include an Infrared Brightness Adjustment feature to control the strength of the IR beam, helping to reduce "white out" issues in night shots.
A "Timelapse" feature allows the camera to record at set intervals (hours, minutes, or seconds) regardless of motion, useful for monitoring long-term changes like construction projects. The "Recycle" option determines whether the camera overwrites older recordings when the SD card is full or stops recording.
To set up the camera, users first remove any PIR sensor protectors. An SD card (class 10, up to 16GB max) and at least four AA batteries must be inserted. The camera can accommodate up to eight batteries, with an additional four in a "back pack" for extended running time. Battery choice is crucial for performance, with Energizer Ultimate Lithium AA (non-rechargeable) or Panasonic Eneloop Pro 2500mA Rechargeable AA (rechargeable) being recommended. Alkaline batteries are not advised due to insufficient power.
The camera's back plate is removed by releasing side clips and a hand-tightening screw. The ON/OFF/TEST switch on the bottom of the camera is moved to "TEST" mode to access the LCD screen and menu settings. If no compatible SD card is inserted, the screen will turn off.
In "TEST" mode, the MENU button allows access to various settings, navigated using UP/DOWN and LEFT/RIGHT arrow keys. The OK button saves changes. Available settings include:
After configuring settings, moving the ON/OFF/TEST switch to "ON" activates the camera for automatic recording. A red light blinks for about 10 seconds, allowing the user to exit the sensor range. The bottom hatch is closed, and the back plate re-fitted using side clips and the screw to seal the camera from elements.
For optimal camera placement, it's recommended to position the camera at 45-90 degrees from the expected subject entry point. This maximizes sensitivity and ensures subjects are captured effectively.
Recordings can be viewed directly on the built-in LCD screen or by removing the SD card and inserting it into a computer (a USB SD Card Reader may be needed).
To playback on the LCD screen:
To delete recordings in Playback mode, push the Menu button and choose to delete the current clip/photo or all of them.
| Battery Life | Up to 6 months |
|---|---|
| Night Vision | Yes |
| Image Sensor | 5MP |
| Memory Card Support | SD card (up to 32GB) |
| Picture Resolution | 5MP |
| Power Supply | 8 AA batteries |
| Detection Range | 65 feet |