Page 7 of 9
Acorn Controls Division of Acorn Engineering Company®, A member of Morris Group International™
Manual #7802-116-000
SV16 Installation & Operation Manual
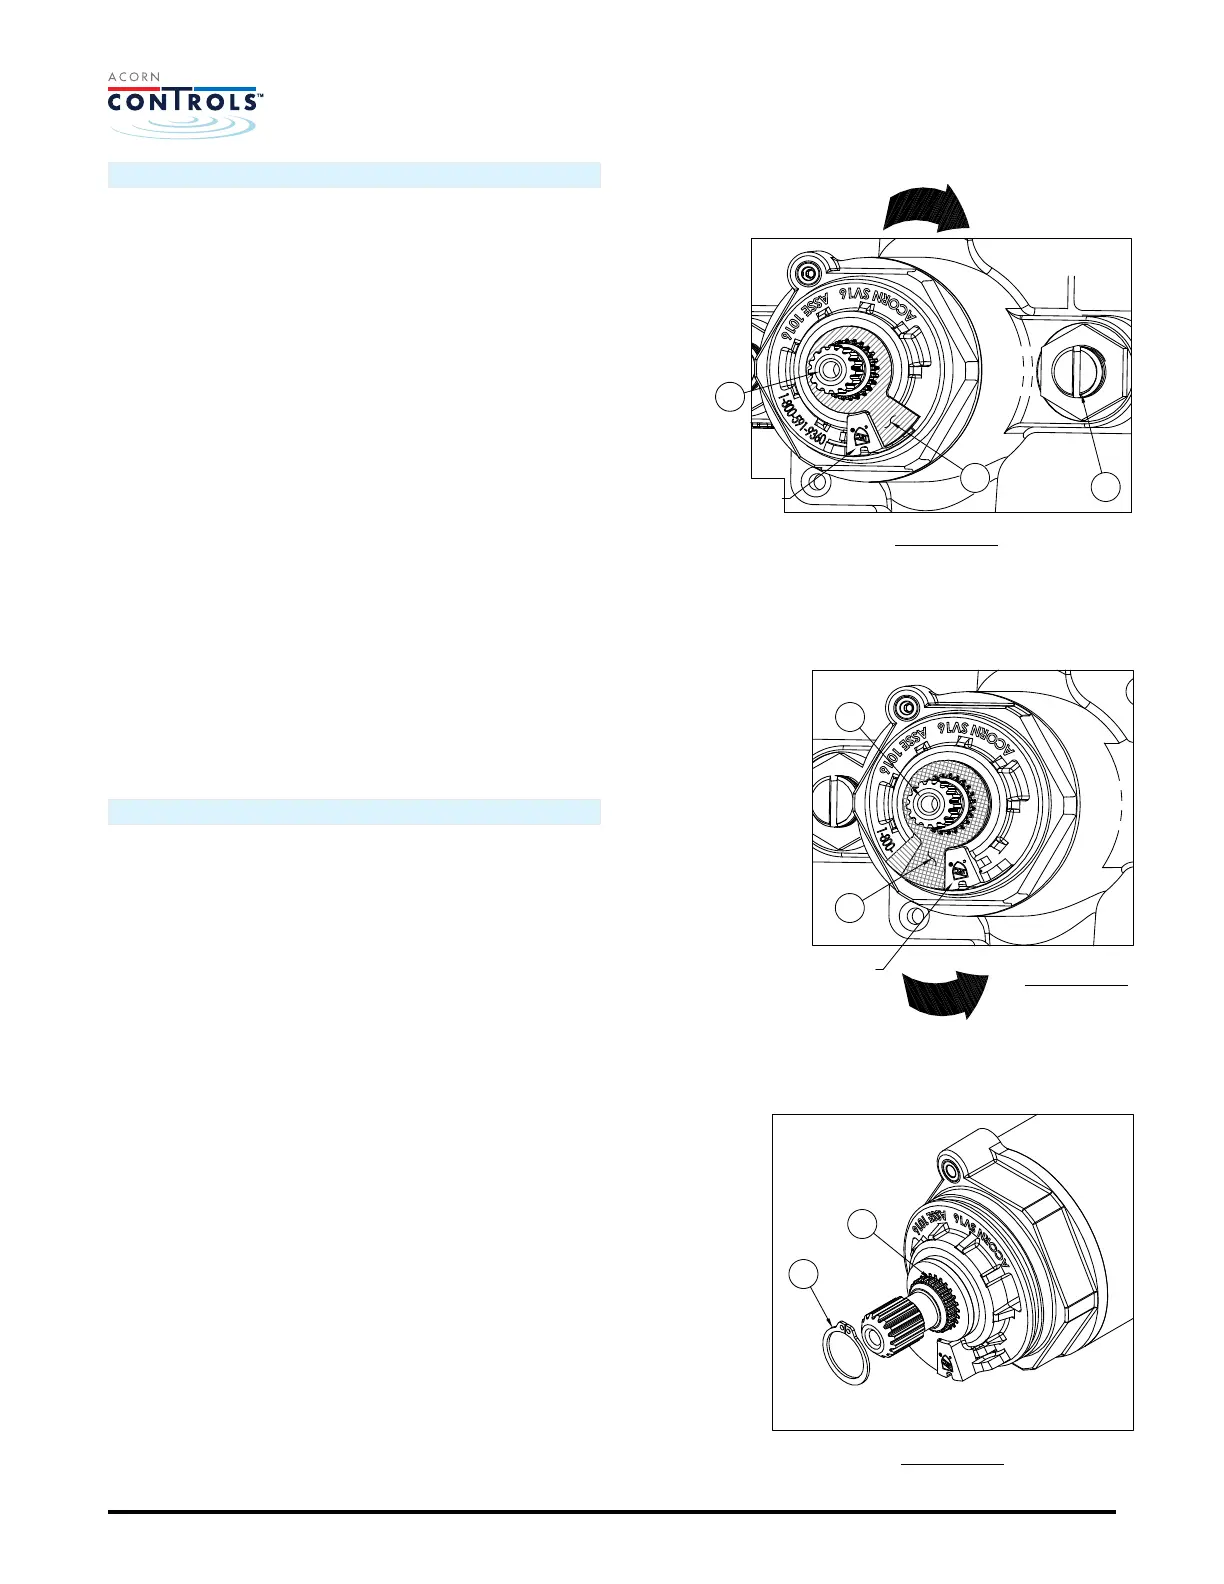
OFF POSITION SETTING:
1. Turn on hot and cold water supply. Open both check
stop assemblies by turning check adjustment screw 16
counterclockwise until screw tops out. Check for leaks
around bonnet and stop assemblies at this time.
2. Using handle, rotate valve stem 21 clockwise two full
turns. Continue to slowly turn handle clockwise until
water flow stops. Then continue to rotate handle
clockwise an additional 90 Deg. (1/4 turn) then stop.
Turn back counterclockwise slowly until the water flow
completely stops.
3. With the flow of water now shut off, place the first
temperature stop washer 18 on the valve stem 21
keyed on the counterclockwise side as close to the
bonnet stop as possible. See Figure 12.
4. Once temperature stop washer 18 is installed, slightly
valve by turning stem with handle counter-
clockwise and then back clockwise until first
temperature stop washer 18 hits stop on valve bonnet.
At this time, ensure that water is shut off completely to
showerhead.
5. If not, rotate stop one tooth either way and repeat step
until the water flow is shut off and the temperature
stop washer 18 is against the valve bonnet stop.
HIGH LIMIT TEMPERATURE SETTING:
1. Rotate external stem 21 with handle counter-
clockwise measuring water temperature with a
thermometer until the high limit temperature is
reached. (Recommend 105° to 110 °F)
2. Place the second temperature stop washer 18 on the
valve stem 21 keyed on the clockwise side as close to
the valve bonnet stop as possible. Rotate counter-
clockwise until it is fully against bonnet stop (full hot).
See Figure 13.
3. At full hot, use thermometer to verify required high
limit temperature is reached.
4. With valve in the “ON” position and water running
install the retaining ring 17 with snap ring pliers.
Confirm snap ring is inserted properly on groove of
stem. (When water is running, the external stem 21 is
pushed outward increasing the exposure of the snap
ring groove.) See Figure 14.
open
4
18
21
18
21
21
17
FIGURE 12
FIGURE 13
FIGURE 14
BONNET
STOP
BONNET
STOP
16
Date: 09/01/16
 Loading...