11 | P a g e
Step 2: Mount the bracket
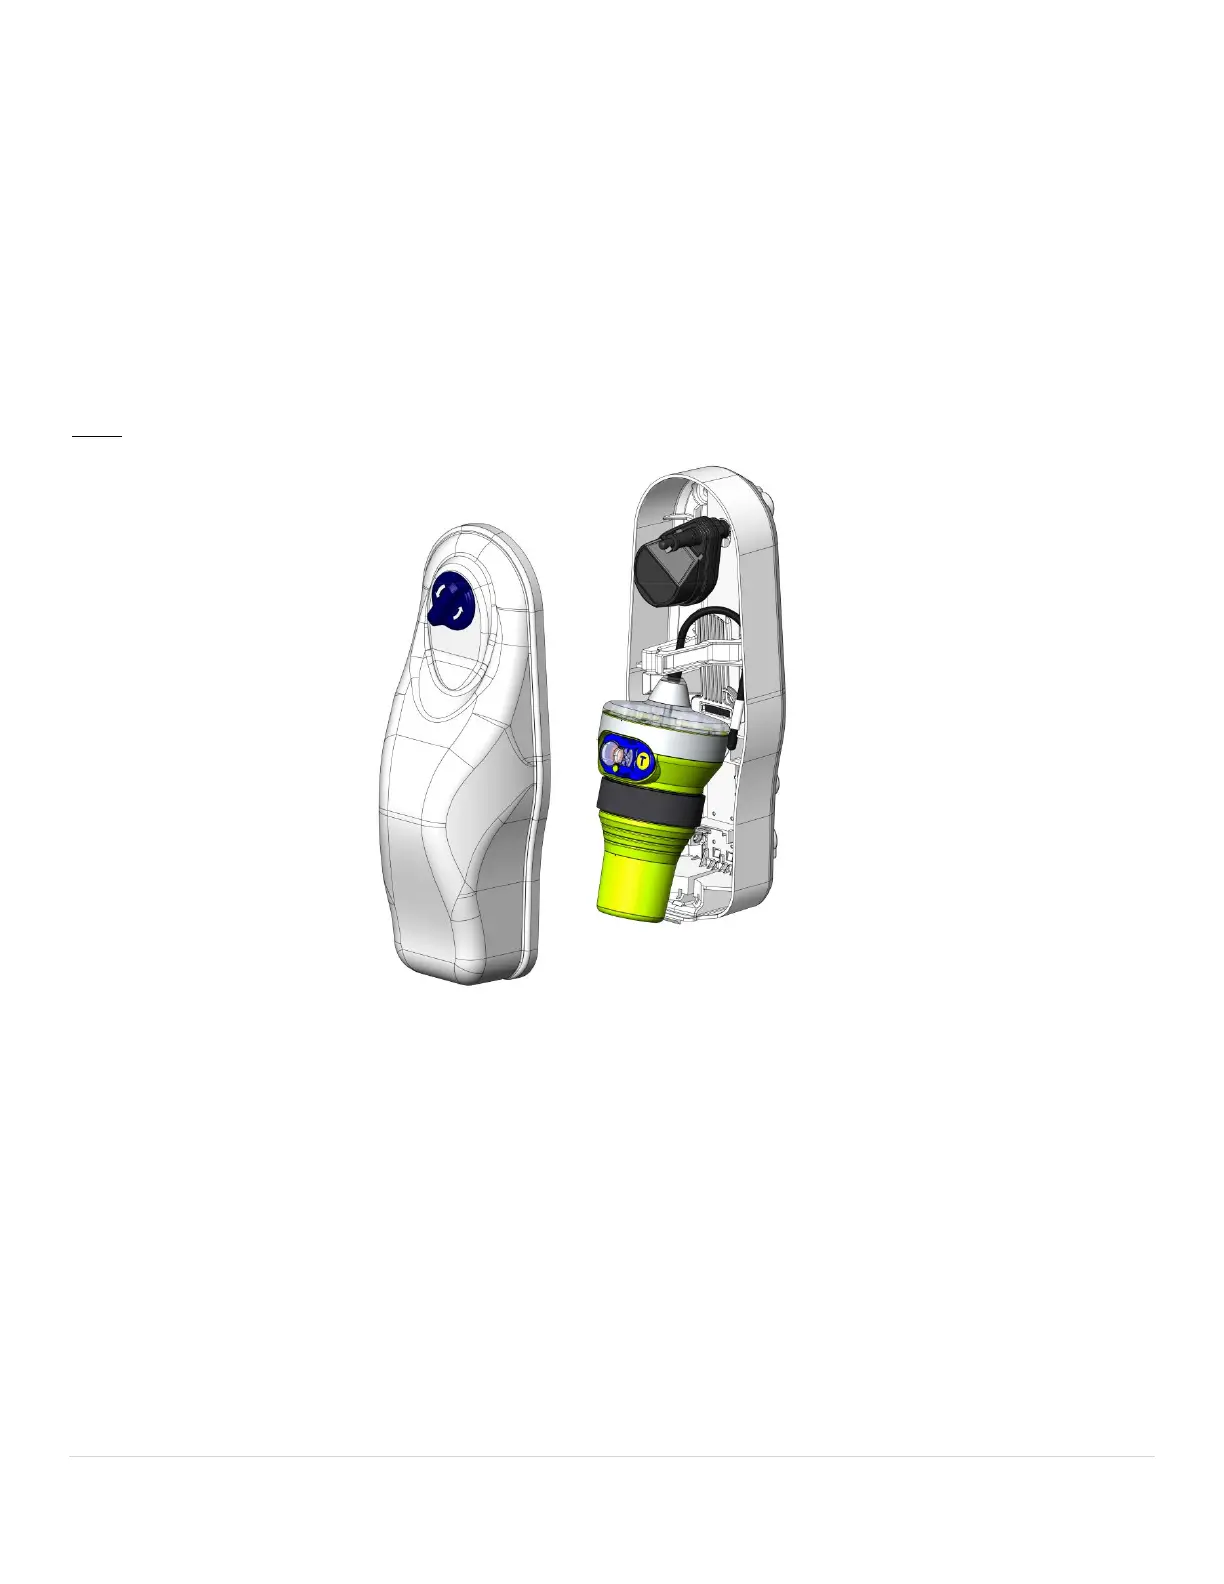
Category I bracket mounting: To access the bracket’s five pre-drilled mounting holes, remove the bracket’s lid by
turning the spring loaded knob on the lid 1/4 turn counterclockwise and pulling. The lid will lift away from the top of the
base and disengage at the bottom of the base. The lid is tethered to the base to help prevent loss. (If this tether is
somehow broken off, please have it replaced to prevent the inadvertent loss of the top cover.) Pull the beacon with
steady pressure from the bracket. For normal use situations, four of the five holes can be used to mount the bracket. It is
therefore not necessary to remove the HydroFix HRU to mount the bracket using all five holes. For extreme use
situations, remove the HydroFix HRU and deploy the ejector spring for access to the fifth mounting hole. Hold the bracket
in place to mark the screw holes or use the provided mounting template. The use of #10 pan head stainless steel
fasteners [minimum of ½” (1.27 cm) long] and #10 ½” (1.27 cm) washers is recommended.
NOTE: FASTENERS AND WASHERS NOT INCLUDED.