16
AWM-J-2010 Application Information
Routing of Piping
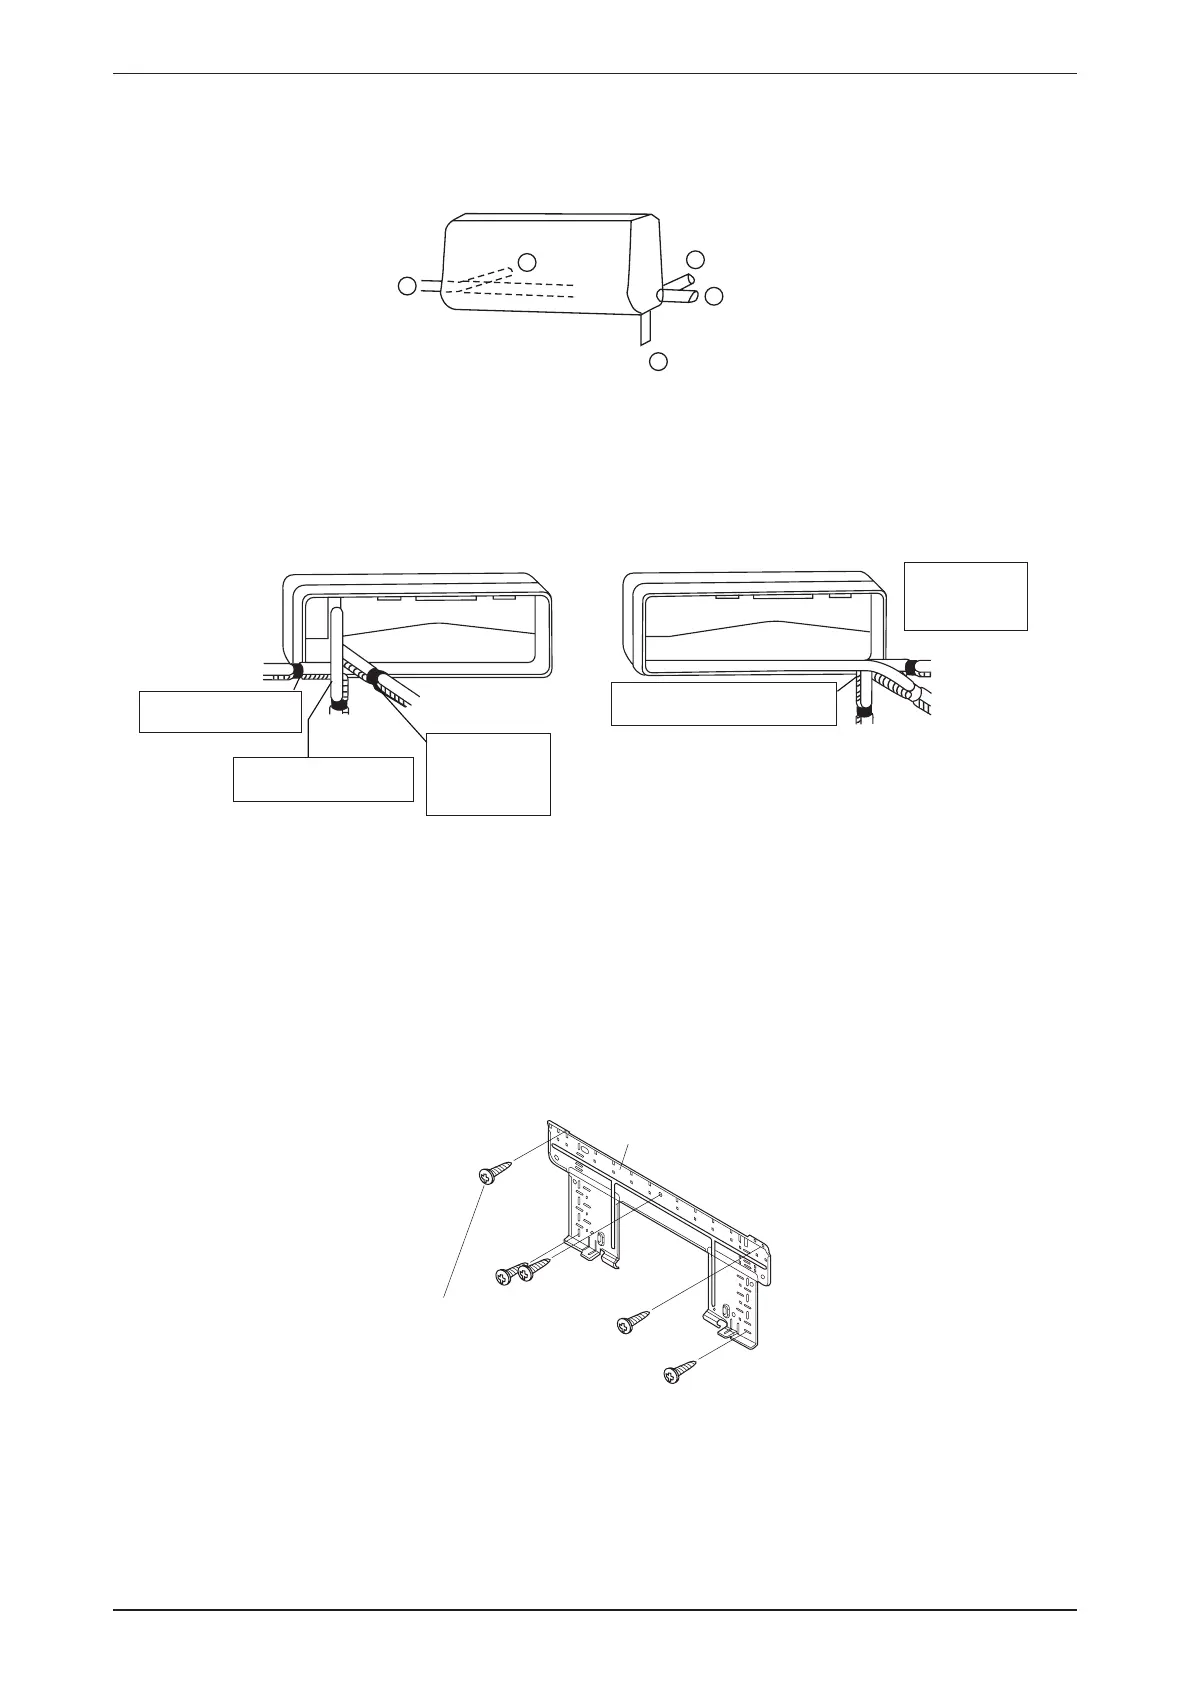
The refrigerant piping can be routed to the unit in one of 5 directions, by using the cut outs in the unit
casing (refer to Figure 1).
1
2
3
4
5
Figure 1
Carefully bend the pipes to the required position to align with the hole. For right hand and rear side draw
out, hold the bottom of the piping and fi x direction before shaping it to the desired position
(refer to Figure 2).
Right & Rear Side Routing
Right-back piping
Bind coolant pipe
and drain hose
together with
insulating tape.
Right-bottom
piping
Remove pipe port cover
here for right-bottom piping
Right-side
piping
Remove pipe port cover
here for right-side piping
Remove pipe port cover here for
left-bottom piping
Remove pipe port
cover here for
left-side piping
Left-back
piping
Left-side
piping
Left-bottom piping
Figure 2
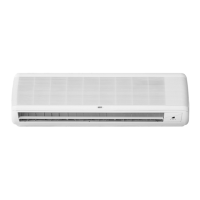
Mounting Installation Plate
Paste the installation plan provided on the desired location on the wall and marks the holes location
accordingly.
Ensure the wall is strong enough to withstand the weight of the unit. Otherwise, it is necessary to reinforce
the wall with plates, beams or pillars.
Ensure the levelness of the installation plate, and fi x with 5 suitable screws for A(5)WM09/10/15J/JR and 7
suitable screws for AWM20/25J/JR.
Mounting plate
Mounting plate
fixing screw
•
•
•
•
•