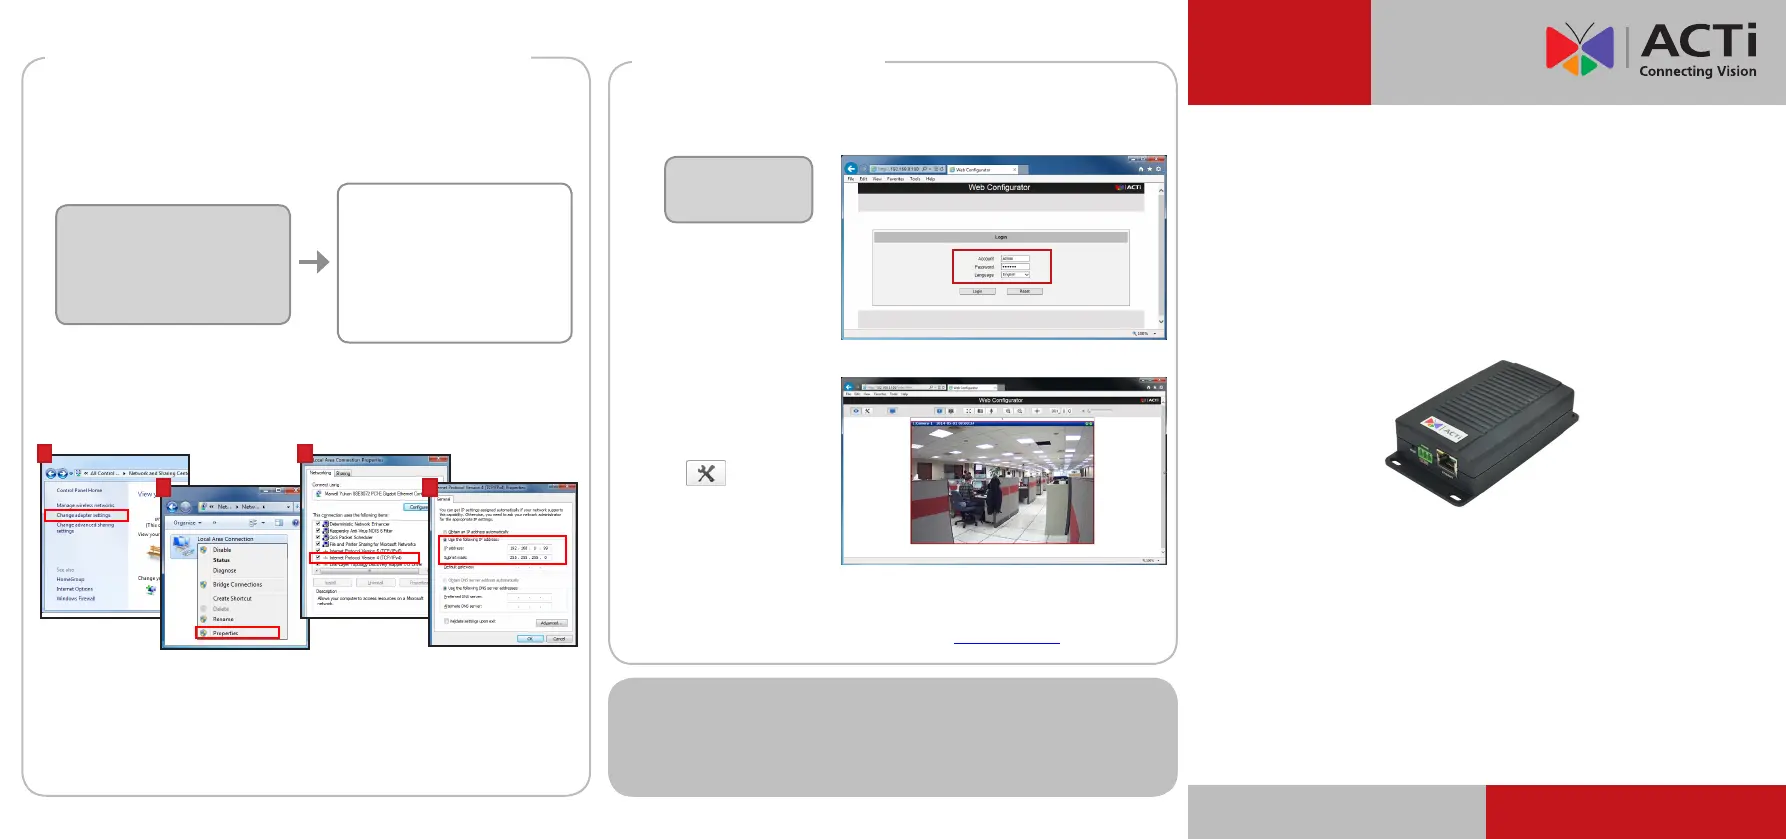
Step 5: Log-in
Default
Account: admin
Password: 123456
1. On the Login page, type the Account and Password.
2. Select Language, if
necessary.
3. Click Login.
The Live View screen
appears.
4. Click to access the
Setup menu to modify
the Encoder settings.
For more detailed instructions, please refer to the “Firmware
Manual” downloadable from the website (www.acti.com).
On Network without DHCP Server (Default IP)
1. Ifnecessary,conguretheIPsettingsofyourPCtomatchwiththe
network segment of the Encoder.
2. Open a web browser and type 192.168.0.100 on the URL address bar.
The Web Congurator appears. Login to access the Encoder.
Encoder Defaults
IP Address:
192.168.0.100
Subnet:
255.255.255.0
PC can be assigned with
IP Address:
192.168.0.99 or
192.168.0.101 or
192.168.0.102 and so on
Subnet:
255.255.255.0
How to congure the PC IP address?
Click Start > Control Panel > Network and Sharing Center >
Change adapter settings. Then follow the steps below:
1
2
3
4
Note: For full functionality, it is recommended to use Microsoft Internet Explorer
®
.
When using non-IE browsers, free 3
rd
party software plug-ins may be required.
Refer to the device Firmware Manual for more information.
ACTi Connecting Vision and its logo are registered trademarks of ACTi Corporation.
Microsoft
®
and Windows
®
are registered trademarks of Microsoft Corporation.
All other products or company names mentioned in this document are trademarks or
registered trademarks of their respective owners.
Copyright © 2014, ACTi Corporation All Rights Reserved
Quick Installation Guide
V11 Encoder
V.2014.07.28
www.ac.com
Step 4: Access the Device (con’t.)
 Loading...