WaterMaster 25 - 35 - 45 - 70 - 85
WaterMaster 120
6
1
2
4
3
5
1
2
3
4
WaterMaster 25 - 35 - 45 - 70 - 85 - 120 : A1006482 - 664Y7300 • D
en
40
EN
FR
NL
ES
IT
DE
PL
RU
INSTALLATION
CONVERSION TO PROPANE
General remarks
• According to the indication on the type plate, the water heater is factory preset to operate
with natural gas (G20/G25). Converting the water heater to propane is done through the
addition of an orifice and adjustments. The conversion is prohibited in Belgium.
Set-up conditions
• External power supply isolated
• Gas supply closed
• Upper front panel and top panel of the water heater open, refer to “Removal and Installation of the Front
and Top Panels” on page 39
Procedure of orice installation (WM 25 - 35 - 45 - 70 - 85)
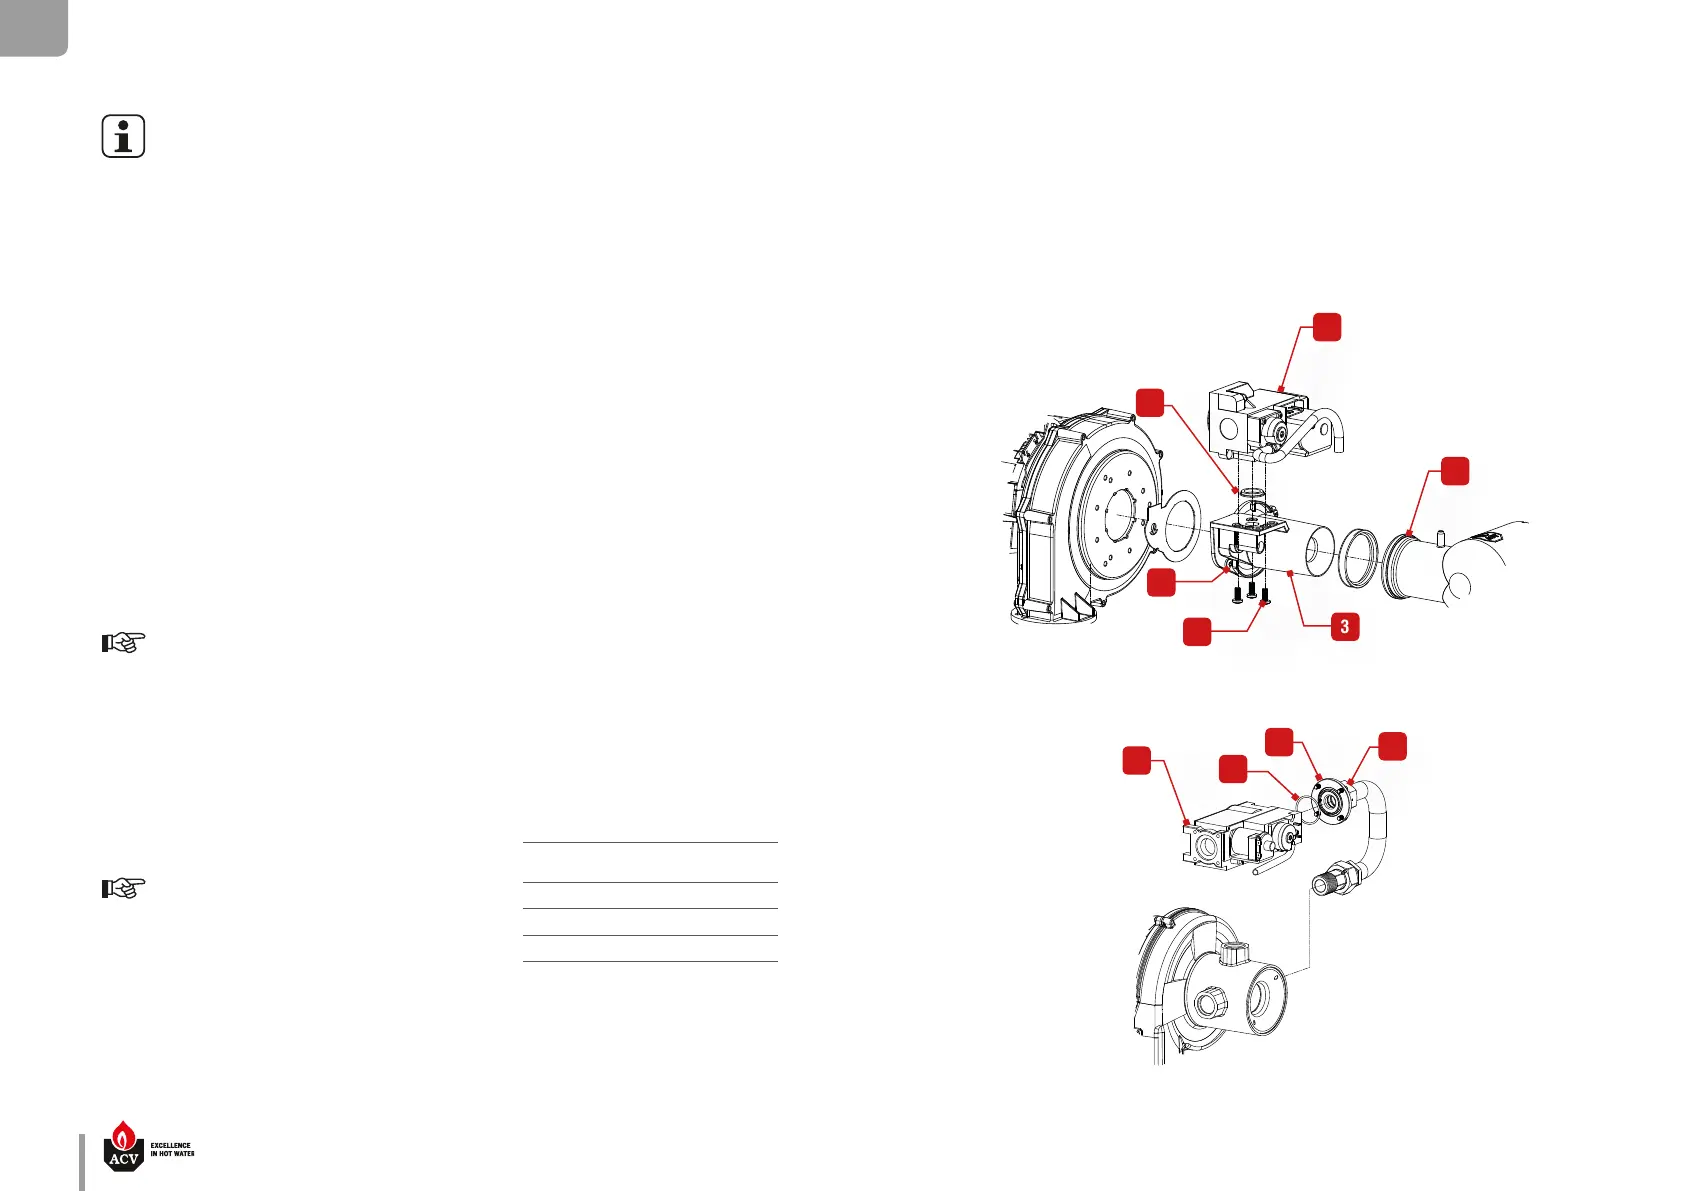
1. Unscrew the gas pipe.
2. Remove the plug from the gas valve (1).
3. Disconnect the air inlet (2) from the venturi (3).
4. Remove the gas valve/venturi assembly by releasing two screws (5). Retain the screws for
reinstallation.
5. Remove the gas valve (1) from the venturi (3) by releasing 3 screws (4). Retain the screws for
reinstallation.
6. Install the orice in the center of the O-ring (6).
Make sure you position the O-ring correctly.
7. Reassemble the gas valve/venturi assembly, following the same procedure in reverse order, and
torque the 3 gas valve screws (4) and the 2 venturi screws (5). Refer to "Torque Values" on page 46.
8. Reinstall the air inlet (2).
Procedure of orice installation (WM 120 )
1. Remove the plugs from the gas valve (1).
2. Unscrew the union (4) of the gas pipe.
3. Release 4 screws from the gas valve ange (3) and retain for reinstallation.
4. Install the orice in the ange (3).
Make sure you position the orifice correctly
(shouldered face turned towards the gas pipe, flat
face turned towards the gas valve).
5. Install the O-ring (2) on the ange.
6. Install the ange (3) on the gas valve (1) using 4 retained
screws.
Follow-on tasks
• Stick the sticker provided with the conversion kit on the water heater and check the box to indicate
the type of gas to be now used with the water heater.
• Reconnect gas pipe connection.
• Reconnect the plug(s) to the gas valve (1).
• Restart the appliance.
• Change the appliance code through the Installer menu, refer to the “Installer’s handbook”
• Carry out the CO
2
adjustment, (refer to “Checking and Adjusting the Burner” on page 42).
• Reseal the oset and the throttle on the gas valve (1), as required.
WaterMaster Propane orice dia.
(mm)
25 - 35 - 45 5.2
70 - 85 6.8
120 8.6


 To Next Page
 Loading...