Connection and setup
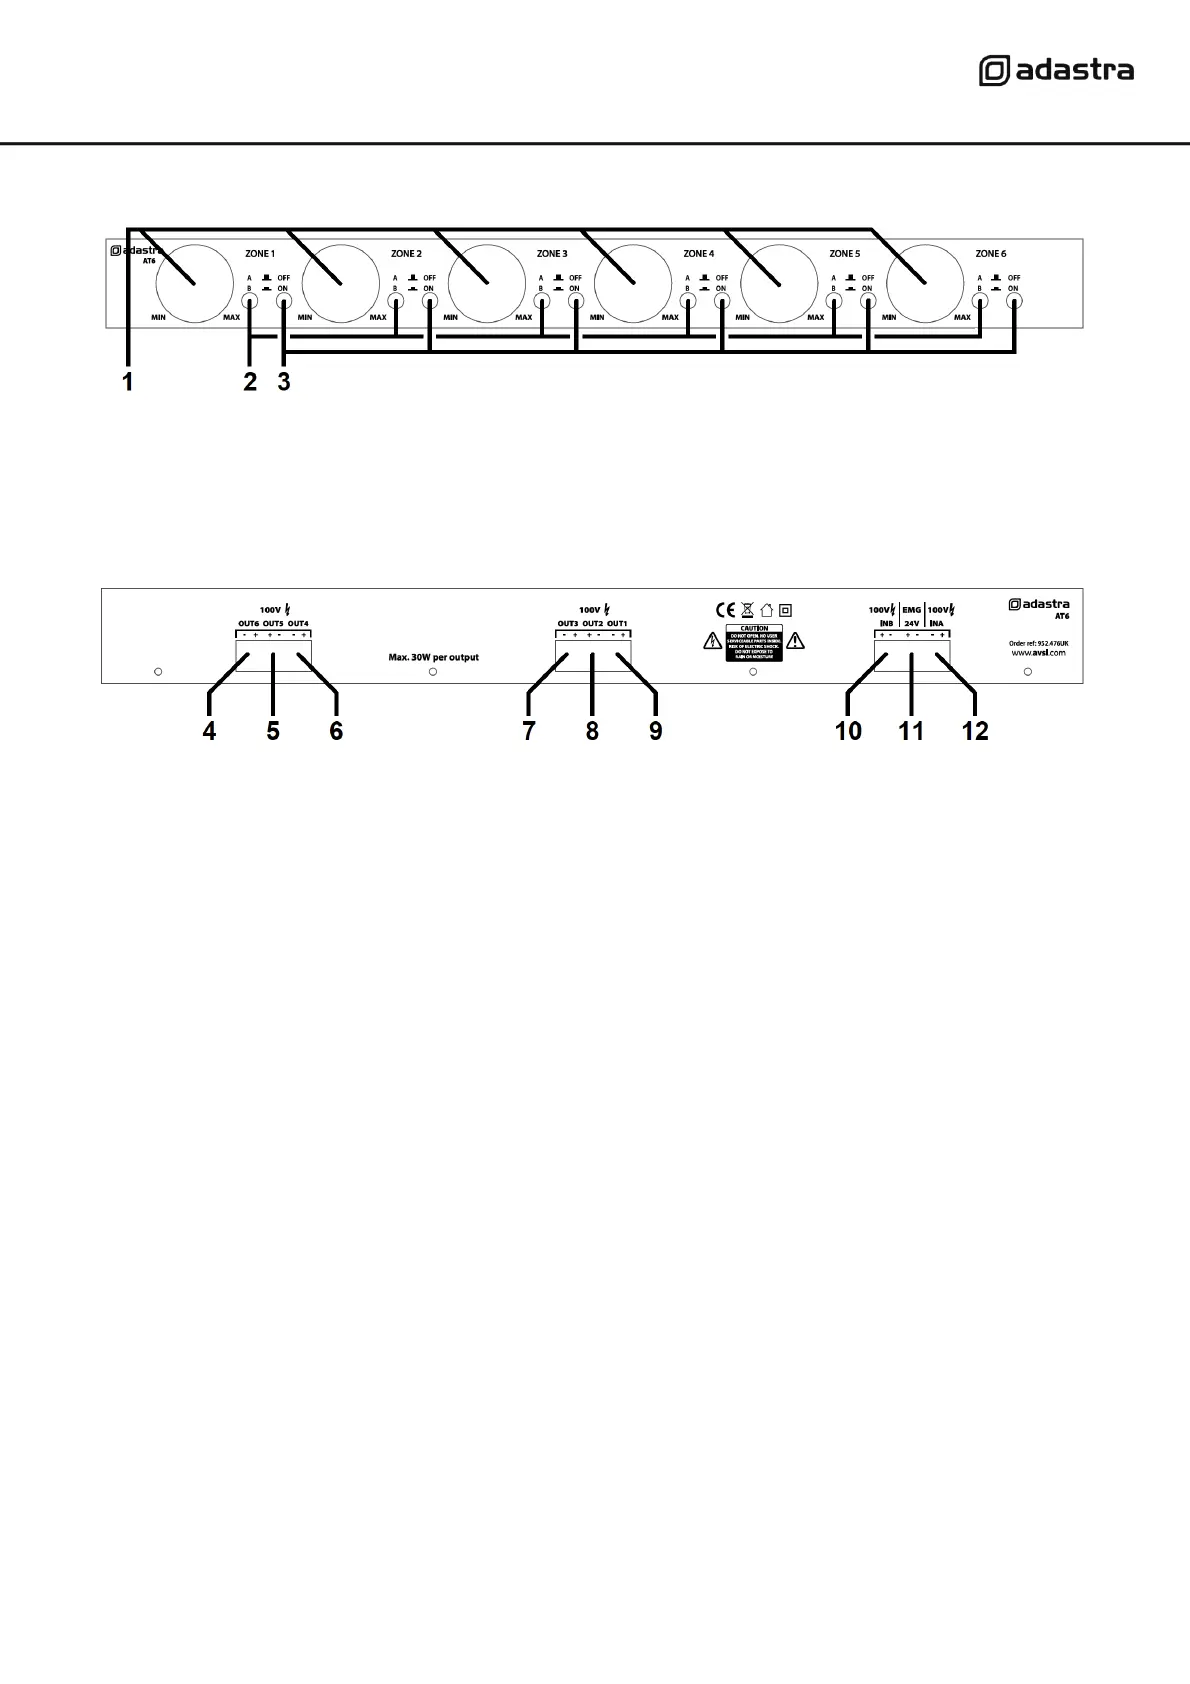
Connections for the AT6 are all on the rear panel and the screw terminals are on removable blocks
for ease of installation. Ensure all connection polarities are correct as indicated on the rear panel.
The AT6 can operate in conjunction with one or two 100V amplifiers as input sources.
Connect the 100V output terminal from an amplifier to the “+” terminal of IN A on the AT6 (12)
Connect the COM output terminal from the same amplifier to the “-” terminal of IN A on the AT6.
If another amplifier is to be used as a second source, repeat the above steps for IN B terminals (10).
Between the terminals for IN A and IN B are another pair of screw terminals labelled “EMG 24V” (11)
These may be connected to the 24V trigger of an emergency panel to mute all outputs upon alarm.
Take maximum care not to allow any shorted strands of wire across any of the terminals.
All 100V speaker outputs are via screw terminals on 2 further removable blocks (4 – 9)
Connect 100V speakers via the corresponding “+” and “-” output terminals on the AT6
If more than 1 speaker is to be connected to a single zone output, connect these in parallel.
Ensure that the total load of all speakers on a single output does not exceed 30W.
Make sure all screw terminal blocks are firmly in place on the rear panel after making connections.
 Loading...