INTRODUCTION freezer compartment. Both controls are Io- '
cated at the upper rear of the refrigerator
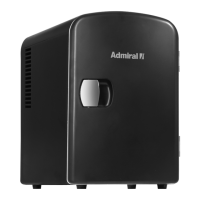
We welcome you into the Admiral family compartment, just below _e light shield.
as an owner of a quality Home Appliance. _ @ To start your refrigerator, setthe refrigera-
This product was designed, engineered,and tor controlon "F" and set the freezercontrol
manufactured to the highest standards of on "4". Let the refrigerator run at least two
quality and performance. Please read these hours before loading it with food.
instructions carefully to become better ac-
quainted with your new Admiral appliance. ..- IG EI
1tram_tlpm_ _ mca_rw M_ _ • |
INSTALLATION
a
In" 5 4 3 2] m.- m,¢m_,,_,n,
LOCATION TOCORRECTTHIS TOCORRECTTHIS _ ,,... .... .,_,,....
If you have agreed to install your new re- CONDITION.RAISE CONDITION,RAISE I
RIGHTCORERAHO LEFTCORNERAHD/
frigerator yourself, pleasefollow these help- /ORLOWERLEFT ORLOWERRIGHT IMPORTANT: In a day or so you may de-
ful suggestions. C0 RHER Ul TI L C0 Rl ERURTI L cide that one or both compartments should
1. Remove base skids and replace front O0 0 RS itLI 6 N D0 0 RS A L16 N be colder or warmer. DO NOT change either
lICROSS TOPOF ACROSSTOP OF control more than one letter or one number
levelers. CIIDIIIET. CADIHET.
at a time, Allow 24 hoursfor temperature to
2. Remove all exterior and interior tape To lock the cabinet in place, turn down stabilize before resetting. This does not ap-
carefully and retain old tape. Make a one or both leveler feet, located near the _ ply when you first start your refrigerator.
small pad of this tape to pick off any re- front wheels. Rear leveler feet are not re- To turn off your refrigerator,set the refrigera-
maining tape residues. This will elimi- quired, tot control on off.
hate the need to usedangeroussolvents If the floor is not level and it is necessary
of any kind. to raise the rear of the cabinet, we suggest WARM CABINET SURFACES
rolling the rear wheels on to a piece of At times, the front surfaces of your refrig-
3. Remove and discard cantilever shelf plywood or other shim material, erator cabinet may be warm to the touch.
packing clips located just above each This is a normal function of your refrigerator.
shelf where it hooks onto the frame. To ELECTRICAL CONNECTION This 'feature prevents moisture from con-
remove a clip, wiggle sideways and pull AND GROUNDING densing on the outside of your refrigerator
during humid weather. This condition may
straight out. This applianceis designed to operateon a be noticeable when you first startyour refrig-
nominal 115 volt, 15 amp., 60 cycle line.
Ill[II _at_, during hot weather, and excessiveor
There should be a separate, grounded cir- lengthy door openings.
cult, serving this appliance only. DO NOT
use an extension cord.
co,o REFRIGERATOR
WITH :3- PRONG
=o,o oo. COMPARTMENT
4. Selec_a location for your new refrigera- _) FEATU P,_.S
toraway from any heat sources.Allow a _ _ T(_
free flow of air through the front base To maintain the natural flavor, moisture
I grille, and nutrition of fresh foods, we recommend
5. Your model should not be installed that all dishes, trays, and containers of food
where the temperature will go below _ be covered.
55°F because it will not run frequently SHELVES
enough to maintain proper temperature GROUNOINGTYPE
WALLRECEPTACLE ADJUSTABLE CANTILEVER SHELVES
in the freezer. "LOCAtiONOFP*O_SONrowE*COtO can be positioned to suit your special needs.
PLUG MAy 6E OIFFERENTON YOUR MODEL
6. For ease of installation, you shouldleave T.*NS.OwNHE,E. TO remove a shelf, lift the rear straight up a
a space of about one-half inch between This appliance is equipped with a three- fraction of an inch and pull straight out. To
your refrigerator and adjacent walls or pronged grounding plug for your protection lock the shelf into another position, tilt shelf
cabinets, against possible electrical shock hazards. It with the front up. Insert hooks into desired
frame openings and let the shelf settle into
must be plugged into a grounding recepta- place.
IMPORTANT LEVEUNG cle. Where a standardtwo prong wall recep- _]I
INFORMATION tacle is encountered, it is the personal re-
sponsibility and obligation of the customer
To enhance its appearance and maintain to have it replaced with a properlygrounded
efficient performance, your refrigerator three-prong wall receptacle. DO NOT, under
should be level. If door alignment or leveling any circumstances, cut or remove the third
is necessary, remove the base grille by (ground) prong from the power cord.
grasping at both ends and pulling straight DO NOT use an adapter plug.
out. Adjust the front wheels as shown. All U.L. listedrefrigeratorsand freezersare DELl TRAY
TURNCLOCKWISETO equipped with this type plug. This tray slides out for easy access to
LOWERCABINETCORNER foodsstored within. The tray can be usedfor
__ shortterm storage of lunch meats, cheeses,
- OPERATION bacon and other items you may choose. It is
completely removable for cleaning or for use
SETTING CONTROLS elsewhere in your kitchen.
Your new refrigerator has two controls. The tray is attached to a cantilever shelf
One for regulating the temperature in the re- that can be adjusted to different levelsto suit
TORAISECABINETCORNER frigerator compartment and one for the your special needs.
 Loading...