TM
12
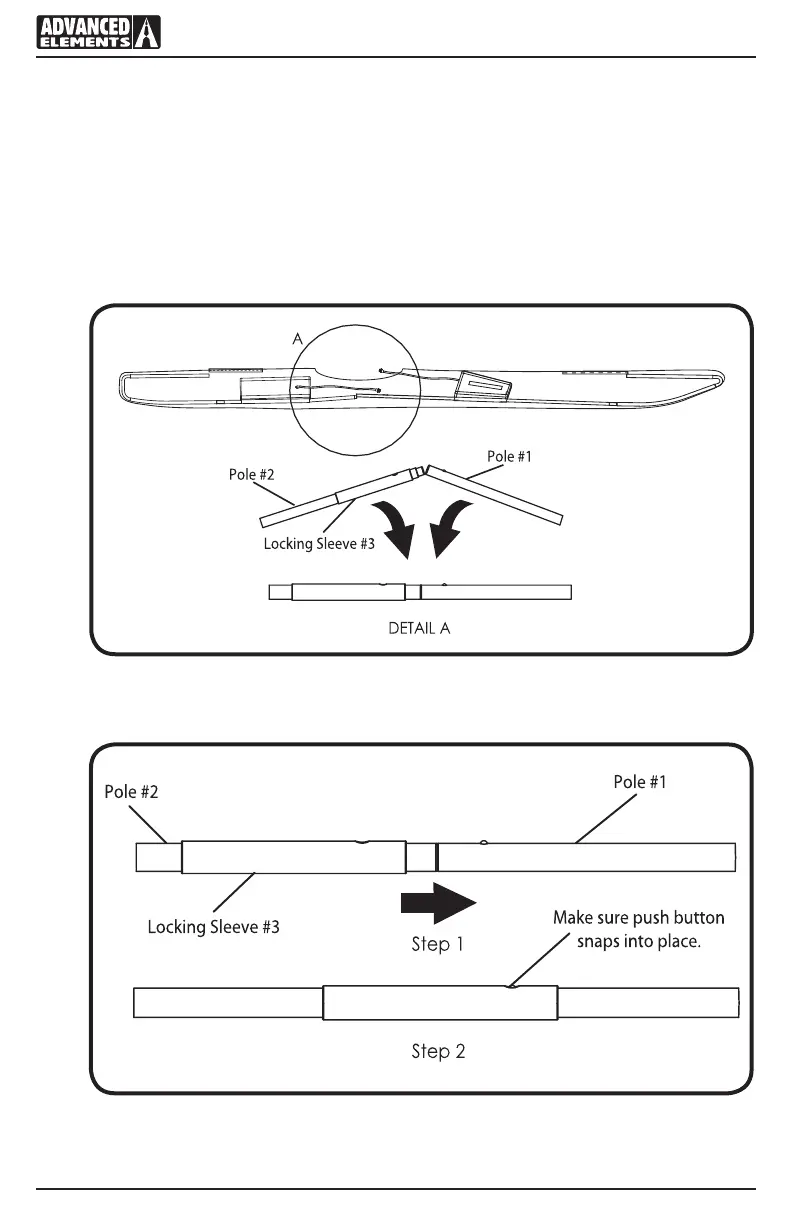
poles #1 and #2 is in the middle of Locking Sleeve #3. Align the hole on Locking Sleeve
#3 with the push buon located on pole # 1 and snap into place. Warning: Make sure to snap
Locking Sleeve #3 into place IMMEDIATLY to prevent poles #1 and #2 from springing
upwards and causing any injury to you or the kayak. Align and secure the completed pole
assembly using the two Velcro loops on the oor of the kayak; the front loop should be
showing through the small hole in the foam oor, this will also insure that your oor is in
alignment. See Figures 9 and 10.
Figure 9
Figure 10