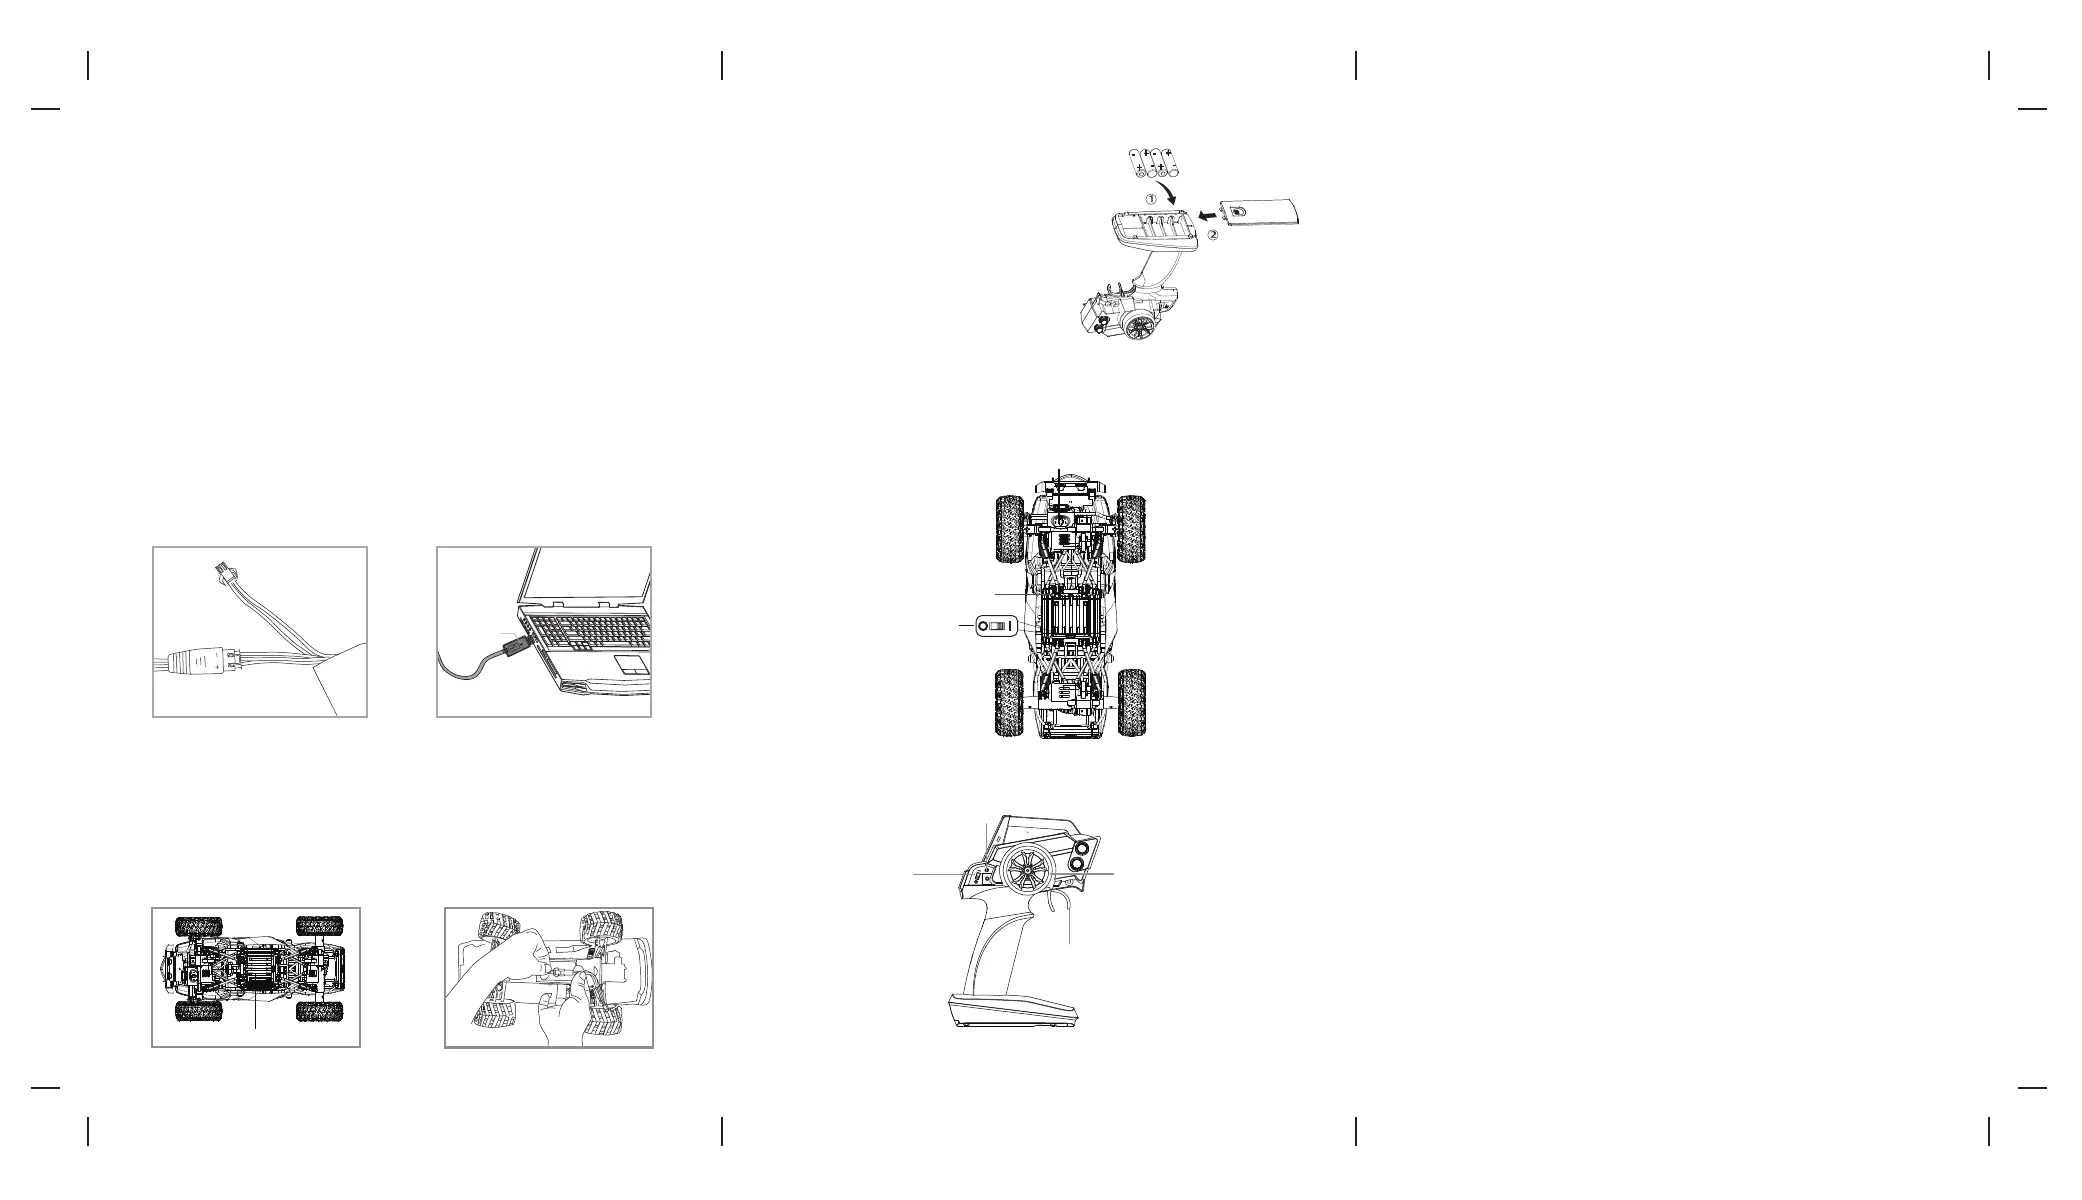
SET-UP
1. Install the battery into the truck.
Pull off the battery cover lock on the bottom of the truck (see diagram C). Connect the battery
power plug (the
2-wire plug) into the truck socket. The battery plug and the truck’s socket fit only one way. Dot not force them
(see illustration D).
Secure lock on battery cover.
2. Install batteries into the remote control.
Open the battery cover on the bottom of the remote
control (see diagram E). Insert 4 AA batteries (not
included) into the battery compartment, matching
polarity (+ and -) marked inside. Replace the battery
cover.
CHARGING THE BATTERY
1. Insert the white, 3-wire battery charging plug into the USB charger's socket. The charging plug and
the USB charger's socket fit only one way. Dot not force them (see illustration A).
2. Connect the USB end of the cable to your computers USB port (see diagram B) or a phone charger, The
Red CHARGE indicator light turns stay to show that charging is in progress.
3. Average charging time is approximately 2.5 hours. The truck operates for approximately 40 minutes on
full charge.
4. The red charging indicator turns off when the battery is fully charged.
Note: Periodically examine the charger should be for damage that may result in the risk of fire, electric
shock, or injury to persons. Do not use a damaged adapter.
OPERATION
THIS IS A HIGH-SPEED OUTDOOR RC TRUCK. DO NOT PLAY INSIDE YOUR HOME OR OTHER SMALL ENCLOSED AREAS.
1. Turn your truck on:
• Pick up your truck and turn it over to make sure the battery is properly installed and the battery
compartment door is properly closed and locked.
• Sync your truck and remote control and set the truck on the ground.
2. Driving your truck:
• Pull the throttle halfway to drive forward at low speed. Pull the throttle fully to drive at high speed.
• Push the throttle forward to make truck move in reverse.
• Turn the steering control to the counterclockwise to turn the truck left. Turn steering to the clockwise to
turn the truck right.
• To break or quickly stop simply pull or push the throttle in the opposite direction.
BATTERIES NOT INCLUDED (4XAA)
PACKAGE CONTENTS
•
ROCK RUNNER
TM
RADIO CONTROLLED HIGH SPEED VEHICLE
• Remote control
• USB charger
• 7.4V Li-poly battery pack
BA
C
D
E
TRUCK DIAGRAM (Bottom View)
REMOTE DIAGRAM
Your ROCK RUNNER
™
features an automatic 2.4G channel selection system that allows up to 8 people
to race side by side in the same wireless range.
For One Player:
1. Before starting, make sure that the power on both your remote control and truck are in the OFF
position. Make sure that there are no other 2.4G devices in the area.
2. Turn ON the truck and set it down on a flat surface.
3. Turn ON the remote control. When the remote control's power indicator flashes, pull the throttle all
the way down and the power indicator lights continuously. This indicates that your truck and remote
control have successfully synced. If pairing fails, repeat steps 1-3.
For Multiple Players:
1. Before starting, make sure that the power on all trucks and controllers are in the OFF position.
Make sure that there are no other 2.4G devices in the area.
2. Each person will have to sync a truck individually at a different time to avoid interference.
Follow steps 1 to 3 above, making sure to keep away from other people while also making sure that
no one else is syncing at the same time.
3. After syncing, leave the truck ON until all players have synced their trucks.
4. If there is interference, all players must turn off their controllers and trucks and restart the syncing
process.
SYNCING YOUR ROCK RUNNER
Steering Wheel Trim
ON/OFF Switch
Battery Compartment
Steering
Throttle
ON/ OFF Switch
Power Indicator
Red
Charging
Light
Battery Compartment
 Loading...