This document provides operating instructions for the AEG FAVORIT 665/665 i Dishwasher.
Function Description
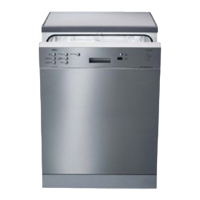
The AEG FAVORIT 665/665 i is a dishwasher designed for domestic use, offering various washing programs to clean different types and degrees of soiled crockery. It features automatic detergent and rinse aid dispensing, as well as a water protection system to prevent damage.
Control Panel (Fig. 1/I):
- Start/stop button with operating indicator: Initiates and stops the washing program.
- Programme selector buttons:
- Extra pre-wash: For crockery collected and intended for washing at a later time.
- Intensive 65° C: For heavily soiled tableware and cookware with dried-on food residues, especially egg-white and starch. The temperature cannot be reduced to 50° C for this program.
- Normal 65° C: For normally soiled tableware and cookware with heavily dried-on food residues. Can be combined with temperature reduction to 50° C.
- 65° C economy programme: For normally to slightly soiled tableware and cookware. Can be combined with temperature reduction to 50° C.
- Temperature reduction to 50° C: A button that, when pressed, reduces the washing temperature to 50° C for compatible programs.
- Economy/short 50° C: A short program for normally to slightly soiled coffee and dessert crockery, as well as sensitive glasses.
Programme Cycle Indicator (Fig. 1/III):
This indicator rotates stepwise during the program cycle, showing the current status of the washing program:
- Pre-wash
- Washing with detergent
- Intermediate rinse
- Final rinse with rinse aid
- Drying with hot air
Rinse Aid System:
The dishwasher automatically dispenses rinse aid during the final rinse to ensure water flows off without leaving drops, providing a sparkling finish. The rinse aid dispenser (Fig. 2/E) is located inside the door. A rinse aid replenishment indicator (dark spot surrounded by a bright ring in the display window, Fig. 8/arrow) signals when more rinse aid is needed. The dosage can be adjusted from 1 to 6 cm³ per washing program using a setting unit (Fig. 9).
Detergent Dispenser (Fig. 2/D):
The detergent dispenser is filled with dishwasher detergent powder before each washing program (except "Extra pre-wash"). The lid opens by pressing a locking lever (Fig. 10/a). Marking lines ("Min" for 20g and "Max" for 30g, Fig. 11) help with correct dosage. For programs with pre-wash, an additional 5g of detergent can be placed in the dispenser cap recess (Fig. 10/b).
Crockery Baskets:
The dishwasher includes upper and lower crockery baskets for loading dishes. The upper basket is height-adjustable (Fig. 13) to accommodate different item sizes, offering two positions:
- Upper position: 20 cm in upper basket, 29 cm in lower basket.
- Lower position: 25 cm in upper basket, 24 cm in lower basket.
The lower basket (Fig. 12) is designed for large, heavily soiled dishes, while the upper basket handles smaller, more fragile items. A cutlery basket is provided for knives, forks, and spoons, with hinged cup holders in the upper basket for cups.
Water Protection System:
The dishwasher is equipped with a water protection system to prevent water damage. This includes an overflow protection to prevent uncontrolled water rising and an outlet protection (float switch in the floor tray) that responds to leaks. The double-skinned supply hose is monitored by a safety valve at the water tap. In case of malfunction, the water supply is interrupted, and the drain pump activates, even if the machine is switched off, to pump away residual water.
Important Technical Specifications
- Capacity (per IEC Publ. 436): 12 standard place settings, including serving utensils.
- Water Pressure: 1 to 10 bar (minimum 1 bar, maximum 10 bar). For pressures over 10 bar, a pressure reducing valve is required.
- Hot Water Connection: Can be connected to a hot water supply of max. 60°C. Not suitable for open hot water appliances or through-flow heaters.
- Detergent Dosage: 5 g in pre-wash sequence, 20 g in wash sequence (for comparison program "Normal 65°C").
- Programme Duration (cold water connection):
- Pre-wash: 11 minutes
- Pre-wash, wash, 2x intermediate rinse, final rinse, dry: 90 minutes
- Pre-wash, wash, intermediate rinse, final rinse, dry: 87 minutes
- Pre-wash, wash, intermediate rinse, final rinse, dry: 70 minutes
- Wash, intermediate rinse, final rinse, dry: 77 minutes
- Wash, intermediate rinse, final rinse, dry: 59 minutes
- Energy Consumption (cold water connection):
- Pre-wash: 0.1 kWh
- Pre-wash, wash, 2x intermediate rinse, final rinse, dry: 1.7 kWh
- Pre-wash, wash, intermediate rinse, final rinse, dry: 1.6 kWh
- Pre-wash, wash, intermediate rinse, final rinse, dry: 1.0 kWh
- Wash, intermediate rinse, final rinse, dry: 1.6 kWh
- Wash, intermediate rinse, final rinse, dry: 0.9 kWh
- Water Consumption:
- Pre-wash: 6 litres
- Pre-wash, wash, 2x intermediate rinse, final rinse, dry: 25 litres
- Pre-wash, wash, intermediate rinse, final rinse, dry: 20 litres
- Pre-wash, wash, intermediate rinse, final rinse, dry: 20 litres
- Wash, intermediate rinse, final rinse, dry: 15 litres
- Wash, intermediate rinse, final rinse, dry: 15 litres
- Drain Hose: Can pump water up to 1m height, with a maximum extension of 3m. Inlet height must be at least 30 cm above the bottom edge of the machine.
- Electrical Connection: Details on rating plate (Fig. 2/G). Nominal voltage must match mains voltage. Requires appropriate disconnection measures for fixed wiring (fuses, automatic cutout, etc. with contact opening width > 3 mm).
- Decor Panel Dimensions (Free-standing appliance): H 590 x B 580 mm. Clamping thickness: max. 4 mm.
- Radio Interference Suppression: Meets EC Directive 82/499.EC and EN 60 555 Parts 1-3/DIN VDE 0838 Parts 1-3, June 1987.
Usage Features
Economical and Environmentally Friendly Operation:
- Collect dirty dishes and wash only when both baskets are full.
- Select the appropriate program based on the degree of soiling.
- Use only branded dishwasher detergent and rinse aid.
- Avoid over-dosing detergent for environmental protection and to prevent residues.
Loading Crockery:
- Remove large food residues before loading.
- Pre-soak pans with burnt-on food residues.
- Load baskets from back to front.
- Place all containers (cups, glasses, saucepans) open downwards to allow water to run out freely.
- Ensure glasses are not in contact with each other to prevent marks and damage.
- Arrange cutlery loosely in the basket, with handles pointing downwards for knives, forks, and spoons. Avoid nesting spoons and forks.
- Use the special spoon rack on the LH side for coffee/teaspoons.
- Long cutlery pieces can be placed in the upper basket to avoid obstructing the upper spray arm.
Starting a Program:
- Fully open the water tap.
- Turn the program switch (Fig. 1/III) clockwise to symbol A or B.
- Press the start/stop and program selector button (Fig. 1/I), and optionally the 50° button if temperature reduction is desired.
Stopping a Program:
- Press the start/stop button; the operating indicator will go out.
- Release any pressed 50° button.
- Open the door slightly to allow steam to escape and accelerate drying. Wait about 15 minutes before taking out dishes.
- Remove dishes from the lower basket first, then the upper basket, to prevent water drips.
Crockery Suitability:
- Suitable: Earthenware dishes marked "dishwasher-proof," glasses and cutlery marked "dishwasher-safe."
- Unsuitable: Wooden boards, hot water-sensitive plastic parts, tin crockery, glued crockery parts, crockery with hairline cracks, older cutlery with temperature-sensitive adhesive, rust-sensitive steel knives, cutlery with wooden/horn/porcelain/mother-of-pearl handles.
- Note: Some decorations painted over glaze may fade, aluminium utensils/saucepans may discolour, and some glass types may become cloudy after many washes. Silver crockery and cutlery should be cleaned of food residues immediately after a meal to prevent discolouration.
Maintenance Features
Cleaning the Strainers:
- Coarse filter (Fig. 15): Remove and clean under running water with a brush. If food residues are stuck, remove the insert (Fig. 16) and clean it. Replace the insert firmly in the coarse strainer and then place it in the fine strainer.
- Fine filter (Fig. 17): If necessary, clean the fine strainer and microfilter. Twist it to the left, clean both sides, unscrew anticlockwise, and clean the top and underside. Replace it so the outside edge rests correctly on the machine floor, then screw on tight clockwise. Never run a program without a strainer.
- Check strainers after every washing program and clean if choked.
General Care Instructions:
- Never clean screens and controls with commercial furniture cleaners or aggressive detergents.
- Use only lukewarm water for cleaning.
Troubleshooting (If the dishwasher is not working properly):
- Program not starting: Check fuses, ensure the door is closed properly.
- No water flow: Check if the water tap is on, ensure the water supply hose is not kinked, clean the strainer at the supply hose connection, verify minimum water pressure (around 1 bar).
- Program switch stops at cleaning/rinsing: Ensure water tap is fully open, check/clean supply hose strainer, verify minimum water pressure.
- Crockery not clean: Check if the correct program was selected, ensure crockery is arranged according to instructions (not overfilled, spray arms not obstructed).
- Dishes not drying/no sparkle: Check if branded rinse aid was used, ensure enough rinse aid in the dispenser, verify correct rinse aid dosage.
- Overdosage: If streaks, stripes, milky marks appear, decrease rinse aid dose.
- Underdosage: If dried water droplets/greyish white drop edges appear, increase rinse aid dose.
- Rust marks inside the machine: Machine interior, filters, and door are stainless steel and will not rust. Rust must be from an external source (water, pipes, saucepans, cutlery). Remove marks with a commercial stainless steel cleaner.
- Drain pump runs continuously: The water protection system has responded. Close the water tap, unplug the machine, and call service.
After-Sales Service:
- Before calling service, attempt to rectify faults using the troubleshooting guide.
- Repairs for faults caused by incorrect operation are not covered under warranty.
- Provide the E-number (product number) and F-number (serial number) from the rating plate (Fig. 2/G) when calling service to ensure correct spare parts are identified.
- All electrical appliances comply with safety requirements. Repairs should only be performed by a trained electrician.