Connect the appliance to an earthed
socket.
The power supply cable must be easily
accessible after installing the appliance.
For any electrical work required to install
this appliance, contact our Authorised
Service Centre.
The manufacturer does not accept any
responsibility for damage or injury
through failure to comply with the above
safety precaution.
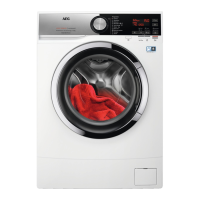
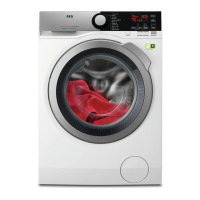
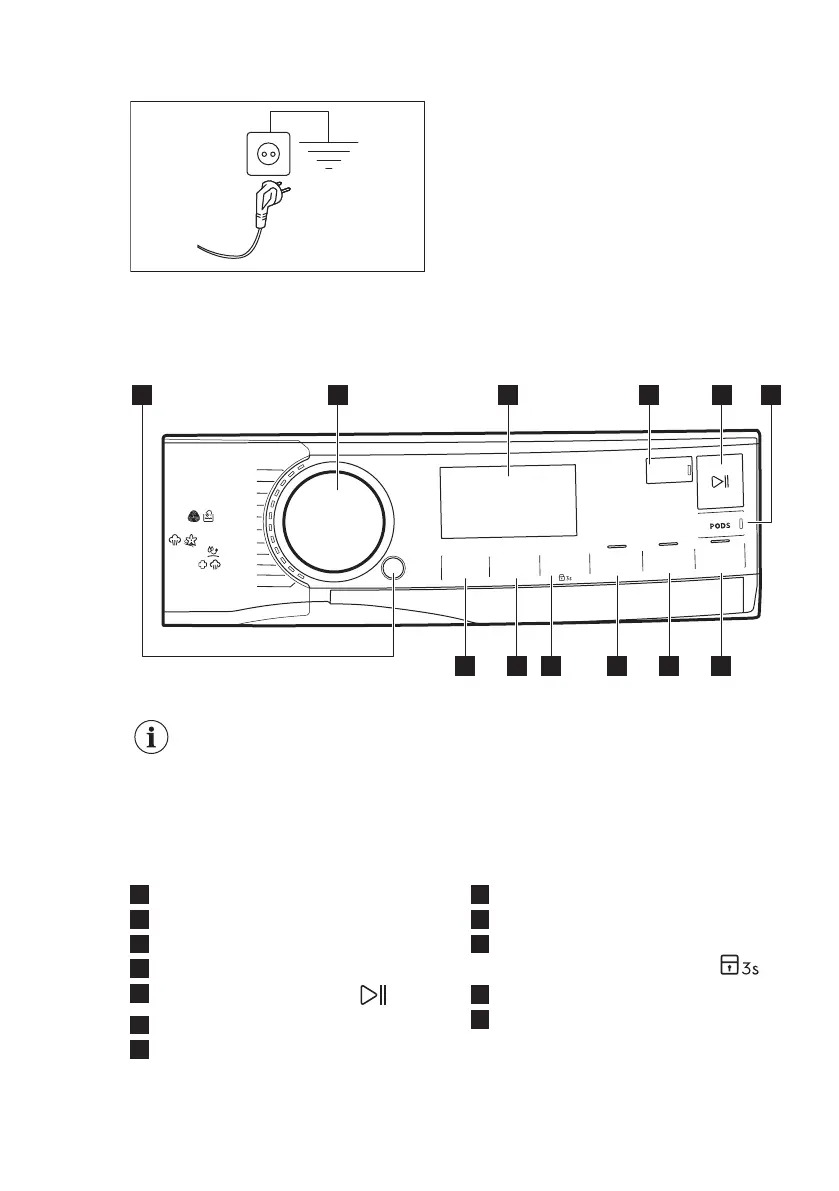
6. CONTROL PANEL
6.1 Control panel description
Power Clean 59min
Eco 40-60
Kat
o
e
n C
o
ton
Fijne w
as D
élicats
Wol/L
a
ine
20 min.
-
3 kg
Stoom Vapeu
r
S
poe
len R
inçage
Ou
t
do
or
Hyg
iene
Tem
p.
C
entrif
uge
ren
Esso
rage
Vlekken/Voorw.
Taches/
P
ré
l
av.
Tijd bespa
ren
Gain
d
e
t
emps
E
xtra spoe
len
Rinçage
P
lus
P
lus
S
team
Aan/Uit
Marche/
Arrêt
Klaar over
Fin
programmée
Synthetica
Synthétiq
ues
Centrifug.
/
P
ompen
Essorage
/V
idan
ge
32
4 5 6
12 11 9 8 710
1
The options are not selectable with all washing programmes. Check the
compatibility between options and washing programmes in the "Options
compatibility with programmes" paragraph in the "Programmes" chapter.
An option can exclude another one, in this case the appliance doesn't
allow you to set the incompatible options together.
Make sure the screen and touch buttons are always clean and dry.
1
On/Off push button
2
Programme dial
3
Display
4
Finish In touch button
5
Start / Pause touch button
6
Pods touch button
7
Plus Steam touch button
8
Extra Rinse touch button
9
Time Save touch button
10
Stains/Prewash touch button and
permanent Child Lock option
11
Spin touch button
12
Temperature touch button
ENGLISH 13
 Loading...