This document provides an installation manual for a kitchen hood, detailing its function, technical specifications, usage, and maintenance. The manual is presented in multiple languages, including English, German, French, Italian, Spanish, Dutch, Latvian, Lithuanian, Finnish, Danish, Russian, Estonian, Hungarian, Czech, Slovak, Polish, Croatian, Greek, Turkish, Bulgarian, Macedonian, Kazakh, Ukrainian, and Arabic.
Function Description:
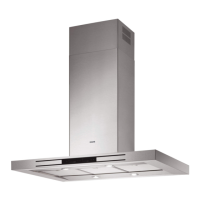
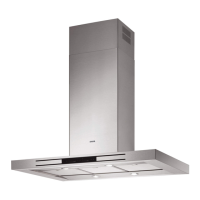
The device is a kitchen hood designed for both extraction and recirculation modes, aimed at removing smoke, steam, and odors from the cooking area. It features a telescopic design, allowing it to be integrated seamlessly into kitchen cabinetry or mounted on a wall. The hood is equipped with lighting to illuminate the cooking surface and a control panel for operation.
Important Technical Specifications:
- Mounting Dimensions: The hood requires specific clearances from the cooking surface. For gas hobs, the minimum distance (L) is 65 cm. For electric hobs, the minimum distance is also 65 cm.
- Ducting Options:
- Extraction Mode: Requires a duct with a diameter of either 120 mm or 150 mm. The manual shows a flexible duct (item 25) and a clamp (item 25) for securing it.
- Recirculation Mode: Utilizes a carbon filter system to purify the air before returning it to the kitchen. This mode also uses the same ducting diameters (120 mm or 150 mm) but directs the filtered air back into the room.
- Height Adjustment: The hood's telescopic structure allows for adjustable height. The minimum height from the bottom of the hood to the top of the upper duct cover is 700 mm, and the maximum is 1040 mm.
- Electrical Connection: The hood requires an electrical connection, indicated by a power cord and plug (item 12c). The specific voltage and current requirements are not explicitly stated in the provided images but are implied by the electrical components.
- Lighting: The hood includes lighting (item 24, labeled "Lux") to illuminate the cooking area.
- Control Panel: The hood features a control panel (labeled "Cmd") for operating its functions.
Usage Features:
- Dual Operation Modes: The hood can be configured for either external extraction (venting air outside) or internal recirculation (filtering air and returning it to the kitchen). This flexibility allows users to choose the most suitable option based on their kitchen setup and ventilation possibilities.
- Telescopic Design: The adjustable height of the hood ensures it can be adapted to various kitchen designs and ceiling heights, providing a custom fit.
- Illumination: Integrated lighting enhances visibility over the cooking surface, making food preparation easier and safer.
- Easy Controls: The presence of a control panel suggests straightforward operation for adjusting fan speed and lighting.
- Installation Flexibility: The manual illustrates different mounting scenarios, including installation into a cabinet or directly on a wall, providing options for various kitchen layouts.
Maintenance Features:
- Filter Access: The manual shows steps for accessing and removing filters (e.g., grease filters, carbon filters). This indicates that filters are designed to be user-replaceable or cleanable, which is crucial for maintaining the hood's performance.
- Grease Filters: These are typically metal mesh filters that trap grease particles. They are usually washable.
- Carbon Filters: Used in recirculation mode to absorb odors. These are generally disposable and need to be replaced periodically.
- Cleaning: The design implies that the exterior surfaces of the hood can be easily cleaned. The manual emphasizes safety warnings before maintenance, such as disconnecting power.
- Component Replacement: The detailed breakdown of parts and installation steps suggests that individual components, such as lights or control panel elements, might be replaceable by a qualified technician if necessary.
- Safety Precautions: The manual repeatedly highlights the importance of reading safety information before installation and maintenance, including warnings about electrical connections and the need for proper handling. Wearing gloves during installation is also recommended (item 12e, 12f, 12g, 12h, 12q).
- Professional Installation Recommendation: While the manual provides detailed steps, the complexity of some procedures and the electrical connections suggest that professional installation or at least careful adherence to instructions is recommended to ensure proper functioning and safety. The symbol of two people working together (OK!) indicates that installation might require more than one person.
Installation Overview:
The installation process involves several key steps:
- Preparation: Unpacking components and identifying parts (screws, washers, ducts, clamps, etc.).
- Mounting Bracket Installation: Drilling holes and securing the main mounting bracket to the wall or cabinet.
- Hood Body Assembly: Assembling the main body of the hood, including the telescopic mechanism.
- Ducting Connection: Connecting the appropriate ductwork for either extraction or recirculation mode.
- Electrical Connection: Wiring the hood to the power supply.
- Filter Installation: Installing grease and/or carbon filters.
- Final Assembly: Attaching decorative covers and ensuring all components are securely fastened.
The manual uses clear visual aids and numbered steps to guide the user through the installation process, making it accessible despite the technical nature of the task. The inclusion of various language options further enhances its usability for a diverse international audience.