Insert Lamp Arm
into Base
1
Bowl & Base Assembly
(front view)
Lamp Hood
(front view)
Lamp
Arm
(front view)
Grow Lights
Model 100340
Included in Package
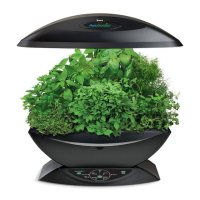
Welcome to the world of indoor gardening!
The AeroGarden 7 is one of the most advanced countertop gardens in the world,
and it’s easy to use. In fact, the AeroGarden 7 is ready to grow in less than five
minutes with just five easy steps that anyone can do!
This handy Quick Setup Guide shows you how to get started and provides everything
you need to know about the AeroGarden 7’s operation, and also offers tending and
harvesting tips for your new garden.
Quick Setup Guide
Simple Steps to Get Your AeroGarden Up and Growing (No tools required)
Start Here!
Keep This Guide!
click
Lamp Arm
(back view)
Push Grow Lights straight into
sockets in Lamp Hood
Remember to replace Grow Lights every 6 months.
DO NOT
TWIST
LIGHTS!
Install Grow Lights
2
Lamp Hood
(bottom view)
Lamp
Hood
Base
(back view)
Push Lamp Arm straight
down until you hear a
“click.”
Plug Lamp Cord
into Lamp Hood
3
Push Lamp Cord
firmly into socket
in Lamp Hood.
Do not connect
Lamp Hood to
any other power
source.
Lamp
Cord
Power Cord
Set Bowl into Base
CONGRATULATIONS!
Your garden is ready to grow.
It really is that easy!
5
(front view)
Check to be sure that Bowl
is securely seated on
Air Coupling in Base.
Place Lamp Hood
on Lamp Arm
4
Center hands over Lamp Arm
and push Lamp Hood down
until you hear a “click.”
(back view)
Seed Kit
click
} Order replacement Grow Lights, extra Seed Kits and Accessories at www.aerogarden.com
Air
Coupling
5 Easy Steps
To Get Your AeroGarden Ready to Plant
Lamp Hood
(front view)
Lamp Arm
Bowl
(front view)
Base
(front view)
For more details on planting,
growing and harvesting your
AeroGarden… please
turn the page
➠
Place Your Garden...
• On a sturdy, water-tolerant surface
(metal surfaces may cause noise due to vibration)
• Near a standard electrical outlet, per local
regulations
• Under a space that allows 22" (56 cm)
clear
ance for the full height of raised lamp
• Consider placement with easy access to
unsof
tened water
• In a 65-75°F (16-23°C) environment
(optimal)
• Away from reach of children or pets
• Away from direct sources of heat
(e.g., stove, furnace vents) or c
old
(e.g., window drafts, A/C vents)
• AeroGardens do not need additional light or a
sunny window. In fact, too much direct sunlight can
overheat your plants