Chapter 1 Performance Tests
Agilent 53131A/132A/181A Operational Verification
Assembly-Level Service Guide 1-7
1
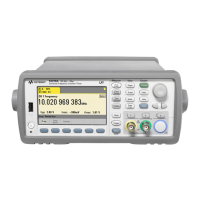
Figure 1-1B. Operational Verification Setup for Agilent 53181A
8 Depending on which Counter you are testing, verify the appropriate reading as
shown below:
For Agilent 53131A and Agilent 53181A, verify a reading of 10.000,000,00 MHz.
For the Agilent 53132A, verify a reading of 10.000,000,000 MHz.
9 For Agilent 53131A/132A, mark Pass or Fail in the Agilent 53131A/132A
Performance Test Record on page 1-41, Test 2.
9’ For Agilent 53181A, mark Pass or Fail in the Agilent 53181A Performance Test
Record on page 1-71, Test 2.
NOTE The remaining steps apply to the Agilent 53131A and Agilent 53132A only since
the Agilent 53181A does not have a standard Channel 2 input. For the
Agilent 53181A, proceed to the following “Run Self Test” section.
10 Press Freq & Ratio key until FREQUENCY 2 is displayed to select Channel 2 for
frequency measurements.
For the Agilent 53131A, verify a reading of 10.000,000,00 MHz.
For the Agilent 53132A, verify a reading of 10.000,000,000 MHz.
11 For Agilent 53131A/132A, mark Pass or Fail in the Agilent 53131A/132A
Performance Test Record on page 1-41, Test 3.
Channel 1
P 53181A
ounter
10 MHz
Out
(rear panel)