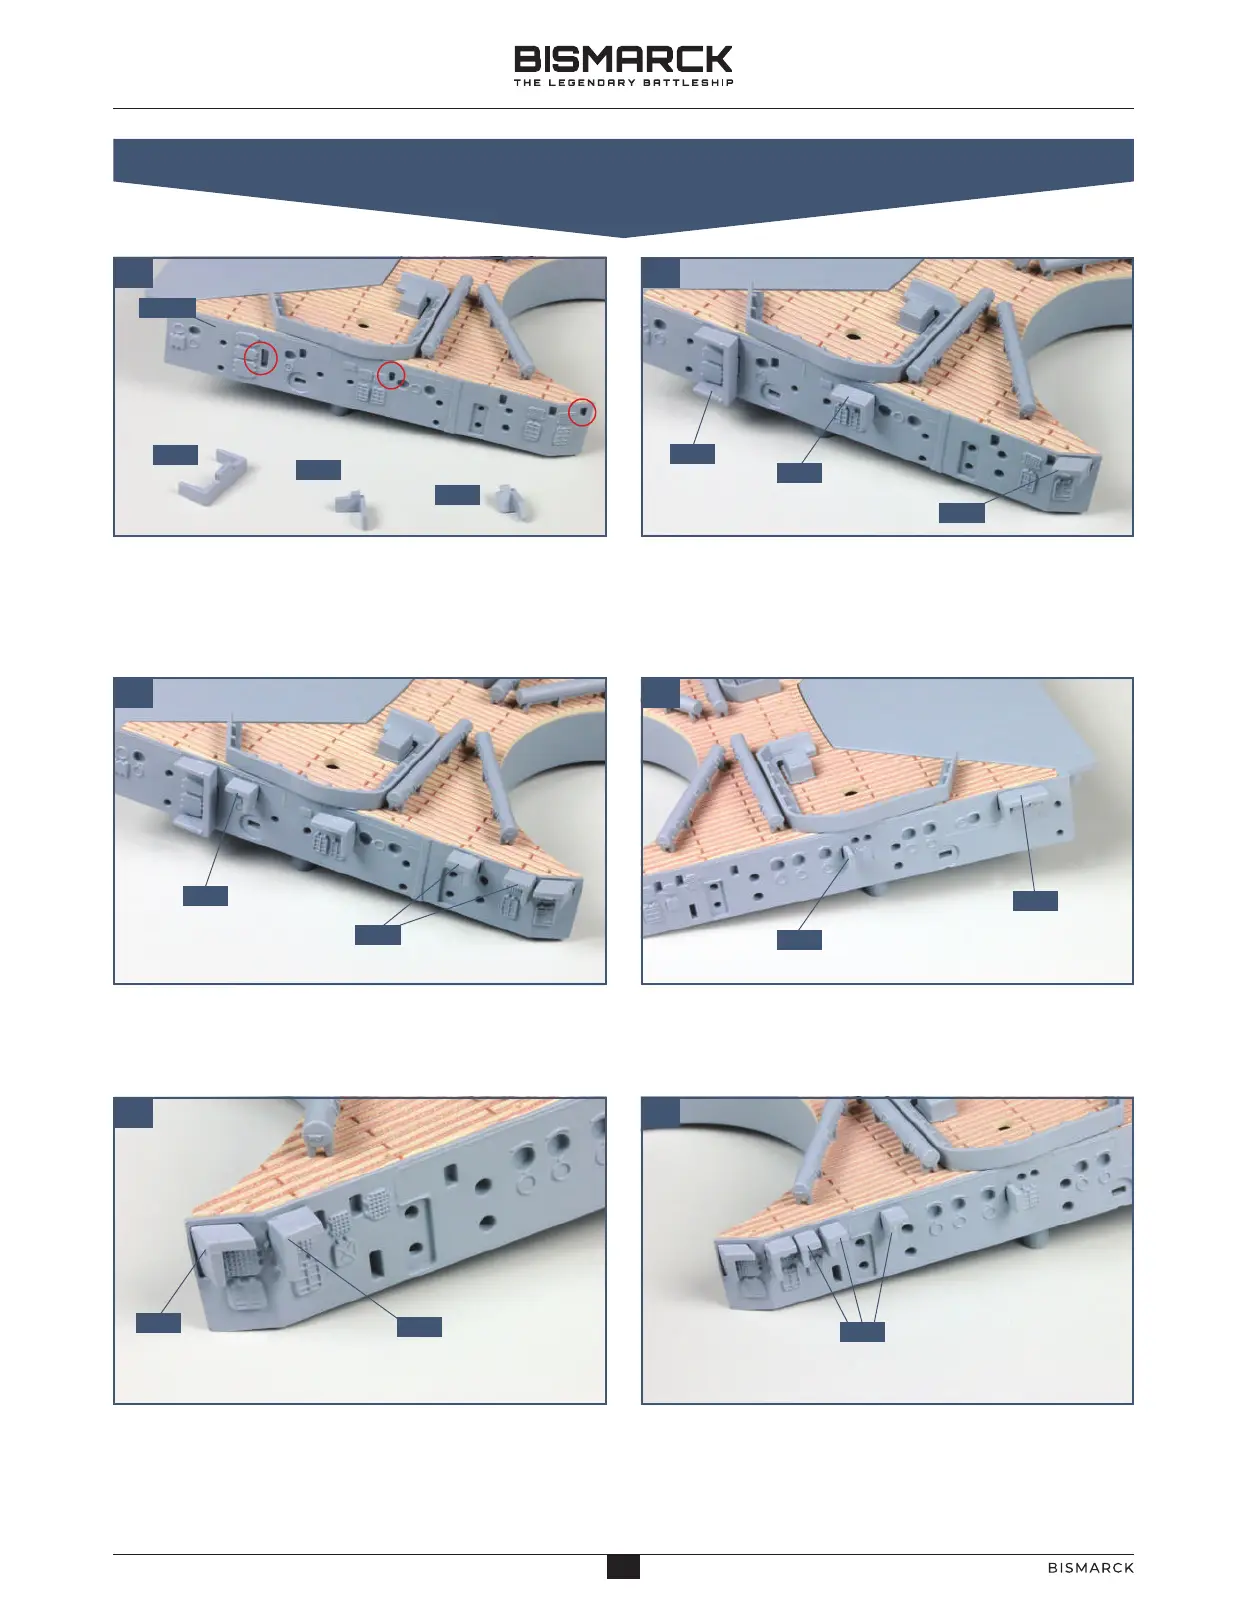
02. DETAILS FOR THE WALL OF THE SUPERSTRUCTURE DECK
05 06
A1
2106
A8
A2
A3
A2
A3
A1
A4
A4
A5
A6
A7
A9
01 02
03 04
Remove the three parts A1, A2 and A3 from the frame
21-07, taking care not to remove the side tabs. Identify
the fixing points on the starboard wall of the
superstructure deck 21-06 (circled).
Apply a little superglue to the pegs on parts A1, A2
and A3 and fix in place on the starboard
superstructure deck wall, as shown.
Next, cut the three rain guards (with their side tabs)
A4 from the frame 21-07 and glue them to the
starboard side of the superstructure deck, as shown.
Turn the superstructure deck around to access the
port side. Cut parts A5 and A6 from the frame with
their side tabs and glue them in place as shown.
At the forward end of the port side, cut the rain hoods
A7 and A9 from the frame with their side tabs and
stick them in place as shown.
Cut the three smaller rain hoods A8 from the frame
with their side tabs and stick them in place next to
parts A7 and A9 as shown.
5
5
AGORAMODELS BISMARCK
PB
AGORAMODELS BISMARCK
 Loading...