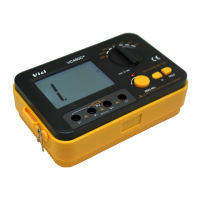
connectors of the black test lead to the two black
connectors of the instruemnt on the left side.
2) Tune the switch the a suitable range.
3) Clamp the two test clips on the 0 ohm circuit terminals, and
adjust the zero knob to make the reading as 0.
4) Once a new range is selected, always do the zero calibration
before measurement.
5) To measure an unknown resistor Rx, follow the following
method as illustrated below:
6) To measure a resistor on a PCB, ollow the following method
as illustrated below:
7) The tested result will be displayed on the LCD.
CAUTION!
1. If the tested resistance is over 2kΩ or there is open circuit,
the LCD displays “1”.
2. When testing a live resistor, to ensure safety, do not
proceed testing until the tested circuit is completely
powered off and all capacitors are fully discharged.
3. If testing results have considerable, it may be caused by
other live components of the same circuit or by electric
potential on the two ends of the resistor.
4. Do not input voltage to the resistance range!
Data Hold:
Press the “HOLD” button, the current data will be held on
the LCD. Press the “HOLD” button again to cancel data hold.
NOTE: There is no data hold function during insulation
resistance measurement.
Backlit Display:
Pressing “*” button, the LCD backlight turns on. Pressing “*”
button again, the LCD backlight turns off.
Safety Instructions and Maintenance
The tester is a precise instrument. User is not allowed to
apply any modification to the instrument circuit.
CAUTION!
1. To ensure safety, the tested object must be completely
shut off from power supply and must be testified that the
tested object has been fully discharged by short circuit
discharge to testify that the tested object dose have any
electrical hazard.
2. Do not apply voltage measurement to the input terminals.
3. Do not apply any measurement before the instrument’s
batteries are well installed or before the rear cover is
well loaded.
4. Before change battery or change fuse, remove all test
leads from the tested object and turn off the power
switch.
5. Keep the instrument away from water and dust. Do not
fall or throw the instrument.
6. Keep the instrument away from high temperature, high
humidity, flammable, explosive and strong magnetic
environment.
7. Use a soft cloth dampened in a solution of mild detergent
and water to clean the instrument. Do not spray cleaner
directly onto the instrument or use any abrasives or
strong solvent.
8. If long time no use, take out the batteries from the
instrument to avoid battery leakage damaging the
instrument.
9. When use 9V battery, if the LCD displays low battery
symbol “
”, replace battery according to the following
steps:
1) Use a screw driver to open the battery door screws,
and take off the battery door.
2) Take off the battery and replace with a new one. To
ensure long time battery power supply, it is
recommended to use alkaline batteries.
3) Load the battery door and tighten the screws.
Fuse replacement
The instrument uses a 150mA/60V resettable fuse. In case
of replacement, please use a fuse of same specification. And
follow instructions as below:
1) Tune the function switch to “OFF”position.
2) Use a screw driver to open the screws on the bottom, and
take off the bottom cover.
3) Take off the PCB screws, and take off the PCB.
4) Locate the resettable fuse on the PCB, which is marked with
“FUSE”. Use an iron to take off the fuse and replace it with a
new one of same spec.
5) Re-load the PCB, bottom cover and screws.
CAUTION!
The instrument uses a resettable fuse, which will protect
the internal circuits once wrong operations occur. Once the
wrong operation is canceled, the fuse will automatically reset,
no need to change fuse.Once a fuse change is in need, use a
fuse of same spec.
Packing List
1. Digital milli-ohm meter x1pcs
2. 4-wire test lead x1 pair
3. 5# battery (1.5V) x6pcs
4. Operation manual x1pcs
5. Shoulder strap x1pcs

 Loading...