EasyManua.ls Logo

Aike AK1205 - User Manual

Aike AK1205
2 pages
Print Icon
To Next Page IconTo Next Page
Loading...
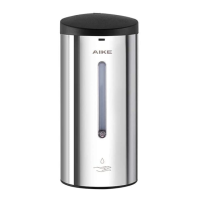
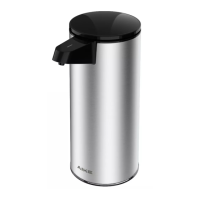
Automatic Soap Dispenser 丨 AK1205
Liquid Adjustment
Key
Cap
Indicator
Sealing Cap
Fixed Bracket
Liquid Button
1. Insert the key into the lock to
open the top cover after install
the battery
2. Open the sealing cap and pour the
liquid soap, remove the extra over
3. Put your hand under the sensor
until the liquid sprayed out
WARNING
Children should be used under adult supervision to prevent accidentally eating!
c
The unit has bee u .
CAUTION
At the standby status, you can adjust liquid by pressing the liquid adjustment button.
The default liqui
crease around 0.5ml output for
per press. Totall
o
may have a slight deviation.
Indicator
Liquid adjustment button
Problem
Potential Solution
Reason
LED indicator o
Control system trouble
m
Batteries
r
Circuits problem or poor contact
Block sight of indicator
r
g
Out of sensing distance
Unit fault
Short liquid supply time
Too viscous liquid
Liquid coagulation or obstruction
h
Indicator on
d
supply
liquid
supply
Tips: Please prevent debris from entering the container to avoid blocking.
Replace the controller
Check the Circuits and batteries
Re-install or replac e the batteries
Check the Circuits
Clean the indicator
Replace the batteries
Remove the sensing object
Contact the the dealer
Adjust the liquid output
Reduce liquid viscosity
Try some times or contact the dealer
Model
Volume
Dimension
Net Weight
P
r
Sensing Distance
Liquid Supply
Temperature
5 step adjustment
After installing the batteries, t
s in the standby state.
The unit is suggested to install batteries even if you don't use it, so that the unit can automatically
run once per 72 hours in the standby status to avoid the catheter pressure adhesion.
Some of unit had installed batteries and in dormant status before delivery. Keep press setting
buttons for more
turning into standby status.
Whereas if the unit turn to dormant status after keeping press the setting button, you can also
re-installation batteries to turn the unit to standby status directly.
USER MANUAL
Using Your AK1205
1. The unit includes electronic devices and solenoid valve, please do not knock.
2. Caution for connecting line
hen disassembling the unit.
3. Please
it using soft cloth th neutral detergent hen cleaning the
product. Next
detergent and dirt by the ung-out soft cloth, then using
dried soft cloth to dry.
4. Please do not
shing th tering or using some detergent h particle
such as scouring
and laundry detergent, also do not using diluent,
detergent
th high acid or Nylon brush to clean this product, lest to damage
surface or erode internal electronic components, especially be careful not to
damage transparent cover
hich placed induc to avoid decrease the
ctiveness of reaction. Tips: Ensure the distance bet sensing
and counter top is above 35cm When installing on stainless steel counter top.
Installation
CAUTION
Troubleshooting
Specification
Zhejiang AIKE Appliances Co.,Ltd.
Add: Yong'an Industry Zone, Taizhou, Zhejiang
E-mail: sales@zjaike.com
T
Website: m
AA Batteries
Question and Answer IconNeed help?

Do you have a question about the Aike AK1205 and is the answer not in the manual?

Summary

Safety Precautions and Warnings

General Cautions

Notes on handling, cleaning, and preventing damage to the unit and its components.

Usage Warnings

Guidance on child supervision, battery disposal, and avoiding water splashes.

Liquid Adjustment

Operating Instructions

Using Your AK1205

Step-by-step guide on unlocking, filling, and activating the soap dispenser.

Troubleshooting Guide

Product Specifications

Installation Process

Mounting Plate Installation

Detailed steps for attaching the mounting plate to the wall using screws and expansion screws.

Unit Mounting

Instructions on hooking the dispenser unit securely onto the installed mounting plate.

Battery Installation and Replacement

Overview

The AIKE AK1205 is an automatic soap dispenser designed for convenient and hygienic handwashing.

Function Description

The AK1205 dispenses liquid soap automatically when a hand is placed under its sensor. It features a liquid adjustment button, allowing users to control the volume of soap dispensed. The default output is approximately 1.0ml, and each press of the adjustment button increases the output by about 0.5ml, offering a total of 5 levels of adjustment ranging from 0.5ml to 2.5ml. This flexibility accommodates different liquid soap viscosities and user preferences. The device operates on DC9V power, supplied by 6 AA batteries, and has a sensing distance of 5-15cm.

Important Technical Specifications

  • Model: AK1205
  • Volume: 700ml
  • Power: DC9V (6 AA Batteries)
  • Sensing Distance: 5-15cm
  • Liquid Supply: 0.5ml-2.5ml (5 step adjustment)
  • Operating Temperature: 0-45°C
  • Dimensions: 100 x 110 x 220mm
  • Net Weight: 1.1kg

Usage Features

The AK1205 is designed for ease of use and installation. Installation:

  1. Battery Installation: To open the top cover for battery installation, a key is inserted into the lock. The device requires 6 AA batteries. After installing batteries, the indicator flashes 6 times, signifying it's in standby mode.
  2. Soap Filling: Once batteries are in place, the sealing cap is opened, and liquid soap is poured into the container. Care should be taken to avoid overfilling.
  3. Mounting: The device can be mounted on a wall. First, a mounting plate is attached to the wall using a pencil to mark three holes. A drill is then used to bore these holes (Ø6), and expansion screws are inserted. Screws matched with plastic nail-heads are used to fix the mounting plate. The unit is then hooked onto the mounting plate and pressed down slightly to secure it tightly. It is crucial to ensure a distance of at least 35cm between the sensing window and the countertop, especially when installing on stainless steel surfaces.
  4. Operation: To dispense soap, simply place a hand under the sensor.
  5. Liquid Adjustment: In standby status, the liquid output volume can be adjusted by pressing the liquid adjustment button. The indicator light confirms the adjustment.

Troubleshooting: The manual provides a comprehensive troubleshooting guide for common issues:

  • LED indicator off: This could indicate control system trouble, power supply problems, poor battery contact, or dead batteries. Solutions include replacing the controller, checking circuits and batteries, or re-installing/replacing batteries.
  • LED light flash: Suggests a circuit problem or poor contact, requiring a check of the circuits.
  • Indicator on without liquid supply: This might mean the indicator window is blocked, there's not enough power, the sensor is continuously working, or the sensing object is out of range. Solutions include cleaning the indicator window, replacing batteries, or removing the sensing object.
  • Insufficient liquid supply: Could be due to a short liquid supply time, overly viscous liquid, or liquid coagulation/obstruction. Solutions involve adjusting liquid output, reducing liquid viscosity, or contacting the dealer.

Maintenance Features

Cleaning:

  • The product should be wiped with a soft cloth using a neutral detergent. After wiping with detergent, use a wrung-out soft cloth to remove dirt, and then dry with a dry soft cloth.
  • Crucially, avoid washing with water or using abrasive cleaners such as scouring powder, laundry detergent, diluents, highly acidic detergents, or nylon brushes, as these can damage the surface or internal electronic components. Special care should be taken not to damage the transparent cover over the induction window, as this can reduce reaction effectiveness.

Battery Management:

  • It is recommended to use the same brand of AA batteries (6 pcs) and avoid mixing old and new batteries, or using counterfeit/low-grade batteries, as this can harm the unit's lifespan.
  • The unit is designed to run automatically once every 72 hours in standby mode to prevent catheter pressure adhesion.
  • If the unit enters a dormant status (e.g., after prolonged storage with batteries installed), pressing the setting button for more than 5 seconds will make the indicator flash 3 times, returning it to standby. Alternatively, re-installing the batteries can also bring the unit back to standby.
  • Discarded batteries should be recycled correctly.

General Cautions:

  • The unit contains electronic devices and a solenoid valve; avoid knocking it.
  • Exercise caution when connecting lines during disassembly.
  • Children should only use the device under adult supervision to prevent accidental ingestion.
  • Do not splash water on the unit.
  • Reflective objects should not be placed within the sensing distance under the unit, nor should the table beneath the unit be covered with reflective materials (like mirrors or stainless steel) to prevent incorrect operation.
  • The device is for indoor use only.
  • Prevent debris from entering the container to avoid blockages.

Aike AK1205 Specifications

General IconGeneral
BrandAike
ModelAK1205
CategoryDispenser
LanguageEnglish

Related product manuals