13. DO NOT leave the battery pack fully charged, completely discharged, or in an excessive
temperature environment (above 50˚C, 122˚F) for an extended period of time. Otherwise, the
service life of the battery will be reduced. If the battery pack is left unused for a long time, it must
be detached from the transceiver after discharging.
Charging Attentions
1. DANGER! NEVER charge the battery pack in areas with extremely high temperatures, such as
near fires or stoves, inside a sun-heated vehicle, or in direct sunlight. In such environments, the
safety/protection circuit in the battery pack will be activated andthe charging will be stopped.
2. NEVER charge the transceiver during a lightning storm. It may result in an electric shock, a fire,
or damage to the transceiver. Disconnect the power adapter before a storm.
3. NEVER charge or leave the battery in the battery charger beyond 8 hours for charging. If the
battery pack is not completely charged during the specified time, stop charging and remove it from
the battery charger. Continuing to charge the battery pack beyond the specified time limit may
cause a fire, overheats, or the battery may rupture.
4. Occasionally observe the battery pack condition while charging. If any abnormal condition
occurs, stop using the battery pack.
5. DO NOT insert the transceiver with the battery pack attached to the charger if it is wet or
soiled. This could corrode the battery charger terminal or damage the charger. The charger is not
waterproof.
6. DO NOT charge the battery pack out of the specified temperature range: 10˚C ~ 40˚C (32˚F ~
104˚F). Ailunce recommends charging the pack at 25˚C (77˚F). The battery pack may overheat or
rupture if charged out of the specified temperature range. Additionally, the battery performance or
the battery life may be reduced.
Charging Operations
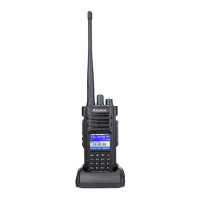
1.Insert the power adapter into the power supply socket.
2. Insert the output terminal of the power adapter into the DC jack behind the charging kit.
3. Insert the battery or radio equipped with the battery into the charging kit.
4. Confirm the battery and charging kit terminal contact reliably, when the charging indicator turns
red and charging starts.
5. After completing charging (charging about 7 hours), the indicator turns green.
Attachment Installment
1. Install the Battery
Match the grooves of the battery pack with the corresponding guides on the back of the transceiver,
and then push it. Press the battery and radio firmly together until the release latch on the top of the
radio locks. After hearing a "click" sound, the battery was locked.
To remove the battery, make sure the radio has been turned off, then slide up the release latch and
remove the pack away from the radio.


 To Next Page
 Loading...