EasyManua.ls Logo

Air Oasis 1000G3 User Manual

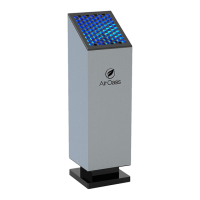
Air Oasis 1000G3
8 pages
To Next Page IconTo Next Page
Page #1 background imageLoading...
Page #1 background image
Owners
Manual
This Manual Includes:
• Warranty
• Safety Warnings
• Operating Instructions
• Replacement Directions
• Troubleshooting Tips
• Cleaning and Maintenance Tips
For use with models:
1000G3, 3000G3, 3000XG3
Before operating this unit carefully
read the contents of this manual.
Due to continuous improvements, the picture included
within this owner’s manual may differ slightly from the
actual product.
R2019.04.12

Questions and Answers:

Air Oasis 1000G3 Specifications

General IconGeneral
Product TypeAir Cleaner
Model1000G3
Coverage Area1000 sq ft
Voltage120V
Weight10 lbs
Filter TypeHEPA, Carbon

Summary

Important Safety Instructions

Lifetime Warranty

Product Registration & Proof of Purchase

Requirement for warranty validation. Product registration or proof of purchase may be required.

Exclusions: Regular Replacement Parts

Warranty does not cover filters and parts intended for regular replacement.

Usage and Maintenance Conditions

Covers normal use, abuse, and environmental factors. Product must not be subjected to physical abuse or water damage.

AHPCO Cell & Filter Replacement Compliance

Adherence to recommended cell and filter replacements is mandatory for warranty coverage.

Replacement Units Policy

Details on replacement units: warrantied products may be replaced with new or refurbished units.

Maintenance and Customer Service

Placement and Operation

For best results, place the unit in a central location, three feet or higher from the ground. Plug in and turn on.

Optional Cleaning Procedures

Instructions for cleaning the base, honeycomb, aluminum shell, and internal components.

AHPCO Cell Replacement

Step 1: Remove Outer Shell

Remove two screws at the bottom sides holding the outer shell, then slide the shell up and off.

Step 2: Unscrew AHPCO Cell

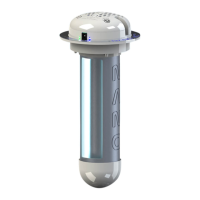
Use a Phillips head screwdriver to remove the screws from the AHPCO® Cell.

Step 3: Remove AHPCO Cell

Grasp the AHPCO® Cell, pull to the side, and remove the lamp connector.

Step 4: Reset AHPCO Cell

Plug in the AHPCO® Cell and slide the reset switch. Unit will beep in 2 years.

Step 5: Secure New AHPCO Cell

Connect the lamp connector and use a Phillips head screwdriver to tighten screws securing the AHPCO® Cell.

Step 6: Reassemble Unit

Slide the shell down onto the base and replace screws, ensuring the cord and switch are at the back.

Troubleshooting Guide

Related product manuals