Do you have a question about the Aire WELKIN and is the answer not in the manual?
How to obtain warranty service, return procedures, and responsibilities for repair or replacement.
Details different outlet box mounting methods and requirements for secure fan support.
Explains the function of speed control buttons on the remote for fan speed adjustment.
Describes the reverse button function for changing fan blade rotation direction for seasonal airflow.
Explains the function of the power off button on the remote control.
Details how to control the light's on/off status and brightness settings using the remote.
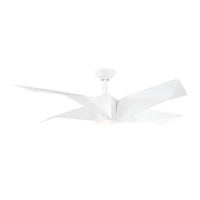
This document is an instruction manual and warranty certificate for a WELKIN by Aire ceiling fan, a product of Minka Group® Design. It provides comprehensive guidance for installation, operation, and maintenance, along with warranty information.
The primary function of this device is to provide air circulation and illumination within a room. It is a ceiling-mounted fan with multiple blades designed to move air efficiently, and it includes an integrated LED light kit for lighting purposes. The fan is controlled by a remote control, offering convenience and flexibility in adjusting its settings.
The manual outlines a detailed installation process, starting with safety rules that emphasize turning off electricity before beginning and ensuring all wiring complies with the National Electrical Code and local electrical codes. It specifies that the outlet box and support structure must be securely mounted and capable of supporting a minimum of 35 lbs, recommending UL-listed outlet boxes marked "FOR FAN SUPPORT." The fan requires a minimum of 7 ft clearance from the trailing edge of the blades to the floor.
The installation instructions cover various mounting options, including securing the outlet box directly to the building structure, and provide diagrams for different scenarios like cross brace, parallel wood brace, and angled ceiling mounting. For situations where an existing fixture has no ceiling joist, the manual suggests installing a hanger bar.
The process involves attaching the fan blades to the motor assembly using provided screws, with a specific note to observe the "THIS SIDE UP" label on the blades as they are not reversible. The fan is then hung using a standard ceiling mounting method, which includes securing the hanger bracket to the ceiling outlet box, assembling the downrod with the motor assembly, and placing the hanger ball into the hanger bracket. The manual explicitly warns against using parts, hardware, or components not supplied by Aire, as this will void the warranty.
Electrical connections are detailed with clear instructions for connecting the receiver to house supply wires (neutral and hot) and ground wires. It also explains how to connect the motor to the receiver wires for both fan and light functions, recommending securing wire connections with plastic wire nuts and electrical tape. The manual highlights that the Aire Control System for this DC motor fan is equipped with a learning frequency function with 32 code combinations to prevent potential interference.
The final steps of installation involve finishing the ceiling mounting by attaching the canopy to the hanger bracket, ensuring it is snug and secure. The LED light kit is then attached by snapping wire connection plugs together and twisting the assembly to the switch box. It is noted that the LED light kit is integrated and cannot be disassembled to prevent electronic shock.
The fan is operated via a remote control, which requires an A23 12-volt battery (included). The remote control features six buttons for fan speed adjustment (minimum to high speed), a reverse button to change the direction of blade rotation (forward for warm weather, reverse for cool weather), an "Off" button to turn off the fan, and a light button to turn the light ON or OFF and control its brightness. The light key has an automatic auto-resume feature, retaining the last set brightness.
The manual explains the auto-learning function for the remote control, which mandates within 60 seconds of turning the fan's AC power ON. Users can select a desired frequency from the back of the transmitter and then press and hold the "Off" button for over 10 seconds to allow the receiver to detect the frequency. The fan's down light will blink twice to indicate successful detection. The DC motor includes a safety feature against obstruction, where it will lock if an obstruction is sensed for 60 seconds or more, requiring removal of the obstruction and a power cycle to restart. There is also an over 60W protection feature that discontinues operation if the receiver detects motor power consumption greater than 60W. A "DIMMER" and "ON/OFF" dip switch on the remote allows selection for light dimmable bulbs or CFL bulbs.
The fan's operation modes are described for both warm and cool weather. For warm weather (forward), a downward airflow creates a cooling effect, allowing the air conditioner to be set at a warmer temperature. For cool weather (reverse), an upward airflow moves warmer air off the ceiling area, enabling the heating unit to be set at a cooler temperature.
The manual provides several suggestions for maintaining the fan. Users are advised to check support connections, brackets, and blade attachments twice a year to ensure they remain secure. For cleaning, it is recommended to use only a soft, lint-free cloth and soapy water, avoiding water or detergents on the fan or blades, as many common household cleaning products can damage the finish. For wood veneer blades, a light coat of furniture polish can be applied for protection and beauty, and small scratches can be covered with shoe polish. Dust can be removed from the blades with a lint-free, lightly damp cloth or duster. The fan's motor has permanently lubricated bearings, so no oiling is required. For glass shades, cleaning with lukewarm soapy water and a soft cloth or sponge is recommended, with a warning not to immerse glass shades in hot water or put them in an automatic dishwasher. Crucially, before attempting any repairs, users must ensure the power is off at the electrical panel box.
A troubleshooting section addresses common issues such as the fan not starting (checking wall switch, circuit fuses/breakers, wire connections, and transmitter connections), noisy fan operation (allowing a "break-in" period, checking tightness of screws for blade holders, outlet box, and hanger bracket), and fan wobble (noting that blade sets are grouped by weight, ensuring outlet box and hanger bracket are secure, and using a balancing kit if provided). It also covers instances where fans/lights turn on and off unexpectedly, attributing this to frequency interference and providing steps to change the frequency settings on the control system. The frequency change process involves turning off power, using a small tool to change settings, restoring power, and then pressing and holding the "Stop" button on the transmitter for 10 seconds within 60 seconds of power-on to allow the receiver to learn the new frequency.
| Model | WELKIN |
|---|---|
| Speed Settings | 3 |
| Oscillation | Yes |
| Height Adjustment | No |
| Remote Control | Yes |
| Color | White |
| Power Source | Electric |
| Timer | Yes |