AGR Installation and Operation Guide
nautic Laugic www.nauticlaugic.com Page 3
Disassembly
Beginwiththegaugeremovedfromdash:Thereby,freethePitothose(cutifnecessary).RemovetheBacklight,by
pullingitfromthecase.Andremovethemountingbracket.
***RemembertoalwaysprotecttheLensFacewithasoftclothor
padtoavoidscratches.
***Refrainfromdiscardingremovedparts!Somearereused.
***Thisprocessisirreversible.Forsomemechanicalpartsare
ruinedastoexpediteandeasetheupgradeprocedure.
***FORBESTRESULTS,READTHEENTIREPROCEDUREFIRST!
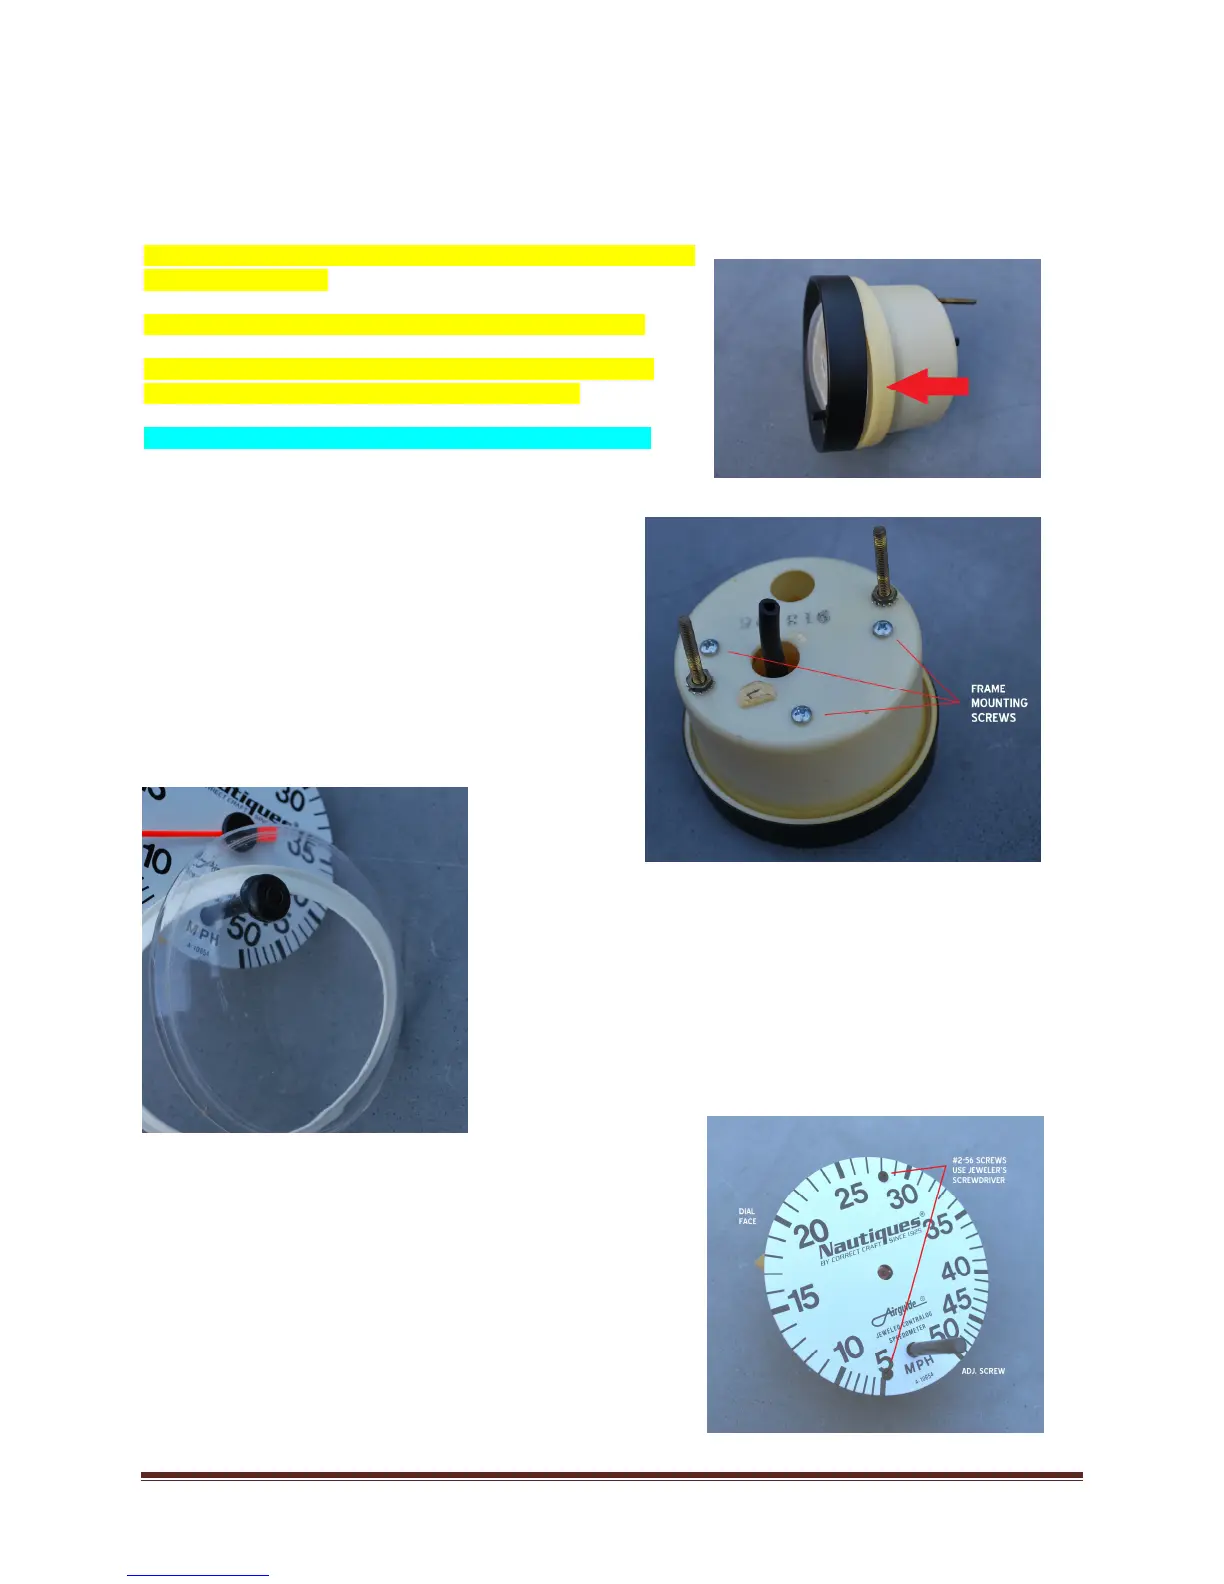
1. Withyourfingers,gentlypry/slidethebezeloff.
2. RemovetheFrameMountingscrews;usea#2
Phillipsscrewdriver.Thescrewsarethreadedinto
framepostswhichsupporttheinternalframe.
Removeallthreescrews.
3. Fromthefront,removetheentiredialfromthe
case:thisincludestheLens,LensGasket,Dialand
plasticframe.
4. SlidetheLens/gasketupandofftheAdjustment
screw.
5. Prytheindicatorneedleloosefromtherotor:
a. Toprotectthedialface,place2maskingtapestrips
undertheneedle,onoppositesidesoftherotor.
b. Neartherotor,slidetwosmallflatheadscrewdrivers
undertheneedlefromopposingdirections.Withtheir
bladesflatonthetape,gentlytwist/prythe
screwdriversshaftsuptoreleasetheneedle.
6. SeparatetheDialfromtheframe.
RemovetheDialFacescrewsusingaPhillips#00screwdriver:
Settheframe(face-up)onatable.Firmlypressthescrewdriver
intothescrewheadsandbrisklytwistCCW,asreleasethe
screw,yetnotstriptheheadslots.These#2-56x1/4”screws
aresmall…setthemasideforlateruse.
 Loading...