This document describes the AIRPLUS KYR-35A1 Portable Air Conditioner, providing details on its functions, technical specifications, usage, and maintenance.
Function Description
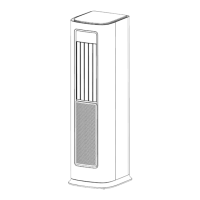
The AIRPLUS KYR-35A1 is a portable air conditioner designed for family rooms, suitable for temperatures ranging from 32-95°F. It offers multiple operating modes:
- Cool Mode: The unit cools the room to a set target temperature. The compressor starts when the indoor temperature is higher than the set temperature and stops when it's lower. Wind speed can be adjusted.
- Dehumidification Mode: The unit operates according to its internal program to remove humidity, defaulting to low wind speed.
- Air Supply Mode (Fan Mode): The fan runs at a selected wind speed, circulating air without engaging the compressor.
- Heating Mode: The unit heats the room to a set target temperature. The compressor starts heating when the indoor temperature is lower than the set temperature and stops when it's higher. Wind speed can be adjusted.
The device also includes several protective and convenient features:
- Defrost Function: Automatically detects and performs defrosting to maintain heating performance in low ambient temperatures.
- Anti-freezing Protection: Automatically detects and activates anti-freezing measures to ensure refrigeration performance when ambient temperature is low.
- Auto Water Full Protection: If the water tray reaches a preset level, the compressor, motor, and water throwing motor stop, an alarm sounds, and "FU" is displayed. The machine resumes operation after drainage.
- Compressor Shutdown/Start Protection: After any operation that stops the compressor, it will not restart for 3 minutes to protect the unit. The compressor runs for at least 3 minutes after each start before stopping.
- Timer Function: Allows users to set a timed ON or OFF period (0-24 hours). The timer indicator light flashes during setting and remains on when active.
- Wind Speed Adjustment: Offers "high," "mid," "low," and "auto" wind speed settings. In auto mode, the unit adjusts speed based on ambient temperature. This function is invalid in dehumidification mode.
- Anion Function: Can be turned on or off to release negative ions, indicated by a dedicated light and icon.
- Wind Up/Down Function: Controls automatic vertical swing of the air outlet, indicated by a dedicated light and icon.
- Wind Left/Right Function: Controls automatic horizontal swing of the air outlet, indicated by a dedicated light and icon.
- Memory Function: After normal shutdown, or in case of a power outage, the last working mode is remembered.
Important Technical Specifications
| Model No. |
KYR-35A1 |
| Rated Power |
115V~/60Hz |
| Cooling Capacity (ASHARE) |
12000BTU/h |
| Heating Capacity (ASHARE) |
11000BTU/h |
| Refrigeration Input Power/Current |
1200W/10.6A |
| Heating Input Power/Current |
1100W/9.70A |
| Refrigerant Charge |
R410A/0.34kg (12OZ) |
| Waterproof Level |
IPX0 |
| Machine size (WxDxH) |
298x338x1100mm |
| Net Weight |
56.2lb |
| Safety tube specification |
T3.15AH250V; Max current 3.15A |
Note: Data may vary due to technical and voltage fluctuations. Refer to the product nameplate for exact values.
Usage Features
- Placement: Must be placed on a flat surface, with at least 50cm of space in front and behind. Avoid damp environments, direct sunlight, and areas with obstacles near air inlets/outlets.
- Mobility: Equipped with casters for easy movement on smooth, flat surfaces. Avoid carpets or obstacles that could hinder movement or damage casters.
- Power Supply: Ensure power supply specifications match the product nameplate. Use a grounded power supply that is reliably grounded and undamaged. Do not use damaged or non-standard power cords, extend the power cord, or share sockets with other appliances.
- Remote Control: Requires two AAA (1.5V) batteries. For optimal signal reception, align the transmitter with the receiver window within 6 meters, avoiding obstacles. Keep away from electronic start type fluorescent lamps, conversion type fluorescent lamps, or wireless telephones to prevent signal disturbance.
- Heat Discharge Pipe Installation: Essential for heating and recommended for cooling to exhaust air outside. The pipe should be as short and flat as possible, without distortion, to maintain smoothness and efficiency.
- Window Isolation Panels: Provided for sealing windows when the heat discharge pipe is in use. Can be installed horizontally or vertically.
- Initial Setup: If the machine has been dumped or transported over long distances, stand it upright for more than 4 hours before turning it on to allow condensate to reflux.
- Temperature Range: The refrigeration function is automatically protected if the temperature exceeds 109.4°F or falls below 59°F.
- Troubleshooting: A comprehensive table is provided for common issues and their solutions, such as power problems, poor cooling/heating, remote control issues, and fault codes (E1, E2, E3 for sensor faults, FU for full water tank).
Maintenance Features
- Safety First: Always turn off the air conditioner and unplug the power cord before cleaning or repairing to prevent electric shock. Do not rinse with water or use volatile liquids (diluents, gasoline) as they can damage the machine.
- Shell and Grille Cleaning:
- Shell: Wipe with a soft towel for dust. For dirt or oil, use a neutral cleaning agent.
- Grille: Use a vacuum cleaner or a soft-bristled brush.
- Filter Frame Cleaning:
- Removal: Buckle out the rear filter frame, then remove the side filter frame.
- Cleaning: Use a vacuum cleaner or clean water. For dirty frames, use warm water with neutral detergent, then air dry in a cool place.
- Installation: Reinstall after cleaning and drying.
- Frequency: Recommended every 20 days of use, more frequently in dusty environments. Do not dry with fire or a hair dryer to prevent deformation or fire.
- Heat Discharge Pipe Cleaning: Remove the pipe from the air conditioner, clean it using the same method as the filter frame, air dry, and reinstall.
- Inspection (Before Usage Season): Check for blocked air inlet/outlet, plug/socket condition, filter cleanliness, remote control battery, and heat pipe damage/installation.
- Inspection (After Usage Season): Cut off power, clean filter frame and shell, and remove accumulated water from the drain tray.
- Long-term Storage: If not used for an extended period, ensure no accumulated water, remove the heat pipe, properly pack the power cord, clean the unit, and package it to prevent dust accumulation.
- Factory Reset: Simultaneously press and hold the "UP/DOWN" and "LEFT/RIGHT" buttons to restore factory settings, clearing memory data and restoring initial data.
- Drainage:
- Manual Drainage: Generally not required in cool mode, but necessary in high temperature/humidity conditions or when "FU" is displayed.
- Continuous Drainage: Recommended for dehumidification mode and heating mode. Connect a drainage pipe to the middle or lower drainage outlet. For cooling in high temperature/humidity, connect the drainage pipe to the lower outlet for smooth, continuous drainage.
- Steps: Cut off power, position a shallow plate or floor drain, remove the water stop button and rubber plug from the lower drainage outlet, and slightly tilt the machine for thorough drainage. Reinstall plug and knob after draining.