Do you have a question about the AIRROBO T10 and is the answer not in the manual?
Connect your phone to a 2.4 GHz Wi-Fi network before proceeding with the app installation.
Search for and download the Tuya Smart application from the app store.
Create a new account or log in to your existing Tuya Smart account.
Allow necessary permissions like Wi-Fi, Bluetooth, and Location for the app.
Navigate through the Tuya Smart app to find and select the correct device model.
Ensure your phone is connected to a 2.4 GHz Wi-Fi network and enter the correct password.
Reset the T10+ by pressing the recharge and power buttons simultaneously for 8 seconds.
Choose the 'AP Mode' from the device status indicator options.
Connect your mobile phone to the device's Wi-Fi hotspot, typically named "SL-XXXX".
Monitor the device addition process in the Tuya Smart app after connecting to the hotspot.
Wait for the progress bar to complete and click 'Done' to confirm successful device connection.
Always use a 2.4 GHz Wi-Fi network standard for connection.
Ensure the Wi-Fi password entered in the app is accurate.
Verify the machine has been reset before initiating the connection process.
Complete the pairing process within three minutes after resetting the device.
If connection fails, consider changing router security settings from WAP/WAP2 to WEP.
If router Wi-Fi fails, use a mobile phone sharing hotspot as an alternative.
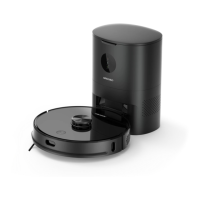
This document outlines the installation and connection guide for the AIRROBO T10+ and T9 devices, primarily focusing on the setup process using the Tuya Smart APP. The guide is structured into three main parts: installing the Tuya Smart APP, connecting the T10+ via the APP, and precautions for connection.
The initial step involves preparing your smartphone for the installation of the Tuya Smart APP. To ensure a smooth setup, it is crucial to connect your phone to a 2.4 GHz Wi-Fi network. This specific frequency band is a common requirement for many smart home devices to establish a stable connection. Once connected to the appropriate Wi-Fi network, the next action is to locate and download the Tuya Smart APP. This is achieved by clicking the "Search" button within your phone's app store or browser and typing "Tuya Smart." After successfully downloading the application, users are required to register an account and then log in. This account will serve as the central hub for managing all connected smart devices. Upon the first login, the Tuya Smart APP will prompt for various permissions. It is essential to allow permissions for Wi-Fi, Bluetooth, and Location services, as these are critical for the app to discover and communicate with the device. Other permissions can be granted based on individual preferences and needs, but the aforementioned three are mandatory for the core functionality of connecting the device.
With the Tuya Smart APP successfully installed and configured, the next phase involves connecting the T10+ device. The process begins by opening the Tuya Smart APP on your smartphone. Within the app, you will need to navigate to the device addition interface. This is typically done by selecting "Add Device." From there, you will be presented with various categories of smart home appliances. For the T10+ device, the correct path is to select "Small Home Appliances" and then choose "Robot Vacuum (BLE+Wi-Fi)." This selection indicates that the device supports both Bluetooth Low Energy (BLE) and Wi-Fi for connection, offering flexibility in the pairing process.
After selecting the device type, the app will prompt you to select the Wi-Fi network to which the T10+ will connect. It is imperative that this network is a 2.4 GHz network, as specified earlier. You will also need to enter the correct password for this Wi-Fi network. Accuracy in entering the password is vital to avoid connection failures.
The next critical step is to reset the T10+ device itself. To do this, ensure the device is powered on. Then, simultaneously press and hold both the recharge button and the power button for approximately 8 seconds. You will know the reset is successful when you hear the voice prompt "WIFI has been reset." Immediately after this, release your fingers. The device's blue light will then begin to flash slowly, indicating that it is in pairing mode and awaiting a connection from the app. This visual cue is important for confirming the device's readiness for the next step.
Following the device reset, you will need to select the "AP Mode" within the Tuya Smart APP. This mode is often used when the device needs to create its own temporary Wi-Fi hotspot for the phone to connect to directly. After selecting AP Mode, the app will instruct you to connect your mobile phone to the device's hotspot. The hotspot name typically follows a format like "SL-XXXX," where "XXXX" represents a unique identifier for your device. You will need to go to your phone's Wi-Fi settings, locate this specific hotspot, and connect to it. Once your phone is connected to the device's hotspot, return to the Tuya Smart APP. The app will then display a status indicating "Adding device," signifying that the pairing process is underway.
The final stage of the connection involves waiting for the pairing to complete. This usually takes about 25 seconds. During this time, the app will show a progress bar. Once the progress bar reaches 100%, it means the machine has been successfully connected to your Tuya Smart account. At this point, you should click "Done" to finalize the setup. The app will then display the newly added device, confirming a successful connection.
To ensure a successful and stable connection for your AIRROBO T10+ or T9 device, several precautions must be observed. These guidelines are crucial for troubleshooting and preventing common issues during the setup process.
Firstly, the router's Wi-Fi network must adhere to the 2.4 GHz standard. Many modern routers operate on both 2.4 GHz and 5 GHz bands. While 5 GHz offers faster speeds, 2.4 GHz provides a wider range and better penetration through obstacles, which is often preferred by smart home devices for stability. If your router is set to 5 GHz, you must configure it to operate on or include a 2.4 GHz band. This is a fundamental requirement for the device to establish a connection.
Secondly, accuracy in entering the Wi-Fi password is paramount. The password for connecting to your router's Wi-Fi network within the Tuya Smart APP must be entered correctly. Even a single incorrect character can lead to connection failure. It is advisable to double-check the password before proceeding with the connection.
Thirdly, it is essential to ensure that the machine has been properly reset before attempting to connect. As detailed in Part 2, the reset procedure involves simultaneously pressing the recharge and power buttons for 8 seconds until the "WIFI has been reset" voice prompt is heard and the blue light flashes slowly. This step puts the device into pairing mode, making it discoverable by the app. Failing to reset the device correctly will prevent it from being found and connected.
Fourthly, the pairing process has a time limit. You must complete the pairing within three minutes after the device has been reset. If the pairing is not completed within this timeframe, the device may exit pairing mode, and you will need to perform the reset procedure again to re-initiate the connection attempt.
Fifthly, router compatibility can sometimes be an issue. Different brands and models of routers may have varying levels of compatibility with smart home devices. If you encounter persistent connection failures, it is recommended to try changing your router's security encryption mode. Often, switching from WPA/WPA2 mode to WEP mode can resolve compatibility issues. However, be aware that WEP is an older and less secure encryption standard, so this should be considered a temporary troubleshooting step if other methods fail.
Finally, if all attempts to connect via your router's Wi-Fi fail, you can try using your mobile phone's hotspot as an alternative Wi-Fi source. This can help determine if the issue lies with your router or the device itself. If you are using an Android phone for the hotspot, it is crucial to manually select the AP band as 2.4 GHz in your phone's hotspot settings. This ensures that the hotspot operates on the frequency required by the AIRROBO device, facilitating a successful connection. This method can often bypass router-specific issues and allow for a successful initial setup.
| Battery Capacity | 5200 mAh |
|---|---|
| Noise Level | 65 dB |
| Weight | 3.6 kg |
| Connectivity | Wi-Fi |
| App Support | Yes |
| Auto Recharge | Yes |
| Climbing Ability | 20 mm |
| Dustbin Capacity | 0.6L |
| Navigation System | Laser Navigation |
| Control | App |
| Water Tank Capacity | 300 ml |
| Dimensions | 350 x 350 x 98 mm |
| Features | Multi-floor Mapping |
| Filter Type | HEPA |
| Voice Control | Yes |